

Introduction: Raspberry Pi LED Blink


Now, you are going to learn the simplest project that you can build using a raspberry pi. If you don't know it by now, I'm talking about the blink program, as seen on the arduino. I'm using some very common stuff that you can learn about in the next step. Lets begin!
Step 1: Needed Components

For the build, you will need the following:
- 1 x Raspberry Pi
- 1 x USB cable
- 1 x LED
- 1 x Breadboard
- 1 x SD Card and adapter (4GB minimum)
- 1 x LAN cable
- 1 x 50-ohm resistor
- 2 x Jumper wires
Allchips is an electronics components online service platform, you can buy all the components from them.
Step 2: Building the Circuit

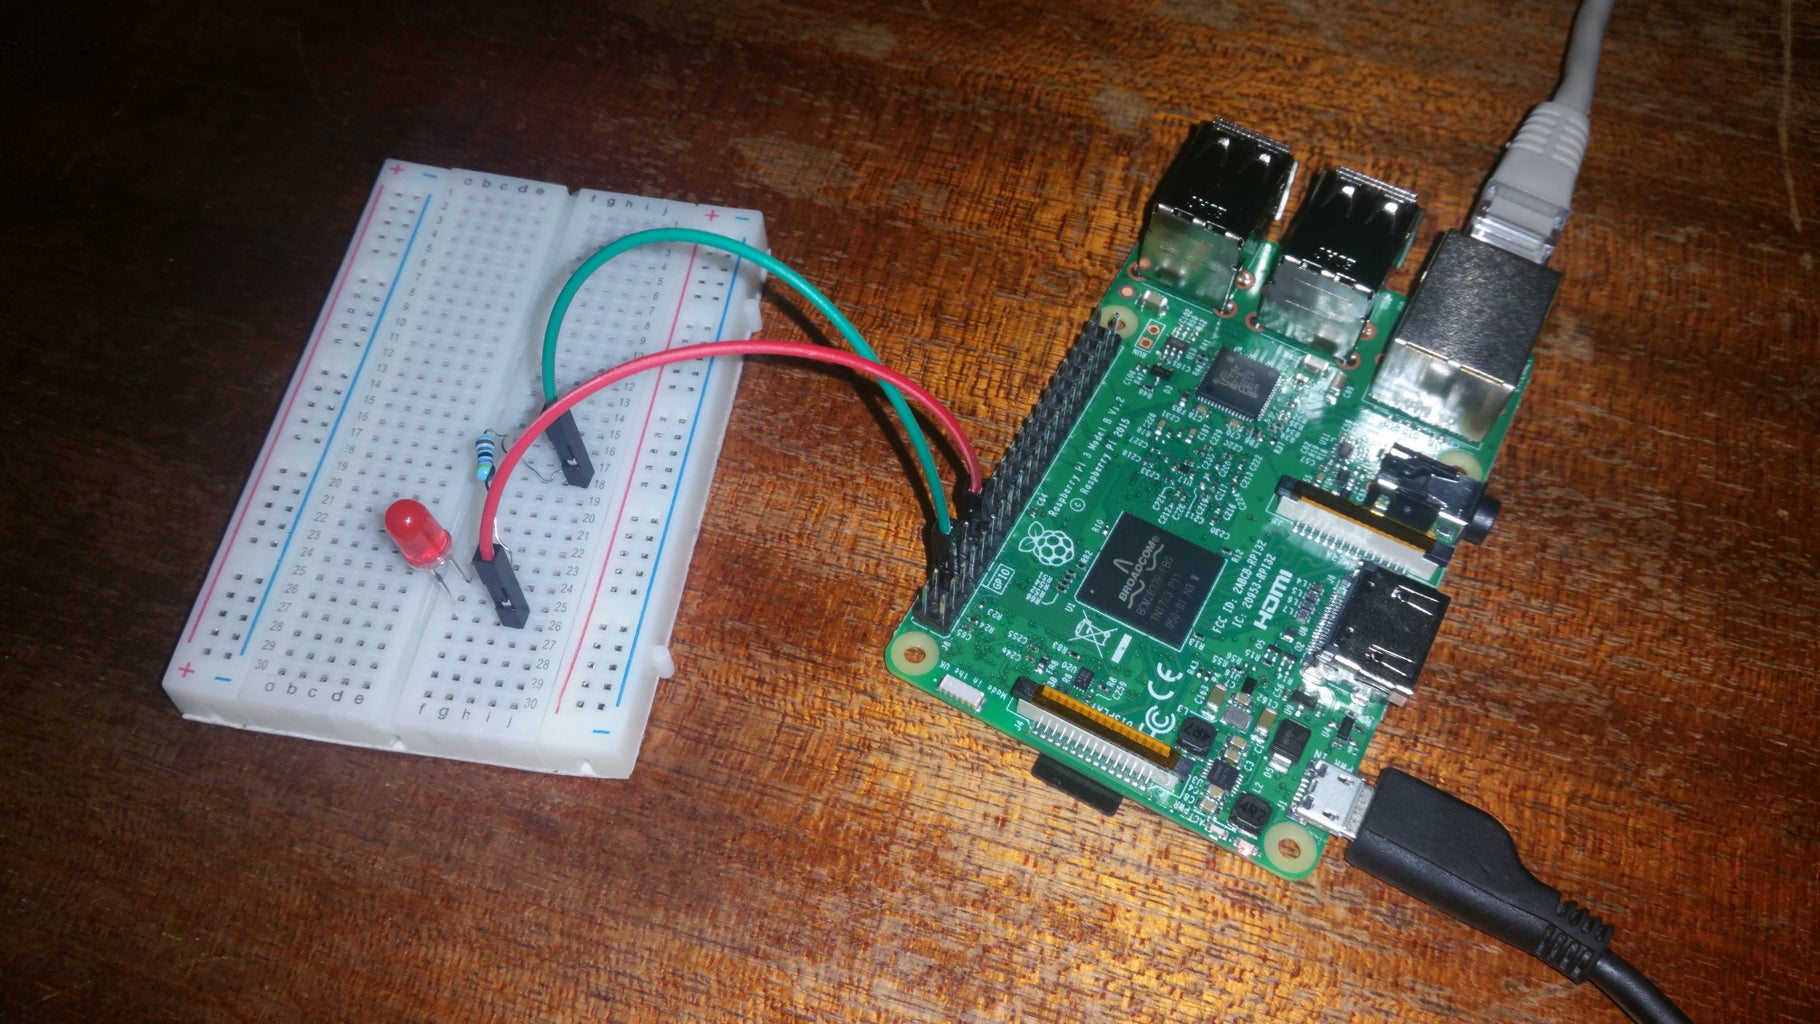
Every LED has two sides - one negative and one positive. Choose the negative one and using the resistor, connect it up to GND (pin 6). The other end goes to pin 18. Feel free to use the picture as a reference.
Step 3: Setting Up the Raspberry

If you want to keep the process as simple as possible, you can follow my tutorial onRaspberry Pi Headless Setup. You can also do it in a more traditional way and no matter how you setup it up, you need to end up with the console on the Pi itself. Now, you need to install Python or Python 3. Enter the following command:
sudo apt-get install python
or
sudo apt-get install python3
(depending on the version that you choose)
Step 4: Writing the Program

You need to use a simple text editor called nano, so enter the command sudo nano file-name.py
* Where file-name is a name of your choice. Remember it, we will need it later!
Paste the following code in the newly-create file:
import RPi.GPIO as GPIO
import time
GPIO.setmode(GPIO.BCM)
GPIO.setwarnings(False)
GPIO.setup(18,GPIO.OUT)
print "LED on"
GPIO.output(18,GPIO.HIGH)
time.sleep(1)
print "LED off"
GPIO.output(18,GPIO.LOW)
Save the file and go back to the console.
Step 5: Running the Program

To run the program, just write python file-name.py
* Replace python with python3, if you are using the newer one. File-name should be the name of the file from the last step.
Here is a video of the project in action

Participated in the
Raspberry Pi Contest 2017


