

Introduction: Recycled Sash Weights


Traditional sash windows are balanced by sash weights which hang in the boxes at the side of the window. Traditionally the weights were made out of lead but in the Victorian era cast iron became a more popular choice as it was easier to get hold of and cheaper. The down side of using cast iron is that it's only about 65% the density of lead so the weights needed to be larger.
Over the last few months I've been building some sash windows and I've got to the point where I'm hanging the windows. Unfortunately due to a slight mathematical error (I can't count) I didn't buy enough lead weights and I was one set of weights short.
The total weight I needed was about 12kg spread over four weights. This would cost me about £40 including shipping and I'd probably have to wait a week for it to arrive. By a happy coincidence though we've recently had an extension demolished and I've salvaged the old lead flashing so I decided to try and upcycle it into my own sash weights.
Ideally I’d melt the scrap lead down and cast my own weights but with the building work going on I don’t have anywhere to work outside so instead I’ll shape the weights cold.
This project along with loads of others is available at Wobblycogs Workshop.
Materials
- Scrap lead flashing. Any size will work although I found lengths about 800mm easiest to work with.
Tools
- Sharp knife
- Straight edge
- Ruler or tape measure
- Tape (optional)
- Drill or drill press
Step 1: Prepare and Layout the Lead


Start by laying your scrap lead out and hammering it roughly flat.
Select a piece of lead and lay it out on the bench and hammer it flat again if needed. I worked on a few different lengths of scrap but I found this piece which is about 800mm long easiest to work with. I'm aiming to make 45mm square weights so I start by marking in from one end and then scoring a line to about half the thickness of the sheet.
I marked 45mm in from the end of the sheet but I found that my weights were a little oversized due to inaccuracies so I’d recommend marking more like 40mm in. Now score lines twice the original distance along the length of the piece of lead.
Step 2: Make Long Strips


Put your best long edge at the front of the bench and measure up 45mm before clamping a long straight edge along the marks. Don’t worry too much if the lead has a bit of a bend along its length it’s easy to hammer back into shape later.
A few passes with the knife should be enough to cut deeply into the lead so remove the clamps and straight edge and turn the lead over. Bend the lead at the score line taking some care not to distort it too much. Work it backwards and forwards until it breaks, you should find that it’ll break cleanly after a couple of repetitions.
Step 3: Fold a Sash Weight


Stack all your lead strips up and, you guessed it, hammer them flat. I found that I got much better results when I hammered a pile of lead flat rather than just a single thickness.
Now select a single strip of lead and bend it at the first score mark. Flip it over and score the back where the first part ends. Flip it over and bend it at the second score mark. Repeat the process until the whole piece is folded up. You should now have a stack of lead that looks quite a bit like a sash weight.
Use your flat faced mallet to give it a good hammering on all faces. Hammering on the side faces will remove any bend that the lead sheet may have had. Hammering on the top face will compress the stack making it more like a single block.
If you have any problems with your folding that have caused sheets to stick out they can usually be hammered back in with an everyday metal faced hammer. I hit this stack so hard I broke the top sheet loose, try to avoid this but don’t worry if it happens it doesn't make any difference to the weight.
Step 4:


Here you can see the various different stacks I made up. This probably took me about an hour but now that I know what I'm doing I could easily do it in half that time and get a better finish. I didn't take much care to clean rubbish off the lead before I started and with hindsight perhaps I should have.
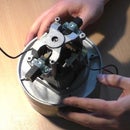
Sash weights have a hole that runs through the middle of the weight. It’s typically around 12mm but I'm going to drill mine at 9mm as that’s enough for the cord I'm using. While you can drill the blocks as they are I found it was much easier if I wrapped some tape around them first. The problem is that lead is quite sticky and the block tended to come unfolded as the drill got deeper if I didn't tape it.
I drilled the blocks at the drill press using a vice to hold the work piece. Keep a tight hold of the vice as the lead will stick to the bit. I found it was best to take little pecks at the lead rather than trying to just power through. On the up side the swarf that comes off isn't sharp. Drilling the rope hole causes a huge burr to on the top face but being lead it’s easy to remove with either a knife or in my case a countersink.
Once cleaned up I threaded the weights onto a piece of sash cord and ended up with the world heaviest necklace.

Participated in the
Leftovers Challenge


