

Introduction: Removable Notebook Cover


It often happens that we don't like the cover page of our notebook. Notebook covers are mostly floral designs, bikes or cars. Some people like these designs while others wish to personalize them, by adding their own designs. So, this instructable will help you in creating a personalized and removable notebook cover.
Step 1: Materials Required

- Chart paper
- Notebook
- Paint
- Art & Craft Tape
- Transparent notebook sheet
Step 2: Tools Required
- Scale
- Pencil
- Scissor
- Craft knife
- Paint Brush
- Glue stick
- Cello tape
- Stencil (optional)
Step 3: Making the Cover


Take your notebook and place it in the center of the chart paper (keep the book open). Draw the boundary of the notebook.
Remove the notebook and increase the boundary by 2 cm (refer image). Draw a rectangular flap having a width of 9.5 cm on both the sides.
On the top and bottom of each flap, draw another rectangle having a width of 8 cm (Refer image).
Step 4: Cutting and Folding


After drawing, cut out the notebook cover.
Now, fold the top and bottom rectangles of each flap. Apply glue on the rectangles and fold the flap inwards(refer image). Make sure that the glued area sticks properly.
After some time, insert the book in the cover.
Step 5: Decoration


Now, it's time to decorate your notebook cover by adding your favorite movie characters, quotes, cars, scenery, etc. You can also use decorative tapes.
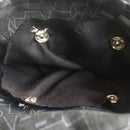
I have decorated my notebook by adding superhero logos, birds, and decorative tapes.
Step 6: Protection


Cover your notebook cover with a transparent plastic sheet, this will protect your artworks from getting damaged.
The inside flaps of the notebook cover can be used for pasting sticky notes.
Congrats!!! You have made your notebook cover.


