

Introduction: Robotic Hand Controlled by Gesture With Arduino + Leap Motion


Hello everyone,
As promised I have made a full step by step instruction for my university final project!
First of all: sorry for my bad english! If something isn't clear, please leave a comment.
The hand is controlled by Leap Motion + Arduino Uno (Standard Firmata, Nodejs & Johnny Five) + Servo Motors and the hand itself was made with Polymorph. It can recognize each finger and it can move them separately with very good precision and sensibility! This prototype can be controlled remotly too via a normal web server using ajax/json requests. Let me know what you think about it and maybe I will publish a complete tutorial when I will have more time... Thank you!
--- Feedback from NASA ----------------------------------------------------
“ Your hand is very responsive and does a good job of showing how well your gesture control/recognition works. ”
Ron Diftler, Ph.D. Robonaut Project Manager, NASA/Johnson Space Center -------------------------------------------------------------------------------------
Step 1: Parts


Parts: (Cost will be about 300$)
- x1 Arduino UNO
- x1 Leap Motion
- 0.5kg of Polymorph
- About 3m Fishing Line (0.17mm - Spiderwire)
- Some elastic strings
- x5 Servos (TowerPro MG956R)
- x1 Battery 1600mah and 6V (NiMH Venom VEN-1504)
- x1 Small Breadboard
- x1 Hot gun
- Some wires and tools
Step 2: Make the Hand!


- Put all polymorph spheres inside a basin with hot water
- Mix up all the spheres in a unique piece of polymorph
- Divide the big piece of polymorph in some smaller pieces
- In order to make each fingers you have to draw a scheme using your hand (see picture)
- Take a piece of polymorph and put it in a microwave oven for like 30s @ max power
- It will become transparent and easy to model. Be careful because it is very very HOT
- Use hand sketch to adjust the size of the finger and model the piece of polymorph, using some pilers to make all the joints. Joints are the tricky part, they should blend just in one direction!
- Make all five fingers and let them cold down
- Now you have to make the palm of the hand: put a bigger piece of polymorph in the microwave oven
- Model the piece in order to obtain something similar to a hand palm: before it cold down you have to put all fingers inside the warm palm. Be carefull to put all the fingers in the right position because once everything is cold, it would be impossibile to fix possible problems!
- Now it's time for some wire loops. We need to make some wire loops on all fingers (on the front, for the fishing line and on the back, for the elastic line) in order to avoid wire intertwine during fingers movements. On each finger you have to make a hole with a hot screwdriver, in between of all joints and on all finger tips (so 4 holes per finger, see pictures)
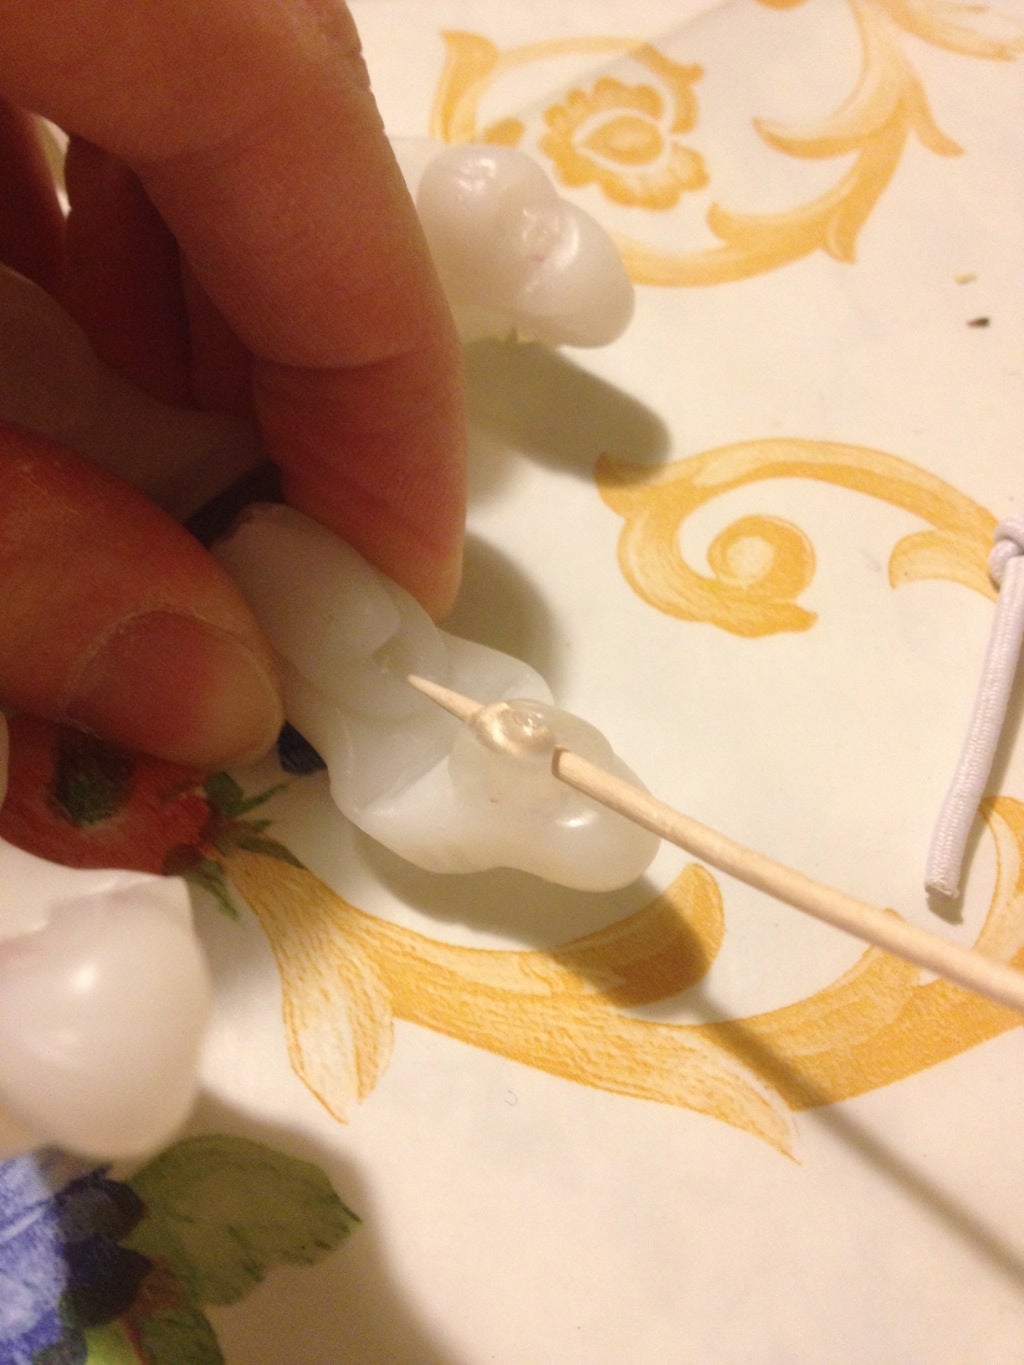
Make some little balls of polymorph and put them in the microwave oven, press one small ball of hot polymorph inside a hole and model it using a toothpick to make a hole throught it (see picture). Fishing line and the elastic one will pass through all these wire loops!
- Make some wire loops on the hand palm too
- Finally we have to make the arm part, that will host all servo motors. Take a A4 white paper and draw all servo motors shapes (See picture).
- Put a big piece of polymorph in the microwave oven. When it's hot, model it on the drawn schema and use a cutter to make all holes for the servo motors.
- When the arm is cold you will have to put all servo motors inside the holes and seal them using some hot polymorph strips. Be carefull to put all servo motors in the right orientation (See picture), two of them will be inverted.
- You have to attach the arm to the hand by using a hot gun and some extra hot polymorph
- When the hand and the arm are fused together the last step consist of connecting all servo motors with each fingers: you can fuse an extremity of a piece of fishing line at the tip of the finger by using a common lighter whille the other extremity can be simply tied on the servo motor (see picture
- It's raccomended to create some wire loops to put on each servos in order to avoid wire interwine while servos will move.
- Finally you can put some elastic line on the back of each finger (see picture), make sure that all elastic lines are well strained: this part will give your hand the ability to keep the relaxed position even when the hand is oriented with the palm looking down!
Now you have finished the mechanical part of the project and you are ready to give life to your artificial hand :D
Step 3: Attaching All Servos to the Arduino


Now that we have our hand and all servos implanted on the arm we must use the little breadboard in order to connect all servos to the Arduino Uno and to the battery pack:
- Each servo come with 3 wires, the black one for the ground, the red one for the power supply and the yellow one for the PWM (important!) signal
- By following the schema in the picture, you should connect all servos wires in the breadboard
- Now it's time to use some wires to connect all grounds and all power supplies (just follow the schema)
Attention! I didn't pay attention to use right colored wires (because I didn't have all required colors!)
- Take a common ground and connect it to the Arduino Uno ground input
- Take another common ground and connect it to ground contact of the battery pack
- Attention! Don't connect the common power supply to 5V input of the Arduino Uno (as showed in the schema), you have to connect this to the battery pack!
- Finally you have to connect all servos yellow wires to a PWM digital input on the Arduino Uno. I have used ports 3, 5, 6, 9 and 10. Attention! Try using these ports because when we will come up with the code, I will assign servos variables to those digital ports!
Now you have the hand, all servos implanted, connected to the Arduino Uno and the battery back.
Step 4: Preparing the Developing Platform and Leap Motion
Now it's time to prepare software platform in order to program the arduino board. Since Leap Motion sends its data throught a Web Socket, we will use Google Node.js as javascript platform (it's based on Google Chrome js engine) so that we can easily read data via the Web Socket. Then, we should install a Node.js module called "johnny-five" that allow us to program arduino board directly with javascript.
NOTE: I did everything with a Macbook Pro so please don't ask me how to solve problems on Windows systems because I can't really help you! Most of problems can be solved by searching on google.
- Plug in Leap Motion and install its software. At the end you should be able to see an icon somewhere, that allows to open the AirSpace software and Leap Motion configurations.
- Inside Leap Motion configuration you should set "Precision" and make the "Recalibration" tutorial. Please note: Leap Motion surface should be very clean!
- Now that Leap Motion is connected, installed and working we have to install Node.js so go to http://nodejs.org and click on the "Install" button (it's possible that first you need to download and install XCode in order to install nodejs, I already have it installed so I can't be sure). You can check Node.js successful installation by going on Terminal and type "node" and press "enter". If nodejs console show up starting with a ">" then you are ready to go. If you have some problems with the installation, please search on google some tutorial because there are a tons!
- Now you have to install some nodejs modules (using npm install syntax). Again, check on google how to install a module it's very easy btw! Needed modules are the following:
- gl-matrix: matrix and vector library
- johnny-five: arduino library
- underscore: javascript support library
- ws: websocket library
- Install LeapJs SDK for Node.js check this url: https://developer.leapmotion.com/leapjs/welcome
- I have installed everything inside a project folder called "Tesi". Inside this folder I have 3 folders:
- "lib" containing the "lib" folder of LeapJS: check on github https://github.com/leapmotion/leapjs
- "node_modules" containing all 4 modules folders
- "script" containing my script
Please, try to keep this project folders structure and paths because unpredictable errors may happen if not.
Step 5: Algorithm and Scripts

This is the last step and the most important one. Now that we have our working artificial hand connected to all servos controlled by Arduino Uno and the developing platform is ready-to-use... We really have to make the software in order to:
- Retrieve Leap Motion data
- Elaborate the data to assign detected objects by Leap Motion to appropriates fingers (servos)
- Elaborate the data to obtain appropriates servos angles
Send elaborated data to Arduino Uno in order to move servo motors
Attached to this step there is my full project folder. The script that you should run in Node.js is "/script/app.js" (make sure that leap motion and arduino are connected to your computer, the arduino should be connected to the battery pack and all servos should be attached to the Arduino board too).
Just for a matter of order I have put all core functions inside another file inside "/lib/handToHand.js" that is imported at the very beginning of the "app.js".
I have rewritten all my comments in english so that anyone can understand what's happening and why. If you follow my comments and check the flowchart (see picture) you will understande everything for sure.
If you have any inquiries please leave me a comment!
That's all... Thank you and good luck!
-----------------------------------------------------------------
Alessio Sacchetta Cali
Electronic Engineer
University of Roma Tre
Attachments


Participated in the
Sensors Contest

Participated in the
Robot Contest

Participated in the
Arduino Contest


