

Introduction: Rope Making With a Hand Powered Drill


Making rope with a hand powered drill is easy. I use a hand powered drill because you must keep a accurate count of the number of turns of the handle, I am presenting two methods of rope making here
You need a drill with a wire hook instead of the drill bit. You also need 2 "C" clamps, 4 "S" hooks and 3 loops of twine all the same size
You can use to the very simple rope club in place of the hand drill.
https://www.instructables.com/id/Making-Rope-With-...
Use the notch of the club as if it were the hook of the hand drill
Step 1:


To make loops the same size set up the clamp in one corner of your work surface. Here is a picnic table a little over 5' long. Put the strand in the "S" hook and tie the ends together at the "S" hook at the other end of the table. This will give a loop a little longer than the table.
Tie a second loop the same way.
Thread the third loop through the other two before tying the ends together
Step 2:
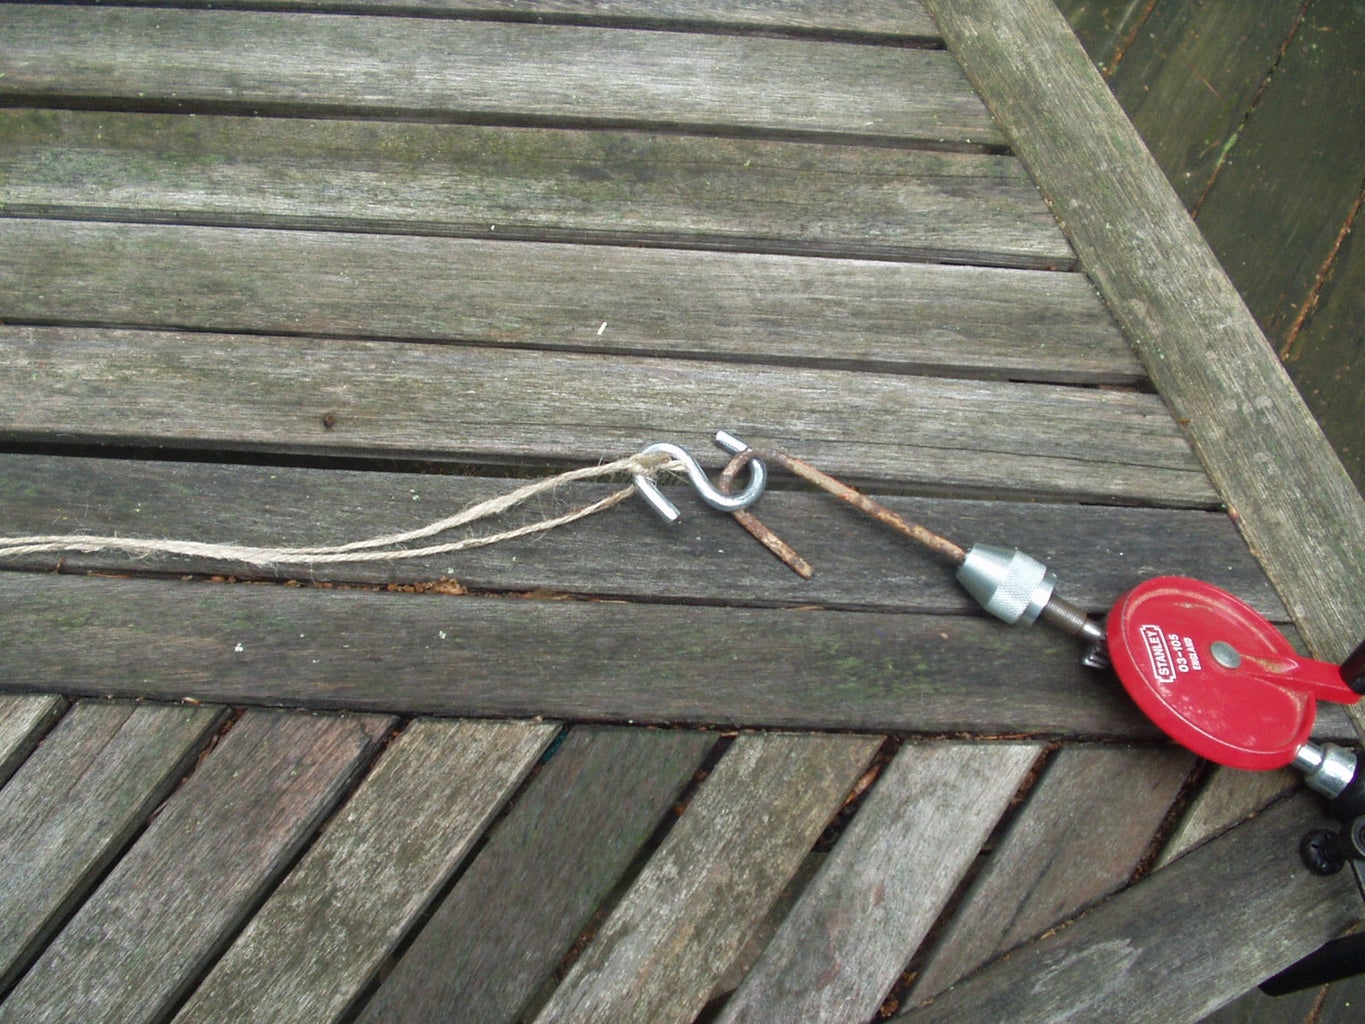


With an "S" hook take the third loop and crank the handle clockwise until a kink develops when tension is eased. Count the number of cranks. Put the "S" hook over the second "C" clamp. Do the same with the second loop (same number of turns) and put the "S" hook in place. Repeat with the third loop
Step 3:


Pick up all three "S" hooks with the hook of the hand drill and turn the handle counter-clockwise. Over twist in this turning an any extra tension will be eased when the rope is taken off the .hooks. (almost exactly 4' long). Tie a constrictor knot at the hand crank end to prevent unraveling, Not necessary to do so at the other end.
Use different colored loops to get a different effect. I used nylon sewing thread to make an extremely strong bit of cordage
Step 4:

Here is another way to make short lengths of rope. I am showing here a "C clamp attached to a table but is is a lot of fun to have one person crank the drill and another hold the "S" hook. Great for making friendship bracelets
In addition to the hand crank you need "S" hooks and a counterweight (pocketknife) with a hook to attach to twisted strands.
Length is limited by how far you can spread your arms
Step 5:


Place "S" hook over clamp. Put the loop over it as shown, Take the knotted end in the hand drill and turning the handle clockwise until a kink forms when tension is eased.
Step 6:


With your left hand place the counterweight near the center point of the twist. Bring your right hand around holding the "S" hook that was on the drill and bring the two hooks together. Raise your right hand and lower your left hand in line with each other. Release the counterweight and it will spin around giving a twist to this phase of the process. Tie an overhand knot in the "S" hook end and trim the ends
Step 7:


If you use two colors you get different patterns depending on how you arrange the colors. . Top is two strands knotted together at both ends - forms a herringbone pattern
Bottom is two interlocked loops - forms a spiral pattern
Step 8:


You can add a third color. After the initial twisting place the "S" hook from hand drill end on another "C" clamp (or your friends other hand.
Place a third strand ar the mid point and twist again. Place the counterweight st the midpoint. Hold the weight in your left hand and keeping tension gather the "S" hooks one at a time. Raise the right hand. lower the left hand below and release the weight.
Step 9:


Another pattern is achieved by threading a new strand through the unknotted end of an already twisted piece.
Now turn the drill handle COUNTER_CLOCKWISE and proceed as before. (if you turn the handle clockwise as before you will undo the already twisted piece).. Finish up as before
Step 10:


I used crochet thread to make this sunglasses holder. Unroll the twist enough to slide each end over the arms of the glasses. The ends will twist back on itself to hold the glasses securely
The second photo shows soft shackles used to hang items from a belt. The top one was made from a chain of loops cut from plastic bags. More examples in the other photos
Step 11:

You can string a split ring or lanyard clip on the strands before twisting. Simply center the ring/clip on the twist and hang the counterweight from that before gathering the "S" hooks and releasisng the counterweight as described above
Step 12:


You can make longer lengths of rope using this method. In addition to the drill you will need 2 "C" clamps, and 3 "S" hooks. I made a loop of twine 5 1/2' long - a little bit longer than the length of the table
Step 13:


As before crank the handle until a kink develops. Stretch the twisted loops out and measure the length of the twisted loops Put a "C" clamp - "S" hook at the mid point. Take the "C" clamp off the drill hook and swing it around and place it above the other "S" hook
Step 14:


Attach the hand drill hook to the third "S" hook and crank counter-clockwise. The result is a little over 3' long. Makes aa nice adjustable loop to tie around things. It turned out this piece was a perfect size to secure a down position patio umbrella that had a missing Velcro strap


