

Introduction: Rotate Real Objects in Your Web Browser - the Easy Way!


Static photos can only get us so far in showing what an object really looks like; sometimes spinning it in 3D is the best way to show it off. Many online merchants stitch together 3D images to allow you to "spin" the product around in your browser.
But what if the object is physical - a sculpture, a breadboard hack, a seashell?
This tutorial will show you how use the Canon Hack Development Kit and a Canon point and shoot camera to photograph an object rotating in place, and how to set up a viewer that allows you to spin the object. I'll talk about setting up the viewer in Wordpress, but you can use similar code on any site. See it in action here!
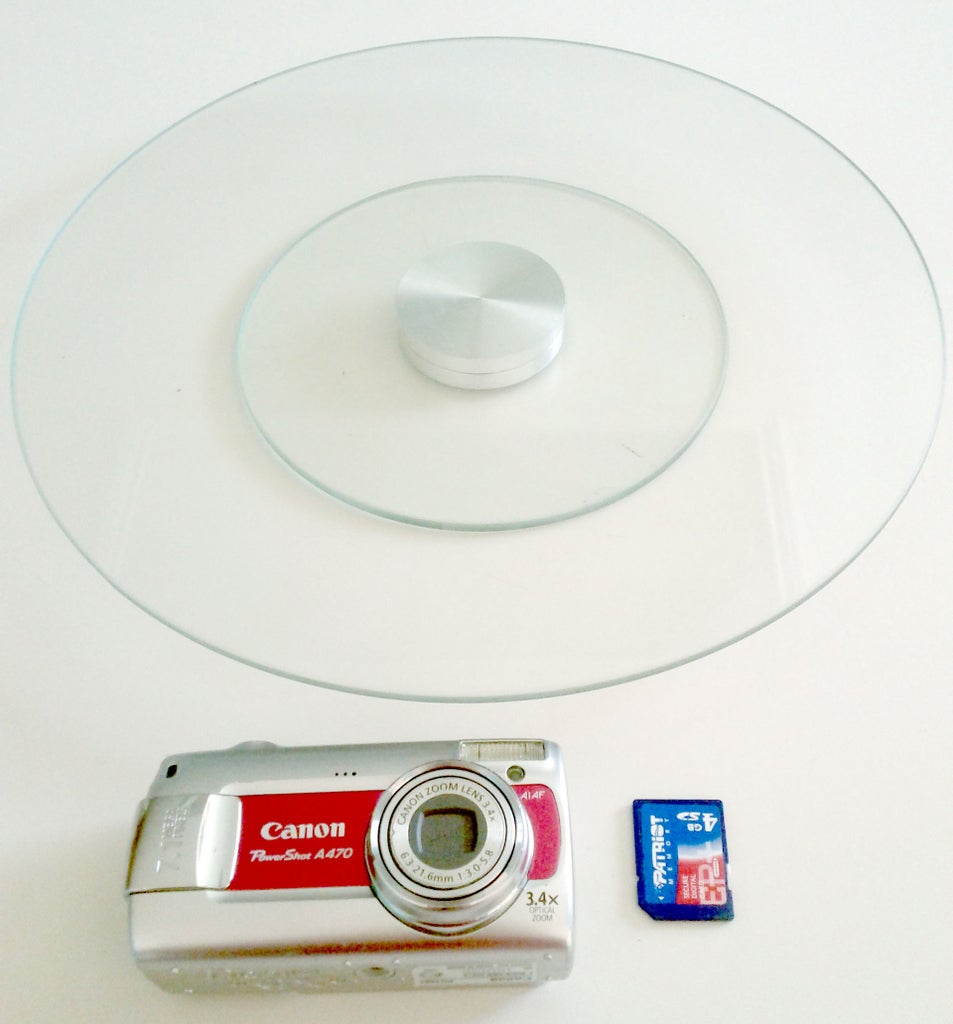
You will need:
A Canon point and shoot camera compatible with CHDK
An SD memory card, 4GB or smaller.
A lazy susan
Something to photograph. For this demo, I'm using a small barware set.
Step 1: Installing CHDK
All you need to do is put files on your memory card; the program doesn't make any permanent changes to your camera.
- Check to see if your camera is supported here and check your firmware version.
- Download the version of CHDK for your firmware from this list.
- Copy all of the CHDK files to the root directory of your memory card.
- Download the script file Timelapse.bas, attached here, or copy and paste this code into a plain text file called Timelapse.bas. Copy the file to your memory card in the directory CHDK/SCRIPTS.
- Insert the SD card into the camera.
- Power up your camera in view mode, press the Menu button, and scroll down to the "Firm Update" option. This will load CHDK temporarily onto your camera.
Attachments

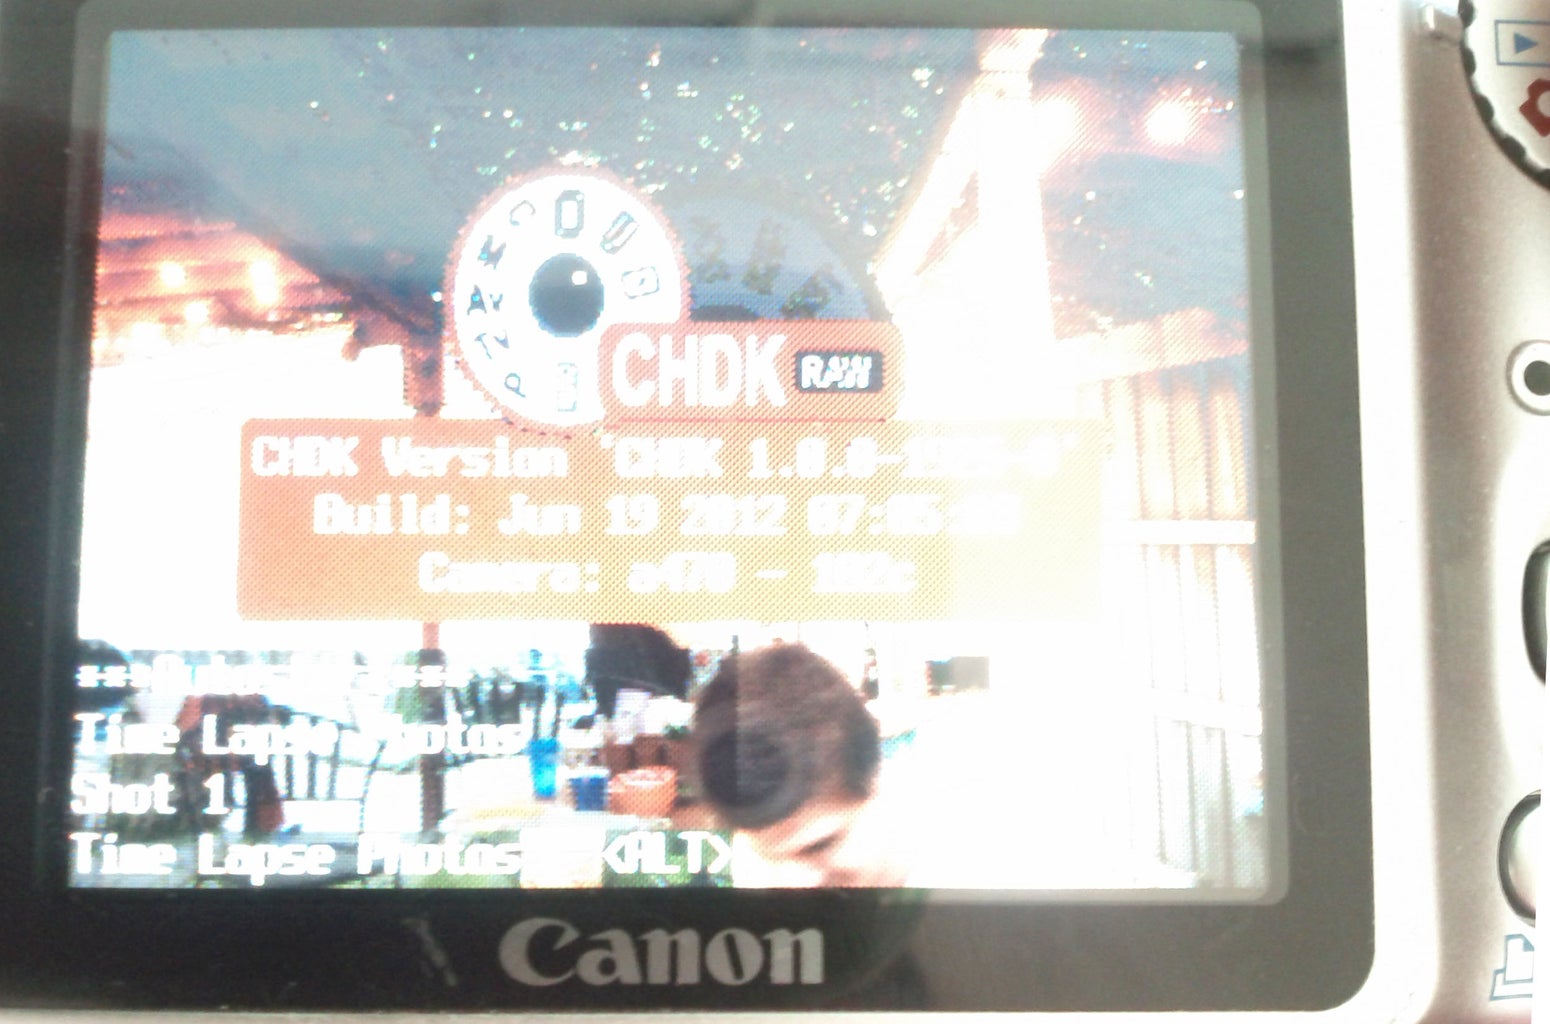
Step 2: Load the Script


Once CHDK is loaded, you're ready to pull up the Timelapse script you downloaded. Press the MENU button, and you'll bring up a different menu - the CHDK menu.
Scroll down and choose "Scripting Parameters", then "Load Script From File...", then select Timelapse.bas from the list. This will bring up an options page for the script where you can change the wait time between shots or set it to run automatically when CHDK loads, but your work here is done.
Hit MENU again, and you'll see that the bottom left corner of your screen now says "Time Lapse Photos." The time lapse script is now set to run when you press the shutter button to take a photo. It will take photos continuously until you end the script by pressing the shutter again.
The time lapse script uses the options you've set up for taking photos normally, so you can change certain options (changing the flash mode, turning on macro focus) and they will apply to all the photos in the set. I recommend turning off your flash and using a well lit background for your photos.
You can leave the CHDK menu and set those options in your regular camera menu by pressing Alt. Press Alt again to return to CHDK.
Step 3: (Optional) Make CHDK Bootable

If you're going to take multiple sets of turnaround photos, loading CHDK each time may be a chore. You can make CHDK boot automatically using a utility called CardTricks.
When you run CardTricks, all you have to do is choose your SD card by clicking on the little SD card graphic, then click "Make Bootable." Before putting your card back in the camera, slide the lock on the left side of the card down, away from the connectors.
CHDK will now run automatically when you power up the camera, and if you set the script to autorun, it will immediately start taking photos. You can disable CHDK by sliding the lock back up.
(Locking the card also prevents your PC from reading the card, so you'll have to switch it back if you want to delete or change any files.)
Step 4: Set Up Your Camera and Prop

Pick a place to set up your shoot. It should have plenty of light directed at the object you want to photograph, and not be backlit. You should be able to easily reach the object you're photographing, and see to point the camera.
You can photograph in front of a backdrop for a clean look, or put your object in an interesting context. People, animals and other moving things in the background may be distracting.
Place the object on top of the lazy susan and position the camera so that the object is centered, and the front edge of the lazy susan is out of frame. You should be able to reach over and touch the edge of the lazy susan without your hand showing up on camera.
Step 5: Shoot and Spin


Press the shutter button to start taking continuous photos, and gently spin the lazy susan with your fingertip. Spin the object several times, and try to capture as many different angles as you can.
Step 6: Create a Photo Sequence
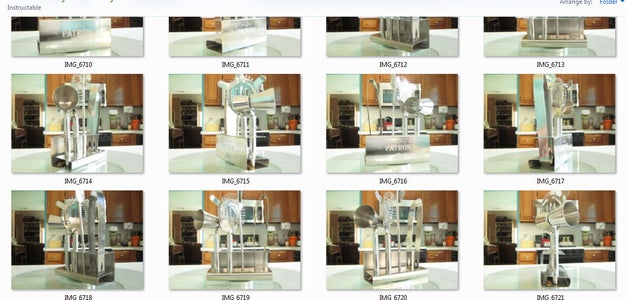
You have your photos! Now to put shots from those multiple spins around the lazy susan together into one rotation sequence.
When you pull up your photos, you'll notice that they aren't really in order; for the sake of sanity, you'll want to reorder them so they make a smooth sequence before we move on to the next step.
I reorder them by picking a "front" photo, renaming the file 01.jpg. Then I pick the photo that's next to last in the rotation and name it 99.jpg. The back view is 50.jpg, and the side views are 25 and 75, respectively. Then I look at the remaining photos and number them so they fit in the sequence, and pull up a slideshow view to see how well the sequence is working.
(You can avoid this step by marking stop points on your lazy susan and taking all of the photos in sequence.)
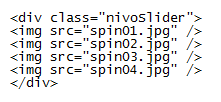
Step 7: Install a Slideshow Viewer
The next step is to put your photo sequence into a slideshow viewer with left and right buttons; the effect will be that viewers can click "left" and the object will rotate left.
There are many, many viewers out there, but the one I like the best for this particular application is Nivo Slider. It has large left and right buttons and a low-key selector at the bottom of the viewer, and it automatically wraps around from the first to the last image, so you'll be able to spin the object infinitely. It's free to download here.
We'll take it one step further, though, and show you how to use Nivo Slider to create these turnarounds in Wordpress using the NIVO slider light plugin. Unlike other plugins, this one is designed to make the image slider in a post, rather than pulling images from a Wordpress category list.
Step 8: Create a Spinnable Object in a Wordpress Post


You can also add a caption, pointing out things visible from each angle, by putting text in the Title field of the image. For example, here's how I'd describe a four-picture turnaround of my laptop.:

And that's it! Now, you can spin anything in a web browser! Check out my blog to see it in action!

Participated in the
Hurricane Lasers Contest


