

Introduction: S-117


I am taking a prototyping class in college where i'm learning about the processes behind designing products. For my final project I was asked to create a prototype product that is interactive in a significant way. I decided to make a cosplay costume piece based on Master Chief from Halo. For this project you will need:
1. A 3D model of your desired helmet
2. A computer with 123DMake from Auto-desk
3. Bondo car body putty
4. Card-stock (lots of it)
5. Craft foam to line the helmet
6. Paint of your choice and modge-podge
7. A laser cutter (scissors can be used instead)
8. Paint scrapers, 1 to 1.5 inches
9. Orbital sander and/or dremel
9. Hot glue gun
Optional: Visor to place over eye cut out to create a face-plate.
Step 1: Creating Papercraft Model

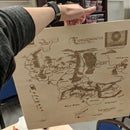
First you need to generate the paper craft plans to print on card-stock. To do this import your 3D model to 123DMake. I have attached the model that I used. Under manufacturing settings, create a new material and fill out the menu with the specifications for your card-stock. Make sure to select this material after it's created. Under object size, adjust the dimensions to accommodate your head size. Select folded panels as the construction technique. You can increase the number of vertices and/or face count to decrease the blockiness of your paper-craft model. Keep in mind that the more faces/vertices used, the more rounded the helmet will look; but increasing these numbers will also increase the number of pieces/folds you will need to make int eh next step. Using the Add/Remove Seams tool, you will need to select edges on the model to create panels or edit panels, until the entire model is blue. Once the model is blue, click the button next to "Get Plans" on the left menu. Export the panel plans as a PDF to your computer.
Attachments

Step 2: Print, Cut and Assemble


Next you're going to need to print out your panels. One way is print out the PDF from the last step and cut each panel out by hand with scissors. Make sure to only cut solid lines, as the dotted lines are folding guides. I used a laser cutter for this part. To laser cut your panels, import each page of the PDF into Inkscape and then print them using the laser printer. If you have not used a laser printer before make sure someone helps supervise you for this step. Tape the panels together according to the model rendering in 123DMake using tape. I would advise folding each dotted line in both directions first to expedite this process. Also, you may find it easier to tape edges together after cutting the tiny tabs off first.
Step 3: Bondo


Next, you will need to apply Bondo to your 3D paper model in order to make it sturdy enough to wear. First mix the Bondo according to the directions that came with it. Then apply it in layers about a quarter of an inch thick at the most.Make sure to do this in a well ventilated area as Bondo is extremely toxic. Use latex gloves or something similar to protect your hands while applying the Bondo to ensure that you don't get any on your skin. I would recommend applying multiple layers to increase the sturdiness (let each layer set before starting the next). This is also the part where you will be forming the final shape of your helmet. What I mean by this is that you will need to apply Bondo in a way as to decrease the blocky shape of the paper model, if you want the final product to look more accurate.
Step 4: Sanding


Once the Bondo has dried, and is no longer tacky to the touch you can start sanding the helmet smooth. Using the orbital sander, sand down the surface of the helmet until it is as smooth as you want it. I used 120 grit sandpaper, but it might have been easier to start with a lower grit and fish with a higher grit paper. Additionally, you can use a dremel to sand hard to reach edges. Keep in mind that any imperfections on the surface will be very visible once the helmet is painted. When sanding use eye and respiration protection as again, Bondo is extremely toxic and sanding it produces copious amounts of dust. Also, make sure to cut out the visor hole so that the wearer can see. I used a dremel to do this, as I was already using it to sand the helmet.
Optional: If you are planning to put a face visor in your helmet make sure to double and triple check the dimensions of the visor plate against the hole you're intending to cut. The best way that I found to do this is to trace the edge of the visor onto the helmet add cut the hole slightly smaller than the outline. I will address attaching a visor in the next step.
Step 5: Painting and Padding


After you are done sanding, you can paint your helmet in a style of your choice. I chose to spray paint it dark grey, to give it a metal look. Keep in mind that I painted my helmet a solid color as I was trying to make the helmet look like a possible helmet from the Halo Universe, however the color of the helmet is completely up you. You can use acrylic paint to add detailing like scuffs and the like. I recommend looking at some of Adam Savage's YouTube videos on how to do detailing like this. (At the time of writing this his channel is "Tested") Once all the painting is done, use modge-podge to seal the helmet. After the paint is dry, cut the craft foam into pads and attach to the inside of the helmet using hot glue on the edges of each foam piece. Pad the helmet until it fits properly. To made sure that the helmet fit, I started by putting padding on the top, sides and back until when I tried the helmet on it was snug on me head. After this, I used smaller chunks fill out the lower edges and the chin portion.
Optional: At this point you will need to attach visor if you so wish. I would place a line of hot glue around the edge of the eye hole on the inside, then place down the visor and make sure it is aligned correctly. Make sure to reinforce this joint on the inside edge. When my visor gets shipped I will update this step.


