

Introduction: Saw Horse Stays


Everyone typically knows how Saw Horses work; you fold open(if you have the folding kind) or set apart then put 2x4's or plywood on them for a temporary makeshift work surface. Problem can be sometimes just throwing the 2x4s or plywood on they can tend to shift or move while your working, unless you clamp them down. Which I find is ok, but I usually end up needing all my clamps for the actual work subject I'm doing.
So I came up with these dowel rod stays.
Step 1: Step 1: Determine Supports and or Work Surface


Sometimes I just need 2x4s depending on what I'm working on. Other times I need a flat surface area. So I got two of the shortest 2x4s that keep the saw horses far enough apart without their legs touching at the feet. Another idea was I grabbed an old computer work desk board for the flat surface solution.
Step 2: Step 2: Drill Holes


Line up the flat board first to the outer edge of the top of either saw horse. Then using a 5/8" foster bit I drill through the flat surface and into the top of the saw horse. (Be careful that there aren't any screws or nails in your saw horses tops)
After doing both sides, I drilled my 2x4 as it didn't need to be perfect position wise I made sure it had at least a bit of overlap.
Step 3: Step 3: Cut Dowel and Customize


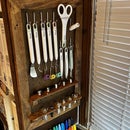
I had an old broom hand that I cut down leaving at least an extra 1" above the hole so it can pulled out when done. As an added customization I had some old drawer knobs that I screwed into the top edges. This helps make them easier to pull out when done using.
Step 4: Step 4: Secure Supports or Work Surface


This works great. By placing the rod into the 2x4 or work surface my saw horse don't shimmy apart when I use my sander, miter saw or other power tools. Added Bonus….when your all done you can pull it all apart and store for next time. You'll notice some extra smaller holes in the flat work surface. Those I made for certain power tool stays to help keep them in place when using. The Miter Saw, Bench Sander, etc. It makes a big difference when working on stuff knowing it won't shift or move when working on a piece.

Participated in the
Workshop Hacks Challenge 2017


