

Introduction: Setup AVR Programming on OS X Using Eclipse

Some time back I managed to setup Eclipse for AVR programming on both Windows 8 and Ubuntu. Not being an expert in programming, nor in electronics, I have to admit I found it challenging.
Now I wanted to setup Eclipse for AVR once again on OS X Yosemite. Spend couple of hours finding out how it works and then managed to get it working. I reused other instructables and blogs to find my way. To mention few of them:
- http://robots.dacloughb.com/project-1/setting-up-t...
- https://www.instructables.com/id/How-to-get-started...
This instructable will guide you through the process of setting Eclipse C++ for AVR programming on a up a brand new OS X Yosemite installation. All I can say is that it worked for me. As I learned myself, that does not mean it will automatically work for you as well. You may need to apply few changes on the way. Still, I do hope it will help you to get up and running quickly.
The setup can be done in roughly 5 steps:
- Installing Java Development Kit 1.8.0_25
- Installing Eclipse IDE for C/C++ Developers
- Installing CrossPack-AVR-20131216
- Create your first C project (project type AVR Cross Target Application) and set the AVR properties.
- Build a sample program, build and upload to your target AVR device
Step 1: Installing Java Development Kit 1.8.0_25


You only need JRE 1.8 if you do not plan to do java development. I do every now and then. So instead I installed JDK 8 update 25. Just follow this link to go to the download page and select the correct download.
After the download completed, go to your Download folder. Click on the disk image file jdk-8u25-macosx-x64.dmg. That opens a window containing the Java Development Kit. Double-click to start the installation. During the process you may have to specify a password to allow installation of new software. That depends on your OS X preferences.
Step 2: Installing Eclipse IDE for C/C++ Developers


Now you need to download Eclipse IDE for C/C++ developers. Choose the correct version, in my case Mac OS X 64 bit. The download will put Eclipse as a tar-file eclipse-cpp-luna-SR1-macosx-cocoa-x86_64.tar in your download folder. Just click on that file. It will create an folder eclipse in your download folder. I renamed the folder to eclipse_cpp. Did the same thing for the executable (so I can see in the dock which eclipse it is).
I used Finder to move that complete folder and of course all subfolders from Download to Applications folder. Just drag and drop and you're done.
Step 3: Install AVR Eclipse Plugin


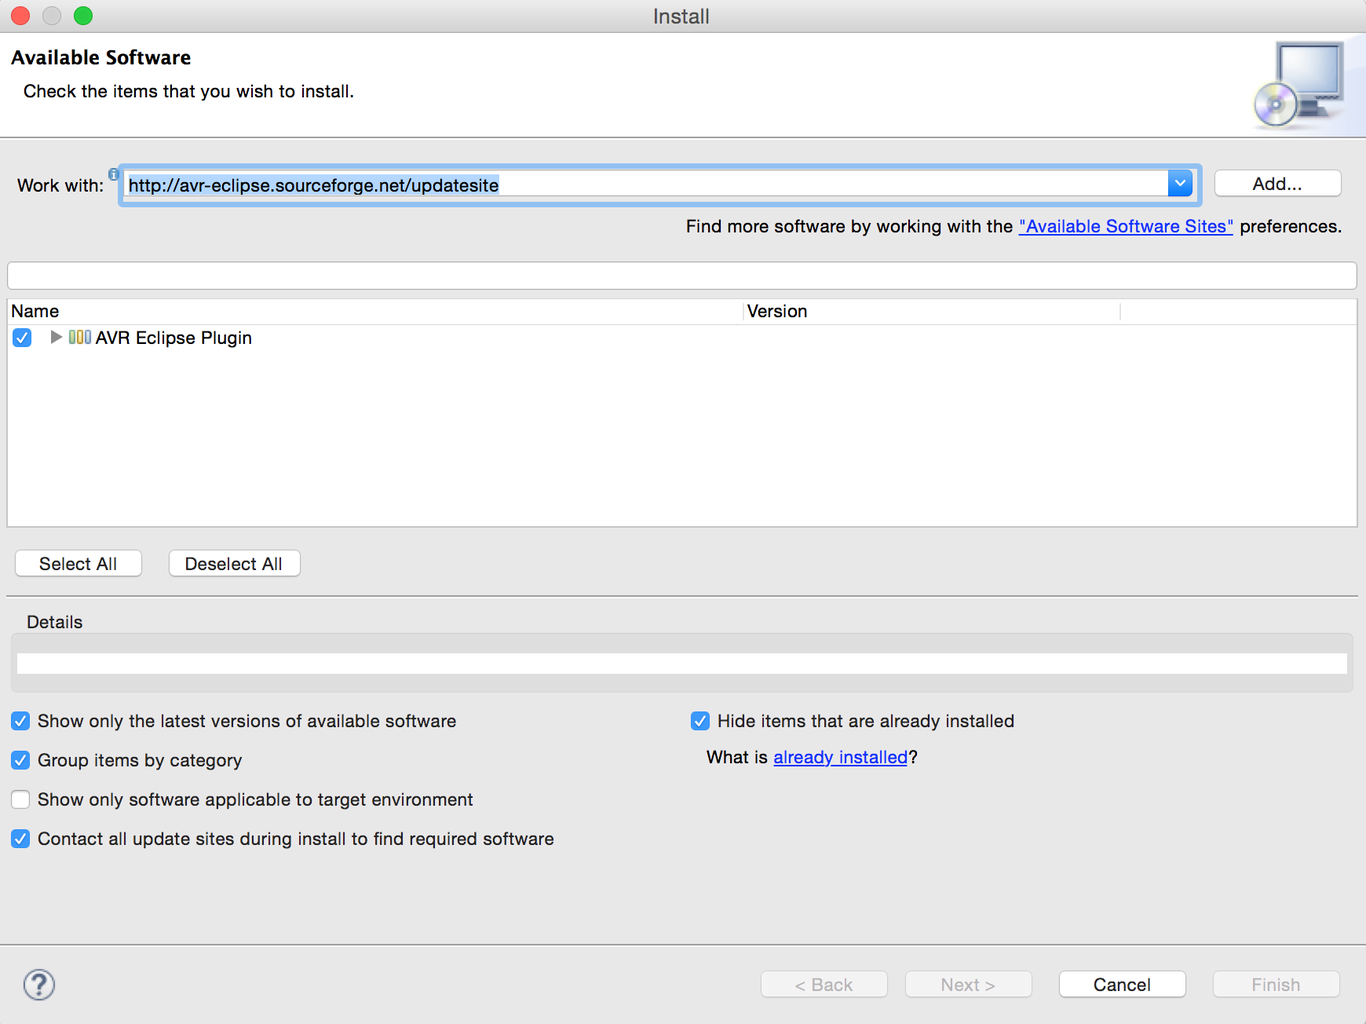
Next to do is installing the AVR Eclipse plugin. You can find all information on the download procedure on http://avr-eclipse.sourceforge.net/wiki/index.php/Plugin_Download
In Eclipse, go to menu option Help, and then select Install New Software... Copy and paste http://avr-eclipse.sourceforge.net/updatesite into the " Work with:" field. Select AVR Eclipse Plugin, hit Next and and follow the procedure.
Step 4: Installing CrossPack-AVR-20131216

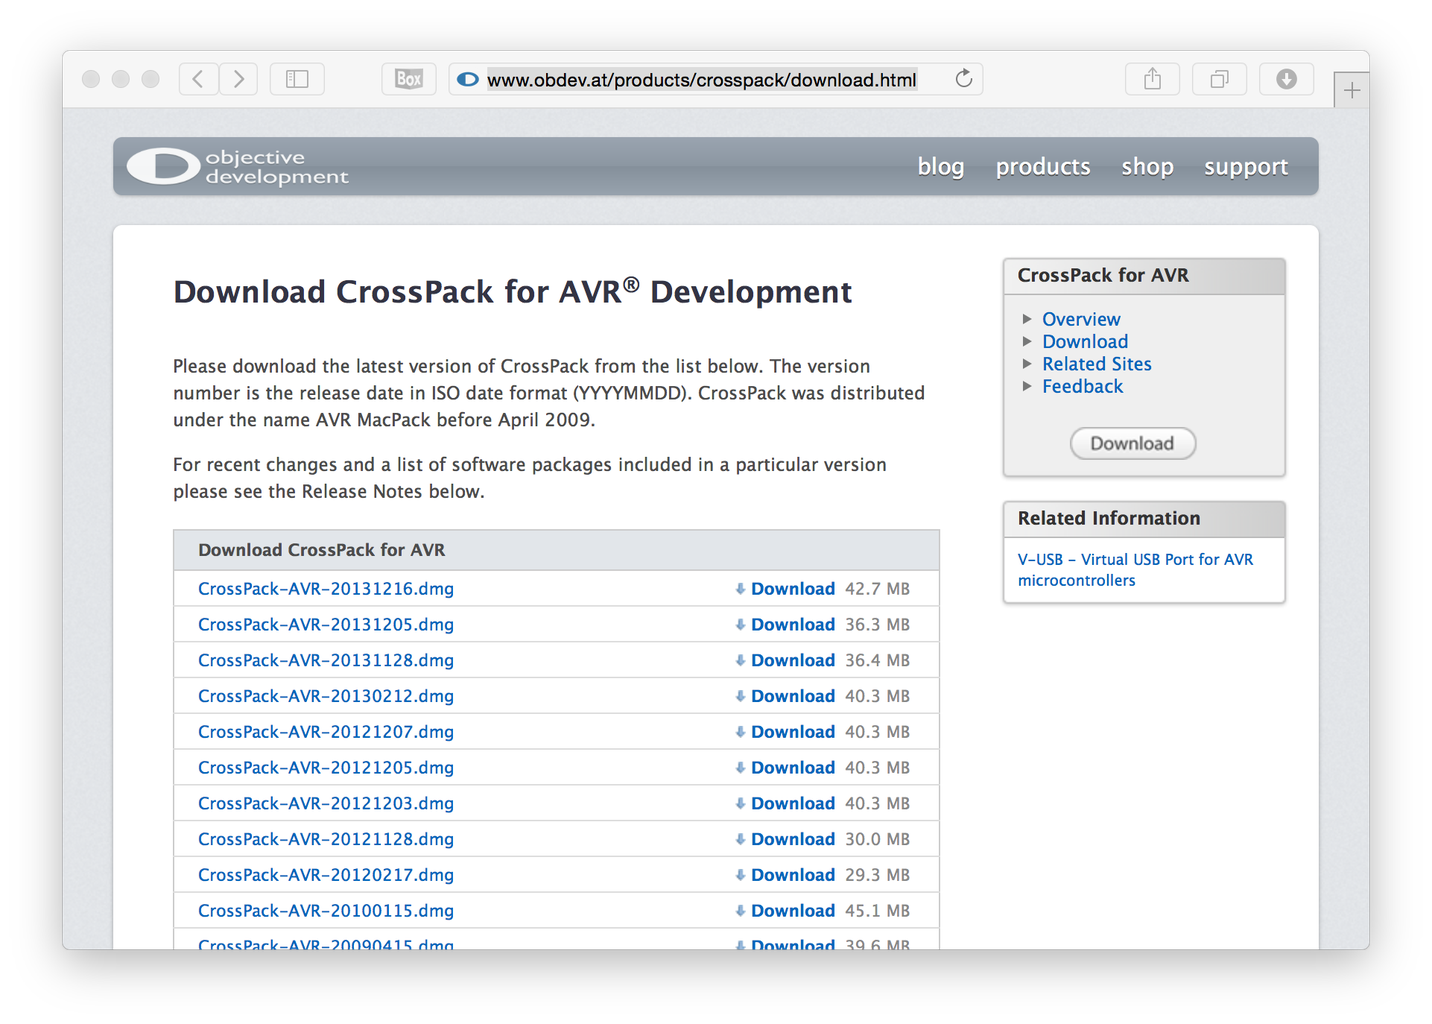

CrossPack is a development environment for Atmel’s AVR® microcontrollers running on Apple’s Mac OS X, similar to AVR Studio on Windows. It consists of the GNU compiler suite, a C library for the AVR, the AVRDUDE uploader and several other useful tools. More info on http://www.obdev.at/products/crosspack/index.html
Go to the dowload page http://www.obdev.at/products/crosspack/download.html. Download the most up to date version, at the time I wrote this that was "CrossPack-AVR-20131216.dmg".
Click on the file that you just downloaded. A window opens with a Readme file and the CrossPack-AVR package. Double-click on the icon CrossPack-AVR.pkg. Depending on you OS X setting you may get a warning that you can't install the software because the developer is unknown. You can bypass via OS X System Preferences, Security and Privacy. Just follow the procedure and you'll be fine. Later on you may again be asked for admin password upon installation of the package. Again, that depends on your OS X preferences.
Step 5: Create Your First C Project (project Type AVR Cross Target Application) and Set the AVR Properties.


Create the project
- Create a new C++ project named " BlinkingLed"
- Project type is " AVR Cross Target Application", empty project.
- Deselect "Debug"
- Ignore AVR Target Hardware properties for now.
You can set the right options here too, but I will use different approach in the next steps. - Finish. Your empty project is now created.
Set the properties for AVRDude and Target Hardware:
- Right-click on project in Project Explorer. Select "Properties" (or use Command-I)
- Expand >AVR
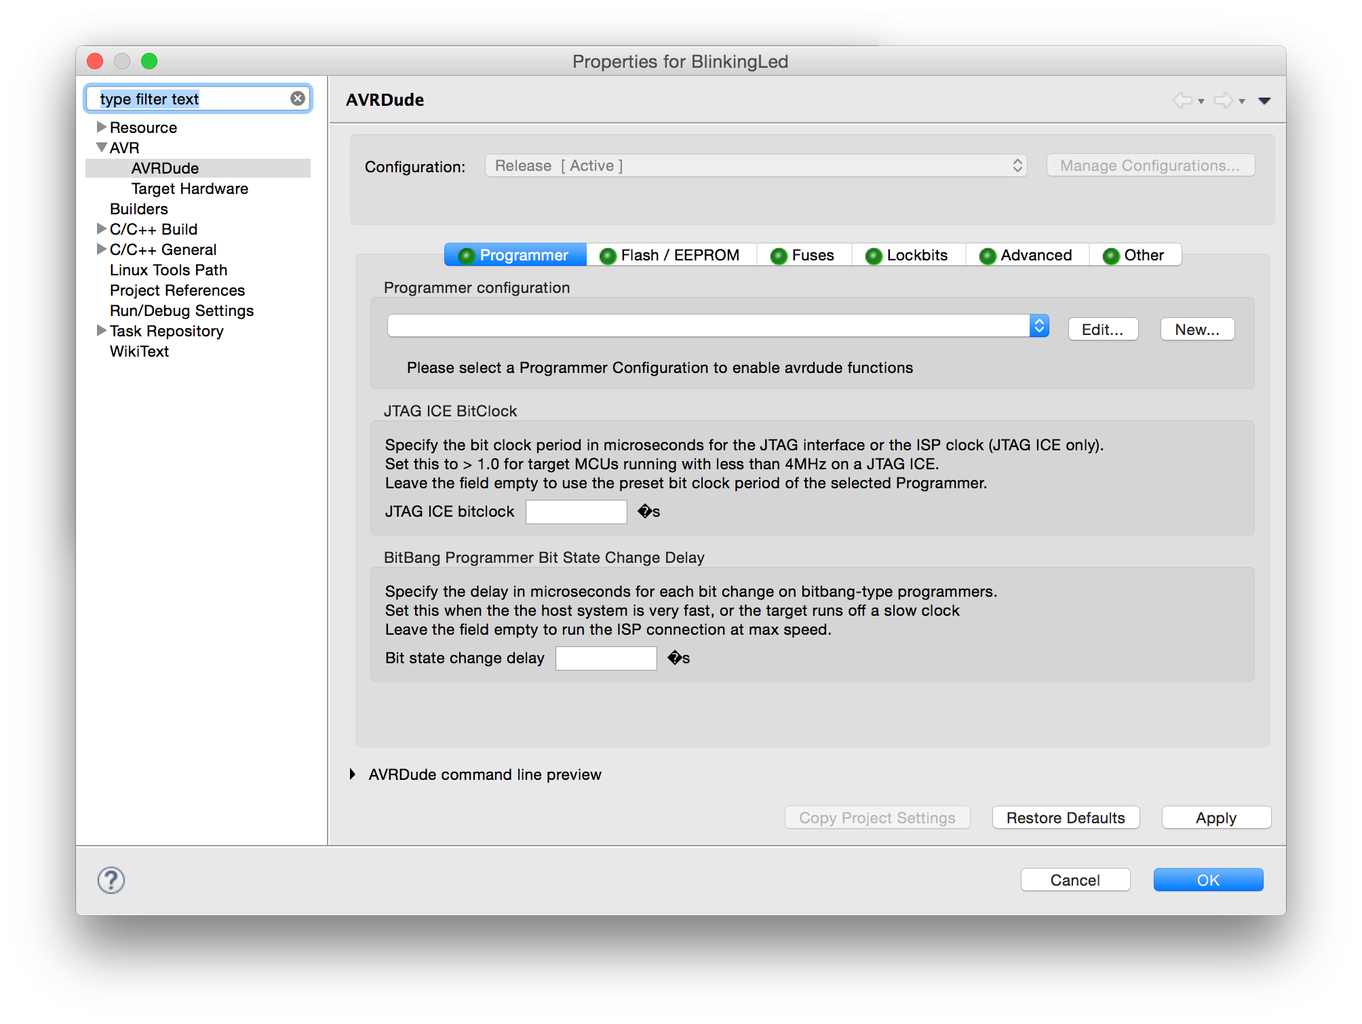
- Select " AVRDude".
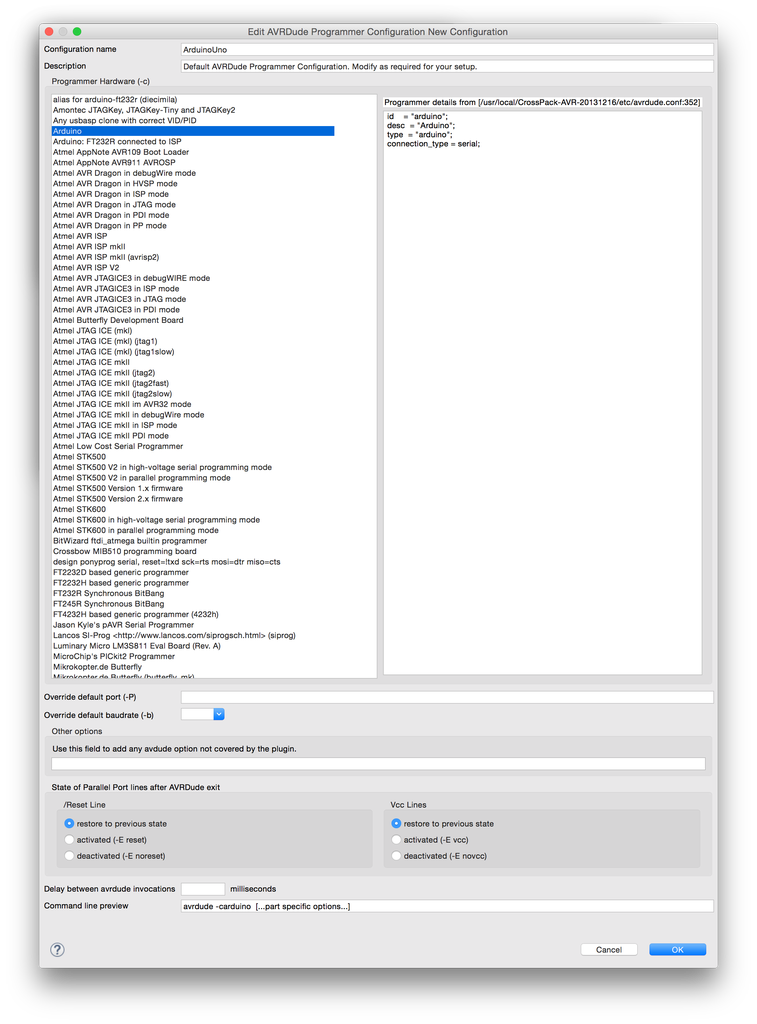
- Now we need to add a programmer for the Arduino Uno.
- New...
- Configuration name " ArduinoUno" (or any name you prefer)
- Programmer hardware " Arduino"
- Override default port: "/dev/tty.usbmodem1451"
Here you will have to fill in your own tty. port! I used the command line to find out which one it was by listing the /dev folder. - Override default baudrate: " 115200". Works for me. Did not try other (higher) values yet. Fast enough for me.
- Ok to save this Configuration.
- Make sure to set the Programer configuration to " ArduinoUno"
- Apply. Ok.
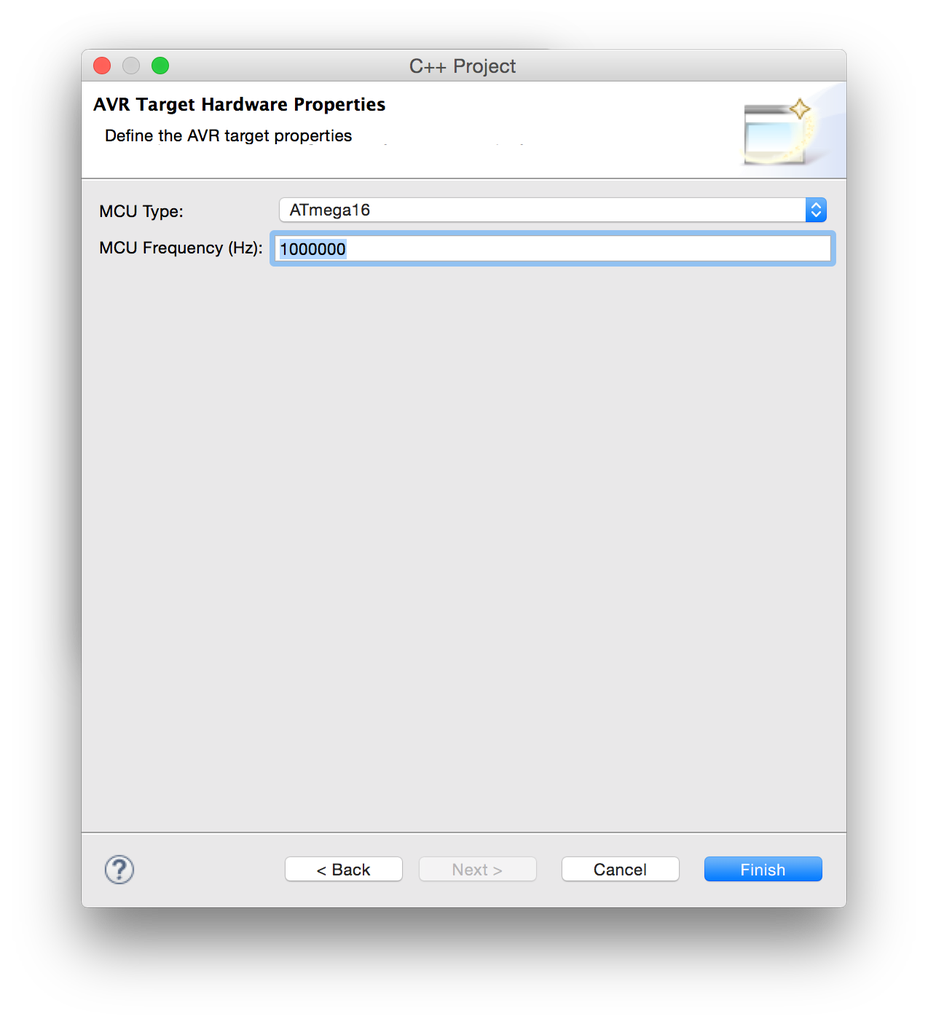
- Select " Target Hardware"
- Make sure your Arduino is connected to your computer
- "Load from MCU"
- As you can see from the screenshot, the MCU Type is loaded from the Arduino board.
- Now manually update " MCU Clock Frequency" and set it to 16000000
- Apply. Ok.
Step 6: Main.cpp Simple Program for Blinking Led on Pin 13

- Create a source file " main.cpp" and copy and paste this code
- Build
- Upload the hex file to your Arduino
#define F_CPU 16000000UL
#include "avr/io.h"
#include "util/delay.h"
int
main (void)
{
DDRB |= _BV(DDB5);
while(1)
{
PORTB ^= _BV(PB5);
_delay_ms(500);
}
}
Step 7: That's It!
That's all. Thanks for using this instructable!


