

Introduction: Seven Segment Display DIY


In this instructables, I am going to show you how to make a seven segment display with CD4511BE. I didn't made the dot "DP" becaise I had no need for it, but you can add it if you want.
I used CD4511BE so I could control display it with only four pins.
This easy, Fun and cheap project that you can do yourself.
Step 1: Make Shape You Want


The material I used is plywood 4mm thick and I printed picture of seven segment display, then I draw how I would cut it, and finaly I cutted plywood in the shape I wanted.
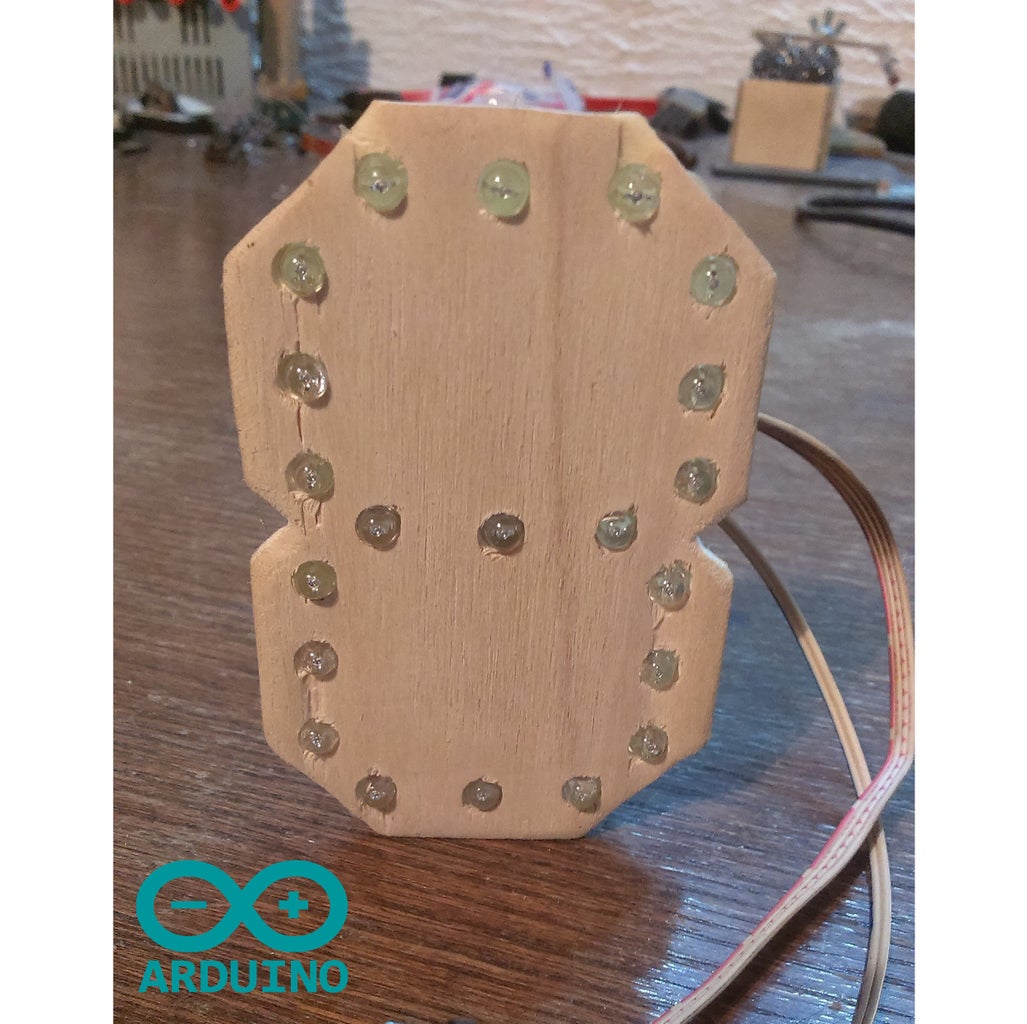
Step 2: Assemble LEDs


Drill right size holes (My LEDs was 3mm),sand plywood so glue will hold it better,and then glue all LEDs.
Step 3: Add Resistors


You need to pick right resistors for your LEDs, I used 220 omh and if you use standard LEDs this ressistor should work for you too. If you dont know how to get right ressistor you can learn that HERE.
Step 4: Add Transistors


I used PNP transistors so I could power LEDs.
Arduino can only supply 200 mA, so I decided to use transistors to bring that to minimum.
I wired LEDs in row becaise transistors I use cant handle over 40 mA, but can over 15V.
All you need to do is to connect it like shown and connect all GNDs, and all anodes of LEDs, and that will be your + and - for giving power to LEDs.
Step 5: CD4511BE


I used this integrated circuit to lower 7 pins to 4 pins.
You need to take care of wiring sections of seven segment display and this integrated circuit or It will not work correctly.
Four pins from CD4511BE are connected to digital I/O pins on arduino and other two are connecred to arduinos 5V and GND. (You can also connect its 5V to LEDs anode, then it will get power from other source not from arduino)
It works like binary numbers, you can controll it by activating pins like this(0 is LOW, 1 is HIGH):
0001 - 1
0010 - 2
0011 - 3
0100 - 4
...
Check out how it works on youtube HERE.
You can also download code that I used in video.
Thank you for your time.
Attachments


Participated in the
Make it Glow Contest 2016

Participated in the
Arduino Contest 2016


