

Introduction: Shoe Sole Repair/Improvement


This instructable shows a way of repairing or replacing the sole of a shoe with urethane rubber. It has a lot of room for improvement. I used it as a way to learn more about mold making and casting. Follow along and pick up some do's and don't that I found out!
Step 1: The Materials

For this project I used:
1. plaster of paris for the mold of the shoes
2. cake pan for the mold container
3. Ease Release 200 mold release agent
4. PMC-790 urethane rubber
5. plastic mixing cup
6. stir stick
7. kitchen scale
Step 2: The Mold

The first thing I learned from this project is that plaster of paris makes a very poor mold unless you use some sort of sealer to keep if from flaking away when you de-mold the shoes. You can get away without the sealer, which is why I haven't listed it in the materials section, but it's pretty easy use a silicone or latex sealer to keep everything together if you want.
The mold making process is pretty straight forward:
1. mix up the plaster to about peanut butter consistency
2. press the shoes into the plaster to capture the shape of the bottom of the shoe (keep the shoes level front-to-back and side-to-side or you'll have a funny walking feeling on uneven shoes)
3. add traction or designs to the bottom of the new shoes by drawing lines, shapes, or words into the plaster
4. let it dry thoroughly
5. spray the release agent on the mold as recommended by the instructions on the can
(the picture is actually of the shoes being cured to the rubber, but you get the idea)
Step 3: The Urethane Rubber

Follow the instructions on mixing the rubber you purchased. PMC-790 is a two part rubber that can be mixed by weight or volume. There is a big difference between weight and volume, just don't try to convince your girlfriend that her weight doesn't matter it's the volume...being dense doesn't sound appealing to most. The following method shows how to mix by weight.
Mixing for PMC-790:
1. place the mixing cup on the scale and press tare (if your scale doesn't have tare just write the weight down so we can subtract it later)
2. weight out an appropriate amount of part A into the mixing cup and write down the amount (if your scale doesn't have the tare function then you need to subtract the weight of the cup from the current weight to get the weight of part A)
3. press tare and add part B until the scale reads 1/2 the weight of part A (if your scale doesn't have tare, just add 1/2 the weight of part A to the current weight and that's you're target weight)
4. follow the mixing instructions on the bottle to make sure you get the two parts mixed well
When you've got the rubber mixed, pour it into the mold all the way to the top. Then lightly press the shoes on top. Again, make sure the shoes are level front-to-back and left-to-right.
Step 4: Trimming the Rubber

When the rubber is firm it's time to remove the shoes. If you let it cure all the way then it will be hard to trim the excess rubber off.
For this step, just pull the shoes out of the mold. You can break the plaster if you need to, just get the shoes out. Then use a sharp knife to cut away any excess rubber around the edges and let the shoes cure for the rest of the time recommended on the bottle of rubber.
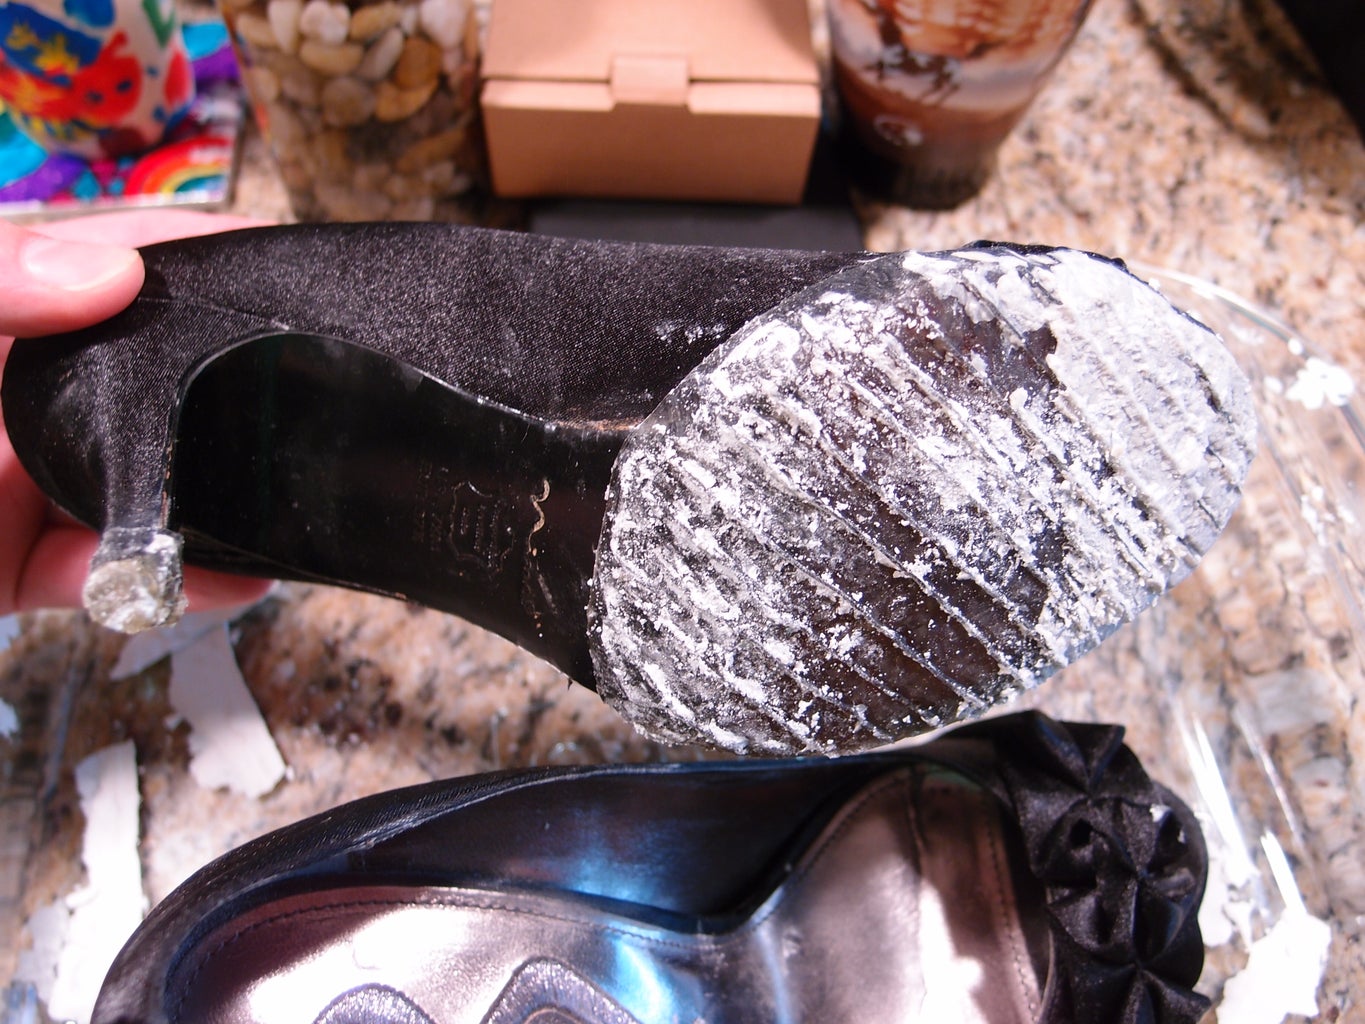
You can see how much plaster came out of the mold with these shoes. A sealant would have prevented this, but the shoes are still usable with the plaster on there. Eventually the plaster will flake away.
Step 5: Some Take-aways
1. This type of rubber didn't work well for the stem of the shoes. There isn't enough surface area for the rubber to bond well with the stem and small amounts of urethane rubber are too flexible. You could nail a block of wood or plastic to the stem like the original.
2. There are lots of silicone mold materials that are actually easier to work with than plaster of paris. They mix just like this urethane rubber does and don't flake away like the plaster.


