

Introduction: Shoot the Bat- PictoBlox Tutorial


Playing games made by others is so mainstream. If you want to really have fun while playing a game, make one ON YOUR OWN! This project is all about making your own game from Scratch (pun-intended) - right from selecting the characters and controlling their movement to taking care of the score and the time - and having fun at the end!
Are you ready? Let’s get straight to it then!
Step 1: Things Needed
Step 2: Understanding the Game
In this game, we will be needing the two main components
- Bat- The prey which we will be aiming at.
- Aim- Will aim the bat using it.
- Score- The number of bats you aim correctly at.
- Timer- Will display the time for the game to end.
Step 3: A Little About PictoBlox
PictoBlox is a graphical programming software based on Scratch 3.0 that makes learning how to code easy and fun. It allows you to interface and control evive with your computer and even uploads code to it.
You can download PictoBlox from here.
PictoBlox, like Scratch, has the following basic elements:
- Sprite
- Stage
- Blocks
- Script
It also has the following extensions that contain special blocks using which you can control evive:
- evive extension: The blocks in this extension allow you to control the inbuilt functionalities of evive such as the tactile switches, slide switches, potentiometer, motors, 5-way navigation key, touch inputs and Real Time Clock.
- Dabble extension: This extension has all the blocks that enable evive to communicate with Dabble.
- Actuators extension: The blocks in this extension enable you to control the actuators such as DC motors and servos connected to evive.
- Sensors extension: This extension allows you to control sensors connected to evive.
- evive Display extension: This extension allows you to control the display on evive screen (change color, font size, and font color), draw shapes, write text, and display values on the screen.
- IoT extension: The blocks in this extension allow you to make IoT-based projects such as home automation, monitoring temperature, etc.
- Lighting extension: This extension enables you to manipulate colors of an RGB LED strip.
- Communication extension: The blocks in this extension allow serial communication.
PictoBlox has two modes in which you can work:
- Stage Mode: In this mode, you can write scripts for the sprite and board and control it in real time. If you disconnect the board, you cannot control it anymore.
- Upload Mode : This mode allows you to write scripts and upload them to your board so that you can control even when it is not connected t your PC/laptop.
In this project, we will work in stage mode.
Step 4: Choosing the Sprite
Before you choose the sprite, make sure to say Goodbye to Tobi!
Right below the stage, you will see a purple button. Take the cursor over it and select Choose a Sprite; then select the Bat sprite and Aim sprite.

Step 5: Setting Up the Stage

It's time to choose the Backdrop as plain black won't add any gaming effect.
Right below the stage, you will see another purple button. Take the cursor over it and select Choose a Backdrop; then select the space backdrop.

You can choose any backdrop as you want.
Step 6: Making the Bat Flap It's Wings

We can do the same animation by quickly changing the Costumes. We need to quickly click the first costume and then the second one in succession.
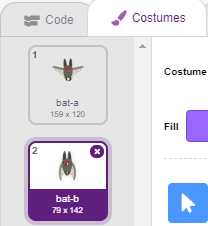
PictoBlox has a block called switch costume to for the same.
Write the following code:

Step 7: Making the Bat Move

We need the bat to randomly appear anywhere on the screen and glide. Then suddenly disappear.
And also, when the aim sprite touches it, a new bat will spawn. We will have to then aim at that bat and so on.
Write the following code:

Step 8: Making the Connection
Make the connection as given:
- Black Wire: Connected to Ground (GND)
- Red Wire: Connected to 5V (VCC)
- Blue Wire: X-axis potentiometer output (VRx)
- Green Wire: Y-axis potentiometer output (VRy)
- Orange Wire: Switch output (SW)

Step 9: Controlling the Aim Sprite

We will be writing code for the aim sprite. Please make sure that it is selected.
Select the board as evive from the Menubar if you haven’t selected it yet.

This will add the evive, evive Display, Actuators and Sensors, on the block palette.
Connect your evive and upload the firmware onto evive.
We will be storing the input obtained from the Joysticks in variables.
Write the following code:

Step 10: Script for Score
The logic is simple: As soon as the aim sprite touches the bat, the score will increase by one.
Write the following code:

Step 11: Script for Timer
We will give the player a limited amount of time to score as high as possible. The timer will count how many seconds are remaining on the game.
Write the following Script:

The complete code is given below.
Attachments

Step 12: Conclusion

With this, your game is now ready and so are you to play it. Aim at as many bats as you can and become the one with the highest score in the room!
PS. We have a piece of really exciting news for you: We are now LIVE on Indiegogo and have been more than 100% FUNDED within LESS than a week into our campaign! DIYers all over the world are LOVING us and we believe so will you. To know more about our campaign and back us, visit HERE.


