

Introduction: Simple RGB Ikea Lamp Hack


CAUTION: This Instructable deals with AC and DC electricity. I strongly recommend that anyone interested in following my instructions please complete the LAMPS CLASS by Paige Russell first. It is a great class and should help ensure everyone is working safely with electricity.
Hello All. This Instructable is about turning a stylish Ikea lamp into a Red, Green, and Blue (RGB) light source to create the perfect light ambiance. The method used is easy and will not require an Arduino, Raspberry Pi or programming (as is the current trend for a lot of hacks). Total cost to make one lamp was $42 (US) with enough LED strip to make a second lamp.
I will show two methods to make this lamp hack - the "easy method" and the "clean method." Enjoy.
Step 1: Parts and Tools


Materials:
1x Hemma floor lamp base - $16
1x 17" Krusning lamp shade - $9.99
1x RGB LED Strip Kit: 5050 SMD, 5 meters with 12 volt power supply and 44 button remote. Waterproof optional. $16 on Ebay.
Assorted shrink tubing - this is less bulky and more secure than electrical tape
4x black zip ties (if doing the easy method)
solder
Tools:
Soldering iron
Wire cutters
Wire strippers
Helping hand
Heat gun
box cutter or sharp razor
Voltage/Ohm meter (Optional but highly recommended)
Step 2: Wiring - the Easy Method


This method would be the fastest way to wire things up. It is not as clean but it requires the least amount of effort.
The first step is to screw the bulb socket and the middle tube together.
Next cut the cord between the middle tube and the bottom tube. Pull the electrical cord out the bottom of the base. Set the cord asside. We will use that later.
Finish assembling the lamp base by screwing the tubes into the base.
Zip tie the power brick to the base of the lamp. Zip tie the output male socket to the top of the lamp near the bulb socket. Connect the LED circuit board/remote sensor to the power supply male socket and zip tie the sensor to the lamp also. use the last zip tie somewhere in the middle of the lamps stem to clean up the wiring. That's it.
Plug in your LED strip to the LED controller sensor. Next plug in the power supply. Turn it on with the remote control. Test the three colors.
From this point the wiring can be left as is or you can make use of the foot switch that came with the Hemma lamp base. It's your choice. If you want to connect the foot switch the instructions for that will be part of the "Clean Method" of wiring.
Step 3: Wiring - the Clean Method, Part 1


This method creates a more finished looking lamp. However, there will be a lot more steps required and a lot more tools. It should also be noted that we will be working with AC current with this method and I highly recommend going through the Lamps Class by Paige Russell.
The Ikea Hemma floor lamp base comes with all the wiring to make it a functional lamp using a traditional light bulb. From the Lamps Class I learned that the bulb socket is an Edison E-26 socket and the electrical wire that makes up the cord is an SPT-2, 18/2. The socket is not important to us but the cord is. SPT-2, 18,2 means it is a gauge 18 wire and there are two wires - a Hot and a Neutral wire. the SPT-2 means a thick plastic insulator jacket coats each wire. Further, Paige Russell informs that the smooth jacketed wire (which happens to have writing on it on the Ikea cord) is the Hot wire and the ribbed jacketed wire is the Neutral. This will be important later.
Here are the steps.
First, peal off the silver warning sticker on the bulb socket. We don't really need the warning since we will not be using the socket or a bulb that uses AC electricity. Next, very carefully separate the upper half of the bulb socket from the lower half. There are two tabs on the lower half of the socket that holds the upper half in place. Gently pry them open and the upper half should come off. Don't break the tabs, we need to reassemble the socket later.
Once the socket is separated into two parts, take your wire cutter and cut the wires off the upper half of the socket as close to the plastic as possible. Then untie the underwriter's knot (strain relief knot). Peel the wires of the cord apart so that you have about 4-5 inches of wires to work with. Do not damage the wire insulation.
There should be two holes at the bottom of the socket. Slip a wire through each of the holes. Once the wires are pulled through, reassemble the bulb socket.
Strip the jacket off both wires so that about an 1/8" of bare wire is exposed.
Step 4: Wiring - Clean Method, Part 2


Next, we need to extend the output wire of the power supply. Take the output wire from your power supply and cut of the end with about 3 inches of wire for you to work with. If your power supply output wire has a choke on it cut off the end with the jack so that you have the power jack, choke and about 2-3 inches of wire to work with. Peel of the outer jacket off the end wire you just cut. Then strip the internal wires to expose about 1/8" of bare wire.
Take the proper size shrink tubing and cut two one inch lengths. Slip a shrink tubing on each of the lamp cord that is sticking out of the lamp socket.
Here is where careful attention is necessary and important. The polarity of the wires has to be maintained. How I did this was to attach the SMOOTH jacket of the lamp cord to the RED wire of the power jack. Remember that the smooth jacket on the ikea cord has writing on it.
Then I soldered the BLACK wire of the power jack to the RIBBED jacket of the lamp cord.
After the wires are soldered. Slip the shrink tubing over the bare wires and shrink with a heat gun.
Assemble the rest of the lamp base.
Step 5: Wiring - Clean Method, Part 3


The lamp electrical cord should be coming out the bottom of the base of the fully assembled lamp base.
Cut off the lamp cord at the base giving yourself 3 to 6 inches of cord to work with. Peel the cord to separate the two wires without damaging the insulator jacket. strip the cord to expose about 1/8" of bare copper for both wires.
Cut two 1" length shrink tubing and slip one on each wire. Cut a larger diameter shrink tubing 2" inches in lenght and slip that onto the lamp cord (to cover both wires).
On the power supply, strip the insulation on the end you cut from the previous step so that 1/8" of bare wire is exposed.
Remembering how we wired the other end of the lamp cord, solder the BLACK wire from the power supply to the RIBBED jacketed wire of the lamp cord. Solder the RED wire to the SMOOTH jacketed wire of the lamp cord.
Slide the smaller diameter shrink tubing over the soldered wires. Shrink with a heat gun. Slide the larger diameter shrink tubing over the whole thing and shrink with a heat gun.
Connect the LED Controller sensor to the power jack near the socket. Connect the LED strip to the sensor. Plug in the power supply and turn on the LED with the remote. Test all colors.
With the LED turned ON, unplug the power supply.
Step 6: Wiring the Foot Switch (Optional)


We still have the foot switch that came with the Ikea Hemma floor lamp base. It is optional to install this part since this lamp hack has a IR remote control that can turn off the lamp. However, even with the LEDs on the lamp turned off, the power supply is still drawing power if it is plugged in. Adding a foot switch will cut power to the power supply.
Here are the steps...
Take the plug side of the power supply. Most likely the plug is polarized, meaning one blade is wider than the other. The Wide blade is Neutral. Keep this in mind and make a note of it. From this information, make a note then of what part of the power supply's plug wire is Neutral. Write it down, mark the wire, or make a strong mental note. OK? Good. Now cut off the plug.
Split the wires on the power supply cord to give yourself 2-3 inches to work with. Strip the jacket off the cord so a1/4" of copper is exposed for both wires. Slip a 1" length of shrink tubing for each wire. Slip a 2"-3" long larger diameter shrink tubing over the whole cord.
On the lamp cord with the foot switch attached, split the wire and strip off 1/4" of the insulation.
Paying very close attention, solder the Neutral of the lamp cord to the Neutral of the power supply cord. Solder the Hot of the lamp cord to the Hot of the power supply cord. Shrink tubing, small shrink tubing first then the larger one over everything else.
Plug it in. Test the switch.
Step 7: Make the Lamp Shade


Fan out the Krusning lamp shade as pictured. Toss the plastic cone that came with it into the recycle bin.
Make a half inch mark about 1-2 inches from the edge of the plastic ring. Cut a slit where you marked through the top 6 layers. Try not to cut the last two layers. If you cut through all the layers, its ok.
You only need 2.5 meters of the LED strip (half of the role). Cut the LED strip at a cut point to give you 2.5 meters. This leaves you with enough LED strip to make a second lamp (but you will need to buy another power supply, remote control and control sensor).
You will be making 6"-8" diameter loops of the LED strip for each layer of the lamp shade. The idea is that you will be spiraling the LED strip up with the end that plugs into the Control Sensor being at the top of the spiral.
Starting from the second from the bottom layer, make one loop around the plastic center ring with the LED strip.
Slip the end that plugs into the control sensor through the slit on one layer of the paper and pull the excess led strip through. Make another 6" to 8" loop of LED around the center ring. Slip the end through the next layer of paper. Pull the excess strip through to the next layer.
Repeat the process until you have completed six loops through six layers of the lamp shade. The end of the LED strip with the pins that plug into the control sensor should be coming out the top layer with maybe 6-10 LEDs.
Step 8: Attach the Lamp Shade, Shape It, Light It Up


Put the lamp shade onto the lamp base like normal. Secure with the plastic nut that came with the lamp base.
If you wired up the lamp using the "easy" method, slip the control sensor through one of the holes in the plastic ring on the lamp shade. If your sensor is too thick to fit through the hole, slip the end of the LED with the prongs through the hole instead.
Plug the LED into the sensor.
Ball up the lamp shade. Crunch it up really well. Try to get a lot of folds and creases in there. When you feel you have sufficiently made the lamp shade crinkly start opening it up. Shape the shade in a manner that pleases you.
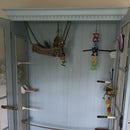
Make sure that somewhere in the lamp shade the black part of the control sensor is visible. That black part is actually the Infrared sensor that sees the signal coming from the remote. On the easy wiring that I did, the black sensor is underneath the lamp shade. On the clean wiring, the sensor sticks out of one of the folds in the paper on top.
All done. Plug it in. Turn it on. Enjoy the light show.
A note on the behavior of the electronics. The LED control sensor and remote control uses Infrared(IR) signals. It just so happens that TV, Blue Ray, Roku and many other entertainment devices us IR remotes too. So don't be surprised if your lamp is near your TV and the color changes each time you change the channel or adjust the volume.
Special thanks to Paige Russell for making the Lamps Class which inspired me to make this lamp.

Participated in the
Dorm Hacks Contest 2016

Participated in the
Epilog Contest 8


