

Introduction: Simple Arduino Robot for Less Than 10€
Hello, In this tutorial we will build a simple robot for less than 10 €. Do not expect any miracles from it. It can serve as a toy or as an aid to learning programming and robotics. Thanks to its 2 sensors it can operate in two modes. In the first mode it is able to avoid obstacles using ultrasonic sensor SR04. In the second mode it can follow the line marked on the floor using IR sensor. Enjoy!
Step 1: Components and Tools

To build the robot we need these parts and tools.
- Arduino nano with USB cable 1x
http://www.aliexpress.com/item/Nano-3-0-controller...
- Micro servo 2x
http://www.aliexpress.com/item/Hot-sale-TowerPro-...
- Ultrasonic sensor SR04 1x
http://www.aliexpress.com/item/HC-SR04-Ultrasonic...
- IR infrared obstacle avoidance sensor 1x
http://www.aliexpress.com/item/IR-Infrared-Obstac...
- Robot ball wheel 1x
http://www.aliexpress.com/item/Robot-Ball-Univers...
- 9V batery conector 2x
http://www.aliexpress.com/item/New-High-Quality-T...
- 220 ohm resistor 4x
- 9V batery 2x
- Cable female female 8 x
- Cable male female 6x
- Power switch 1X
- Heavy cardboard paper 1x
Tools
- scissors
- sharp blade
- ruler
- compasses
- silicon melting gun
- iron solder
- pen
The first thing to be done is to adjust servo motors to 360 degree rotation. This can be achieved by using this tutorial: https://www.instructables.com/id/How-to-Make-a-Towe...
Step 2: Robot Schematic Diagram
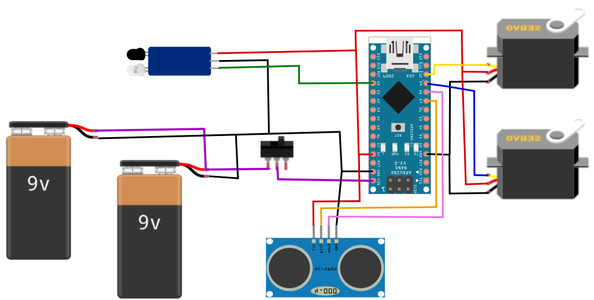
This schematic diagram shows how to connect parts.
Step 3: Cardboard Parts


As a building material, I used hard cardboard, because it was the only material I had at the moment. If you have a more rigid material, you can use it as well.
Step 4: Build Wheels

Since the robot does not have the wheels yet, we should build them. I used four pieces of cardboard in the shape of a circle, that I glued together by using silicone. I put silicone also around the perimeter, so the wheels can have a greater resistance. Finally, I stuck to the wheels terminations servomotor. And the wheels are finished.
Step 5: Build Chassis
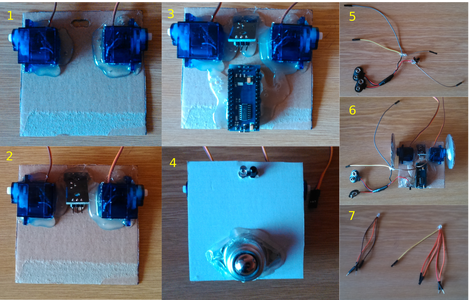
1. In the first step in making of the chassis take cardboard in the shape of a square and stick two servo motors on the sides.
2. Then glue the IR sensor to the prepared hole.
3. Glue Arduino Nano into the middle.
4. On the bottom stick robot wheel ball.
5. Two 9V cable connector solder parallel to each other. Switch solder to the voltage. From grounding we bring out two connectors for ultrasonic and IR sensor
6. Glue the switch on the chassis
7.Since we do not use a breadboard, we bring out four voltage connectors(2 x Male pin servo , 2 x Female pin sensor) from VCC. From GND bring out 2 GND male connectors for servo.
Now we can test chassis.
Test code:
Attachments

Step 6: Robot Case
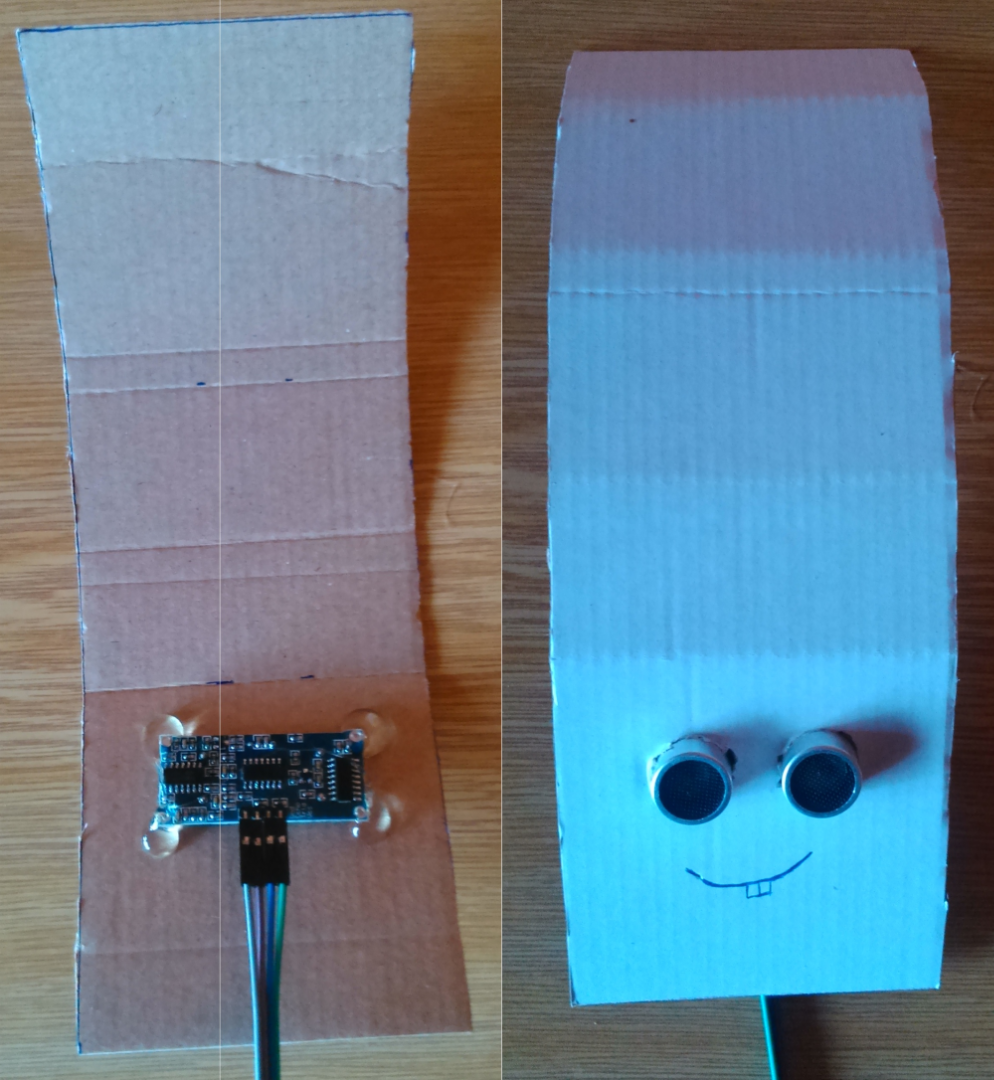

In this step, we put the ultrasonic sensor into the holes. Then stick over robot´s case into the cube. We connect the ultrasonic sensor according to the schematic diagram.
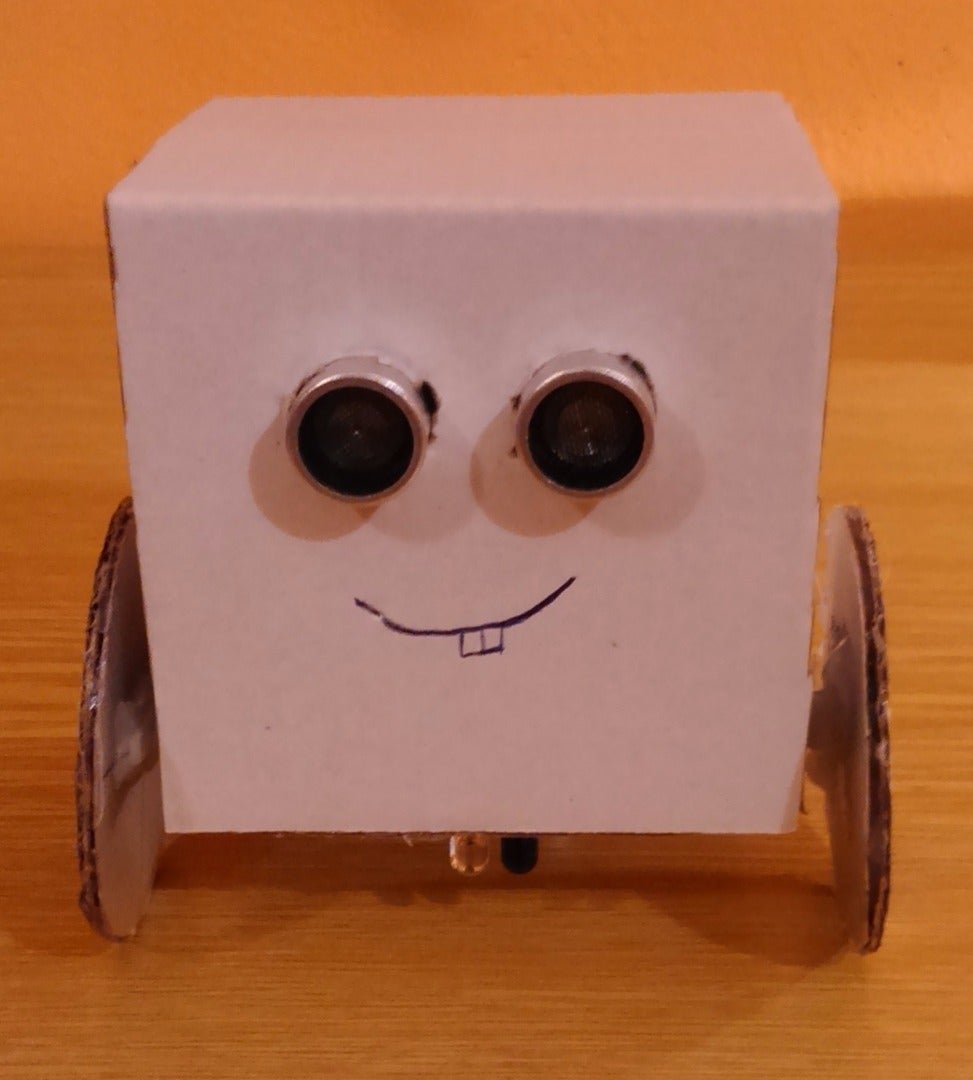
Step 7: Final Robot
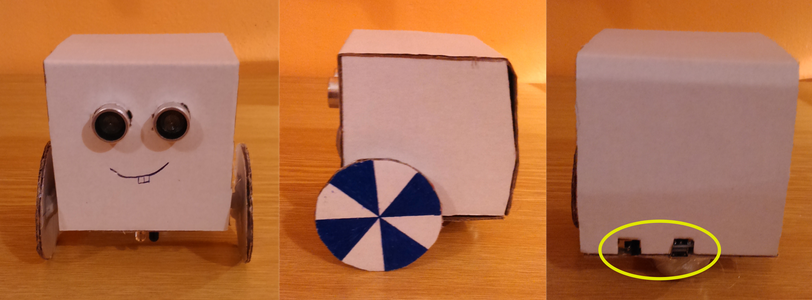
This is how the final robot looks like. Let's test it.
Step 8: Robot Avoiding Obstacles
We load a program for obstacle avoidance into the robot.
Attachments
Step 9: Robot Follow Line
We load a program into the robot to track a line
Attachments

Participated in the
Tech Contest

Participated in the
Robotics Contest


