

Introduction: Six Legged Walker With Strong Joints!


https://www.instructables.com/id/Hexabot_Build_a_heavy_duty_six_legged_robot/
The above linked instructable is awesome. It's cool, and the joints it uses (holes drilled in box tube) will egg out very quickly and degrade with time.
So, I decided to beef it up, so mine wouldn't end up crippled. I followed the instructable pretty well, but used different motor mount configuration, used the wheelchair's motor controller, and made my eccentric drive plate out of steel (free) instead of aluminum.
The theory in my telescoping sleeve bearings is that there is strong steel in the middle (bolt), and less strong steel on the outside (pipe/box tube), with brass and grease inbetween. This brass/grease will decrease wear on the steel components, and take up the slop.
This is a work in progress, to be updated as progress comes along.
Step 1: Measure Your Bolts.
Get a micrometer and measure your bolts. The issue here involving the micrometer is that often the threads are slightly wider than your bolt size, or slightly smaller. For instance, my 1/2 inch bolts have .495 or so diameter on the bolt, and .485 on the threads. this is all basically meaning "use 1/2 and pack with grease". The measureing of everything comes more important later.
Your top end bolts will probably be smaller, I used 3/8th up top, and 1/2 for main drive.
Step 2: Get Some Pipes!
Now get some weldable steel pipe that has a slightly larger ID than your bolt's OD. Then get some brass tubing or pipe that will make up the difference. Make sure (DAMN SURE) that your pipe doesn't have welds internally, or else you are going to have to get more pipe.
i got lucky with my top end, and have 3/8th bolts, with 13/32nd or 27/64th inch brass tube, and a 1/2 inch OD steel tube that fit really well. At this point of buying things, go around with your bolts, and just try different combinations to see if you can get lucky. If you don't get lucky... Well then.
I didn't get lucky with the main drive. I got the 1/2 inch bolts, I found some weldable steel pipe with supposedly 1/2 inch ID, (which was a good bit larger, around 1/8th or 3/16th larger), and then got some brass pipe with a 31/64 ID, and a large OD. Measure accurately with some calipers, chuck that brass on the lathe, and go to town.
Step 3: Drill/overbore the Holes, Insert Pipe, Weld.
So if you've made the walker already (like I did), then you overbore, if not, then drill out to slightly larger than the OD of your pipe. If you drill to the size of the pipe, you'll need to hammer in the inserts (as I did on the smaller/top end ones).
Wash everything, then weld away. I TIG'ed everything, because the tolerances were tight, and I wanted it to be strong. A very good welder could use MIG... I don't think I could. If you don't have tig, perhaps gas welding or stick would be the next best? It comes down to you wanting a good weld with minimal excess fill sticking up top to grind off, then sand it smooth so it doesn't interfere with the washers.
If you get much metal slumping inside the pipes, you may need to bore out the holes. If so, i'm sorry, because that will suck. Just use a lot of cutting fluid.
Step 4: Add Offset
The front didn't line up, so I needed to make an offset, to avoid having a 4 inch stack of washers.
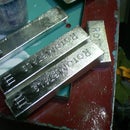
Step 5: Make the Brass Inserts.
I had to lathe down some brass for the larger bolts. After that, sand them very smooth, then assemble everything, and cut them to fit. At this point, don some latex gloves, and grease everything.
This is somewhat of the moment of truth. As it turns out, truth wasn't good for me. My 31/64th id (.485ish) didn't jive well with the .480 bolts, so I lubed them up, and pressed them together with a vice. All the wear is going to be on the outside, apparently.
Step 6: Get a Lift.
Find something to raise your little dude off the table. With the motors, this thing is heavy. Save your back. Make sure to have some diagonal connection as well, so it doesn't tilt when you put on things.
Step 7: Nylock Is for Suckers.
Man up and use a lock nut. What's a lock nut? When you put another nut after your load-bearing nut, and counter-tighten them. You only need 3 threads of engagement to get a good bite, so you don't really have to have excessively long bolts.
Also, don't be like the original hexabot dude. Put your bolts from the outside in, so that you have minimal clearance past the legs themselves. The caveat is the center bolt, which must be facing out. I'm thinking about chopping, drilling, and safety wiring that one.
Step 8: Assemble, Refactor, Rework.
All the legs are done! I jumpered the motors to a battery and made it scramble in a circle! I just need to figure out how I'm going to put together my control circuit.
Current theory is to re-use the banks (8 per motor) of IRF3205 MOSFET's to change a


