

Introduction: Skateboard to Work Skirt Made in SketchBook Pro


I work between two worlds:
One is the awesome crazy fun place known as Instructables.
The other is the super fancy officey Autodesk.
They are both super cool, but definitely different climates. Managing a wardrobe between the two worlds is tricky.
I'm wanting to skateboard to work and still look fly at both places. So here's my idea of a convertible skirt to bridge the divide!
Step 1: Edit Them Contest Flats


I'm lazy! I want instant gratification! I'm going to take the provided contest flats and edit them. You can download them here!
I'm going to use the symmetry tool to make this fast. I only have to draw one side when I use symmetry!
Click on the Y button, or, press this button on the toolbar:
First, I'll make a new layer on top of the contest flats. Click the + button on the layer editor.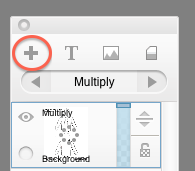
On this new layer I'll put down a bunch of white using the paintbrush tool at full opacity. I'm gonna cover up the pants part of the pants, but keep the top!
Then I'll make a second layer, and sketch out my skirt idea. I'll connect my sketch with the lineart on top, using a pencil brush in black. I'm not too worried about making it look nice. I'm just trying to figure out my idea first!
Step 2: Refine the Lineart & Make a Simple Back View


I used the pencil brush in black and very carefully traced my lineart. I usually go back and forth and draw and erase a bunch to try and make smooth lines. There's no secret to this part, really! It's all about a steady hand and patience.
Hm. But now I need the back view.
I really don't want to draw them again, so I'm going to copy the work I just did, and edit it! I use the lasso tool to draw around my artwork. Then I go to Edit -> Copy Merged. This option copies everything, as you see it, onto one layer!
I'll make a new layer, and hit paste. Set the new layer to 'multipy mode' so you can see through the white parts.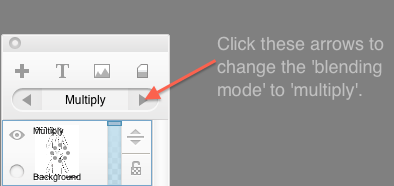
Hold down the 'V' to use the move tool & place my lineart in the right spot.
Step 3: Turn the Front View Into the Back


First off, set the layer back to normal mode.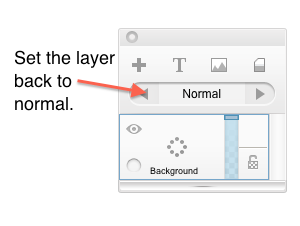
It's going to look like you have two copies of the same skirt.
Since I lined this up perfectly over the back view, I can erase the top part away to turn the front into the back. The 'Copy Merged' also copies the white of the background, so I'll erase those bits so my final product still looks nice.
Now it's time for color!
Step 4: Combine the Lineart Into One Layer


So the trick I like to use for coloring is turning the layer to the multiply mode.
But what happens when I do that? Augh! I forgot, the pants are behind my other art still.
So instead, I'll use the copy merged trick again! I'm going to put my layer back to normal to that everything looks good. The I'll select all by hitting CTRL+A, and selecting the menu option Edit-> Copy Merged. Then I'll make a new layer for my merged lineart, and hit paste on the new layer. I'll hide all the other layers and start to color!
Step 5: Color!


I'll make a new layer for my color.
Make sure your merged artwork layer is set to multiply, and that your color layer is underneath the lineart.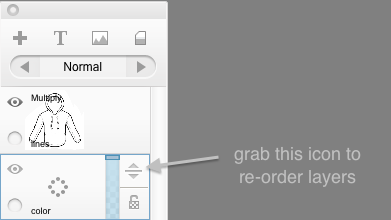
Select the lineart layer, and set it to multiply.
Then select the color layer again to start adding some zest!
I'm using a paintbrush at size 20 with opacity of .5. I like to lay down a bunch of colors at once and play around with it. Once I have a base color started, I then take a darker color to shade. I like to put the opacity of my paintbrush down to .1 or .2 - this makes shading easier.
Step 6: Pinstripes!


I want it to be kinda classy, for my time at fancy Autodesk. I'm going to add pinstripes!
I'll make a new layer for the pinstripes.
Using a pencil tool, I'm going to hold shift to create a perfectly straight line. I'll then select that line with the selection tool, and copy it over and over again! Then I erase the edges to make it look all nice and clean.
For the back side of the pants, I'll copy the color I already worked on and paste it. I'm going to copy the color and the stripes separately because the shading needs to be fixed for the back pockets.
Step 7: Final Details!

Now it's time to clean up the art and describe all the cool details.
I have to make sure Betabrand totally understands my vision.
I'm going to copy the merged artwork on to a new layer, and erase the bottom half. This will give them and idea about how the skirt will look when the bottom is zipped off. And I'm ready to submit my idea!

Participated in the
Dream It, Draw It, Wear It Contest


