

Introduction: Slide Top Box With Copper Etched Plaque


My wife and I play a card game called Hand and Foot that uses multiple decks of cards. We use 12 decks because then we don't have to shuffle as often. And we have some friends that we recently got into it so I decided to make them a personalized box to hold the 12 decks of cards for the game.
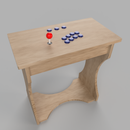
Step 1: Determining the Size


Because I wanted this to hold 12 decks of cards I needed to make sure the interior dimensions would be the correct size. I kept the cards in their packages because I felt that the extra material would ensure that there would be enough room as the cards grew over time. I decided to make the inside dimensions as 4 x 8 3/4 inches.
Step 2: Making the Edges of the Box


To make the edges of of the box I used some 1 x 4 pine board that I had from another project.
I used a miter saw set at 45 degrees to cut all four edges of the box. Every time I cut one of the edge lengths I would use that piece to mark the other piece so that they would be the same length. I then put them together to double check that the dimensions and cuts were good.
NOTE: Make sure to measure the cuts from the inside of the cut so that the inside of the box dimensions are correct.
Once you have the edges cut to length you will need to put in the slots for the top and bottom panels. I used a router to do this but a table saw would work as well. I cut the slot about 1/3 of the thickness of the edge pieces. I also cut one of the shorter length sides so that the lid could slide in and out. All sides should have the slot in the bottom for the bottom of the the box.
Step 3: Making the Top and Bottom Panels


For the top and bottom panels I decided to use some walnut I had. I had to cut it in half to make it the thickness that I wanted. Whatever you use you will need to make sure that it is large enough to be the top and bottom. This includes the inside dimensions along with the depth of the slots cut into the edge pieces. Once I cut the pieces I had to sand them to clean them up and then trim them to the final dimensions. I wanted this to be a snug as possible so I cut them a little large and then slowly sanded them until the box could just be assembled without any gaps.
NOTE: I did not trim the top panel to length until the next step.
Step 4: Making the Slide Top Handle


At this point in the process I decided that I needed to make a handle to assist in opening the box. The design I settled on was to cut another of the shorter edge pieces, router in a slot, and then cut it so that it had the same wall thickness on either side of the slot. I decided on this because when it would be closed the handle would blend in. This also required me to trim one of the short ends to make additional room for the handle. I then trimmed the top panel to the correct width and then used the handle as a guide to determine how long the top panel had to be.
Step 5: Glue It Together

Now that I was happy with the fit of everything it was now time to glue it all together. I glued the edges of the box together along with gluing the bottom panel into the bottom slot. I also glued the top panel into the handle. I forgot to take pictures of that.
NOTE: Make sure the lid slides in and out well before gluing. you will not be able to sand or modify the slot after you glue it together. Although you can thin out the lid to make it slide better if you absolutely have to.
Step 6: Making the Legs


Due to the precision of my miter saw the bottom of the box wasn't completely flat. I didn't want to sand the whole bottom to make it level so I decided making legs for it would be the simpler solution. And it ended up looking great too.
For the legs I just cut some feet out of another piece of walnut and sanded them so they sat flush on the bottom and sanded the surfaces that would be difficult to sand once they were glued on. I then glued them on the bottom and when the glue dried I sanded each foot individually until it sat flush on the table.
Step 7: Copper Inlay in the Handle


Since i designed the handle to blend in so well I decided to insert a piece of copper rod into the handle to make it easier to know which end to pull on to open. I had some copper rod so I just cut it to be just slightly longer than the width of the handle and then drilled a hole in the handle for it to fit into. I then used some 2 part epoxy to glue the copper rod into the hole. All that was left was just sanding it down smooth after the epoxy was dry.
Step 8: Finishing the Box


Now that everything was complete on the box part I sanded down the box until it was smooth and then applied whatever finish you want. I used some danish oil because that is what I had around.
Step 9: Making the Plaque


I wanted to personalize this gift and after jumping around with different ideas I settled on doing an acid etch on a copper plate. There are lots of Instructables about doing this so I wont go into all the details but I'll do a brief summary. If you really want a more in depth explanation let me know and maybe I'll make a separate Instructable covering this.
- First you make a pattern on the computer. Make sure the design has the areas you want etched in white and everything else in black and any test is mirrored. You then need to print it out using a laser printer (this is important) on some sort of transfer paper. I used label paper after you remove the labels. It worked OK.
- You then need to prep your copper or whatever material you are using. This involves sanding with a fine grit sandpaper and then cleaning off all dust with acetone. Don't touch the copper surface you are etching until you are completely done etching it. The oils from your skin can mess it up.
- You then need to transfer the printed image onto the copper. This is usually done with an iron. You place the printed image on the copper and then iron it on. Use high heat and a good amount of pressure.
- Clean up the transfer (optional). The transfer was just OK so I decided to go over all the area that is supposed to be black with a sharpie to provide extra protection against etching. If you get a wonderful transfer then you wont need to do this.
- Cover all other exposed copper. If you don't want the edges or back to be etched then you will need to cover it up. I used electrical tape. This worked well for me.
- Etch. I used Ferric Chloride. I already had this but there are other options that will work as well. Timing may vary depending on how deep of an etch you want. I left mine for about three hours.
- When you are done with the etch you will need to remove it from the etch and then neutralize the etchant to prevent further etching. I used baking soda and then window cleaner. I've heard either can work but I wanted to be double sure as I hadn't done this before.
- then you remove all the tape and use acetone to remove the transfer. Your etch is complete.
I wanted the text to stand out so I covered it in black nail polish and carefully used acetone to remove the access and then sanded it to remove the rest. If you remove too much then just add more nail polish to those areas and try again. Now I just needed to drill the holes for the screws and trim it to shape. I used snips to trim it to shape and then sanded down the edges good to smooth it out.
Step 10: Mounting the Plaque


Now that I had the plaque I needed to mount it to the box. To do that I positioned the plaque where I wanted it to go and marked the hole locations. I then used tape on the drill bit I was going to use so that I did not drill all the way through the box. After you drill the holes in the marked location you just need to screw it on to attach it.
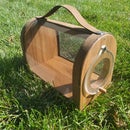
Step 11: Complete


The box in now complete. All that was left was to do was fill it with the 12 decks of cards, wrap it up, and give it to our friends.
I don't know if you have the need for a box that holds 12 decks of cards but you could definitely use this same design or a modified version of it for whatever you want. It could work well as a nice gift box for a bottle of wine or liquor.

Participated in the
Homemade Gifts Contest 2017

Participated in the
Metal Contest 2017


