

Introduction: Small Grow & Germination Box in Cardbord Box


Hello everybody,
First of all, I want to say i'm not english, so if I make some grammar or orthographic errors(or any else) please excuse me and let me know I will try to fix it.
I hope at least it will be understandable.
I would like to thank the managers of the website and all the contributors for their work and their sharing.
It's my first instructable, so be clement.
I am aware that the pictures are of a poor quality, I have to loan a real camera to take better, pictures should come this weekend.
Disclaimer : May contains affiliate links
Step 1: Grab Materials and Tools


Materials :
Cardbox, here I used 47x40x18cm the only one I have, you can use any cardboard box, i will upload some prototypes.
Duct tape
Wire with plug
Pieces of electrical wire
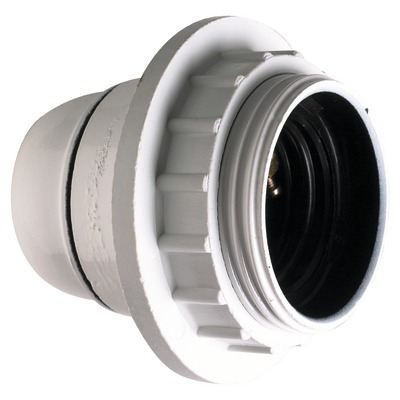
2-4 bulb holders, more if your box is bigger, here I used E27 according my led&CFL bulbs.
Grow lights, here LED (bad ones), you can use CFL, DON'T USE HPS HERE, you will burn da house.
Screws :
-Fan screws : 4 for each fan (here 8)
-Wood screws : depends your bulb holder you may no need them, here I used 6, 4 for bulbs holders and 2 for making closing system
Optional :
Timer electronical or mechanic, used for light cycle
Tools :
Brain
Hands
Screwdriver for your screws
Cutting tools any should work, I did my frist prototype with kitchen knife
Marker/pencil
Expected time for assembly : 20min, if your 12v psu is ready if not 20min more, as I don't like to hurry I will say 1hour to be safe.
Step 2: Planning Before Cutting & Cut


Think about opening, holes for fan, place fans and bulb holders to make you an idea.
Here I decided to :
Put the largest surface on floor, so I have an effective area of 47x18.
Place fan on top of each side
Place hygrometer/thermometer nearest possible to plants, I have two of them, one with movable probe
Use Enermax fan instead of Coolermaster, Enermax have a switch to change fan speed, so it's perfect, but you can use any
Now you are ready to cut your holes, do a mark with marker and cut.
/!\As always be careful when using a sharp object /!\
I have marked the outline of fan on outside, after this I used the dust filters to mark the 4 holes for fan, I left 1cm or margin and I cutted a hole in middle (hole might looks perfect on picture but isn't, just looks at margins)
Step 3: Wiring, Testing, Mounting, Testing


After you get all you holes done, place dust filters and fans, for doing this step easy way I screwed the dust filter frist in cardboard, after just hold the fan inside and screw filter to fan.
I plugged the passive(without probe) hygro/thermometer, I passed the plug wire and the 12v wire through an hole and I put the hygro/thermometer after. (Last time I let the cables go out through the opening, but my cats managed to open box every night, with this solution no more problems).
/!\Always be careful with electricity, if you don't feel it ask for help/!\
Wiring bulb holders :
I have 2 cables, one with plug(will call it A) and a small piece (will call it B), take cables link together A+ with B+ and A- with B-, connect them on frist bulb holder and connect the other cable part to second bulb holder (simple branch circuit).
Test with any bulbs, if not work, unplug and check connections
For this project I used and old psu 12v 1A, I just cutted the plug, I soldered to a prototype pcb with some pins, with this pcb I can run 4fan (model I use) psu can handle 5.
PSU: 12V/1A
FAN:12V/0,2A
Just for information my coolermaster fan actulay use more power (12V 0,3A) and run a lot slower.
If you need more detailed steps for making this small psu mod, please ask I will make my best.
Step 4: Anchor Bulbs Holders


Anchor buls holders using screws and your pieces of wood, put wood on the exterior side and screw holders on it, as this the weight on bulb will be spread on wood surface, without this cardbord don't offer sufficient strength to hold blub weight.
If you use bulb holder like these, is easier.
Put some duct tape on wire to hold them on walls.
If you are not confident with the solidity of the structure, put a pillow or some shirts on box, and wait 24-48h running only fan, only thing can fall are bulb holders, in this way if bulbs fall they won't broke.
Step 5: Lunch Grow


Prepare your seedlings and lunch grow.
As you can see my box is perfect to fit 12 buckets or 2 seedling 12holes like this, I actually own only one but I put 6 buckets with it, I will upload a picture to show.
Here you can see plants after ~1week, got more germination than expected...
Step 6: Improvements

Add some reflective material on walls (mylar, aluminium foil, even white paper will reflect a lot of light)
Add a junction box for making electrical wiring looks better and safer
Find a new cardboard box, mine have 4years, and I used it for growing purpose for 7month right now
Here you can see why I used dust filters, they may be optional according your environment.
Step 7: Grow/Germination Tips
Lights :
As you can see I use some "grow" led, it's perfect for germination and small plants, but if you want to make this and buy some grow lights, considers buying CFL's will be best ratio price/quality, when using led light you need to consider a lot of factors, a lot of led chips are not designed to growing purpose, specially designed growing led are very expensive, so a lot of manufactures use random leds, but using blue and red leds don't turn them in growing led, it's just usual red and blue led, they not have any impact on your plants compared CFL at same power, in most cases CFL will do better at same power use.
The bulb you can see here is this, 50w model, but please don't buy this, if you really want them, ask a discount from seller you will have it.
If you want to use CFL, you just need to know two things :
-5500/6500k(day light) is more appropriate to germination/growing stages, 2500/2700k(soft light) is more appropriate to flowering/fructification stages, but all will work. Bold values are better, if you have choice between these two, choose bold one.
-When you switch to flowering/fructification stage, DON'T remove grow bulbs (6500k), plants keeps growing even when flowering/fructifying.
I recommend using 2bulbs 6500k, once plant go bigger/don't get enough light/switch to flowering stage add 3bulbs 2700k, with these 5bulbs(45$ for 10,000h) you can easy manage to grow anything on a 40cm²(~6"*6") surface, if your space is bigger buy better bulbs or add some, 40watts per square inch is good start value, more you have more you will produce.
I produced radish in this box only with this led light, it took me 75days and this summer I tried make same plants outside, they took 60days, but when I tried make 4 tomatoes plants with 8 of these bulbs(400w) I got only 6 tomatoes on 4 plants with almost 3month of grow...really disappointed.
Germination:
When you put your buckets for germination you can run lights 24/24, even for first growing stages, slowly reduce time every day, don't go under 12h of light., most growers use 18/24 growing and 12/24 flowering.
Keep in mind bulbs consume a lot of power, if the current costs less expensive parts of the day think about adjusting the timer accordingly.
Most plants need a "DIF" to grow healthy way, "DIF" is the difference of temperature between day and night (light-on and light-off), for example this summer I grown some cherry tomatoes, light optimum temperature was 26 and night 18, "DIF"=8°C (26-18=8, difference of temperatures) easy isn't it, this value is very hard to find, if you don't find try to reproduce temperature of climate of origin. (this may have a real scientific name but I don't know it)
Obviously follow the usual culture tips that are not mentioned here, you can find a lot of guides for each specific species you want to grow, use them.
Here just for you I lunched some radish, I make this picture 4days ago, now almost all seeds are germinated lights runs 18hours per day, I will post some news pictures so you can see the advanced.
Step 8: Thanks
Thanks for reading.
Feel free to use,modify & share this.
Do not hesitate to make your constructive remarks.
Don't forget to Like & Vote !

Runner Up in the
Indoor Gardening Contest 2016

Participated in the
Green Electronics Contest 2016

Participated in the
Trash to Treasure Contest 2017

Participated in the
First Time Authors Contest 2016


