

Introduction: Smart Attendance System (Intel Edison Inside)


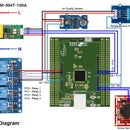

Smart Attendance System has developed based on RFID & Intel Edison Board for Attendance management application for schools, offices & institutes. This system is very easy to use, student or employee will carry a RFID card tags, we will install an attendance system based on RFID reader and Intel Edison in Schools or institutes, The student have to show his RFID card to device, device will scan unique Code RFID Tag, After scanning card id no, the system will search the student on the previously created database. If it found the student on the database it instantly stores date and time of the entry of student. The system can sent email to parents email address after the entry of the student. The system can be accessed from the browser.
This system can be used in many application such as library management, automatic stock entry and so on. .
Now-a-days different types of attendance system are available. The system like Barcode system, Smart - card and Bio - metric technology are present. As compare to them RFID is faster than barcode and smart card system and cheaper than bio - metric system, Hence I used RFID for my Project.
Apologized for the poor video and image quality. Video is recorded by mobile phone as I have no camera.
Step 1: Components & Tools Required


Hardware
- Intel Edison with Arduino Breakout (sparkfun)
- 12V-2A DC Power Adapter (ebay)
- Grove - 125KHz RFID Reader (seeed studio)
- 125KHz RFID tag (seeed studio)
- Some jumper wires
Software Tools
- Yocto complete image (Intel)
- SSH client (PuTTY)
- FTP client (WinSCP)
Intel® XDK IoT Edition (Intel)
Are you ready with your tools? Lets, start working...
Step 2: Basic Setup

- Assemble the Edison with Arduino expansion board (Intel guide).
- Install The Required Drivers(details here)
Set up your serial connection (details here)
- Flash Your Edison with latest Yocto image (details here)
- Connect your Edison with WiFi (details here)
Upgrade The Edison Image
- Setup your local time to Edison (details forum-post)
Set your device name using this command (in serial terminal): configure_edison --name
- Set your device password using this command (in serial terminal): configure_edison --password
Device name will enable you to access you device from browser(on a computer connected to your local network) without IP by typing in "http://device_name.local/" (eg. "http://edison.local/"). Device password will enable you to connect your device with STP client (such as WinSCP).
For the above steps you can also follow
Sparkfun video guide:
Step 3: Package Update
The default filesystem contains various packages that should be updated by using the following commands (more details here). From the serial terminal execute the following commands:
echo "src/gz all http://repo.opkg.net/edison/repo/all" >> /etc/opkg/base-feeds.conf
echo "src/gz edison http://repo.opkg.net/edison/repo/edison" >> /etc/opkg/base-feeds.conf
echo "src/gz core2-32 http://repo.opkg.net/edison/repo/core2-32" >> /etc/opkg/base-feeds.conf
opkg update
Do not run "opkg upgrade"
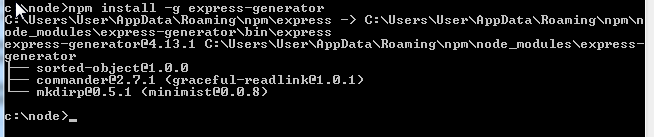
Step 4: Install Express Generator

We are going to develop a database application with Edison. Several tools are required for the purpose. Node.js, is one of the key tool among them and pre-installed with Edison but Node.js alone is not enough to build a handsome web application. We need to install express generator and mongoDB manually.
Express JS is a Light-weight Web Framework to develop Web Applications very easily and quickly in Node JS Platform. Latest Express JS Framework version is : 4.x.
MongoDB is a popular open-source document NoSQL database best fit with Node.js.
Node.js, Express and MongoDB are good friends.
For installing express and emailjs node package in your Edison type the following in serial terminal:
npm install -g express@4.12.4 express-generator mongoskin emailjs mraa
opkg install git
Next step...
Step 5: Install MongoDB
opkg can’t install the MongoDB package. So you need to do the following on your Edison board for manual installation:
First, download the mongo linux package in the working directory of your Edison by the following command from the terminal:
wget http://fastdl.mongodb.org/linux/mongodb-linux-i686-2.6.8.tgz
Then, untar the tgz file in a directory name database like this:
mkdir database
cd database
tar -xvzf ../mongodb-linux-i686-2.6.8.tgz
Finally, Check the installation by the following command
ls ~/database/mongodb-linux-i686-2.6.8/
You should see the following output:
GNU-AGPL-3.0 README THIRD-PARTY-NOTICES
Step 6: Develop the App in Your PC


First we will develop the app in our PC and then we will transfer it to the Edison. I will use my Windows PC but you can use Mac or Linux as you like. So, lets start working.
- Install Node.js in your PC from here.
- Fire up a console window and navigate to wherever you're storing these web projects. I am using C:\node If you're placing your work elsewhere (for example /home or /Users), adjust accordingly.
3. Make a directory in your C drive and rename it as node.
4. Open the command prompt and browse the node directory.
5. Install Express generator, like this:
COMMAND C:\NODE\
npm install -g express-generator
6. Create an express project named as attendance by following command
COMMAND C:\NODE\
express attendance
If success you will see something like this:

By this command express only auto-generate a website skeleton in a new directory called attendance. So we have to do some more work on it. You'll note that the express-generator routine created a file called package.json in your attendance directory. Open this up in a text editor and it'll look like this:

This is a basic JSON file describing our app and its dependencies. We need to add a few things to it. Specifically, calls for MongoDB and Monk for our database application. Let's make our dependencies object look like this:

Note that a comma is added at the end of the serv-favicon line and last line monk has no comma.
7. Switch back to your command prompt, browse your attendance directory, and type:
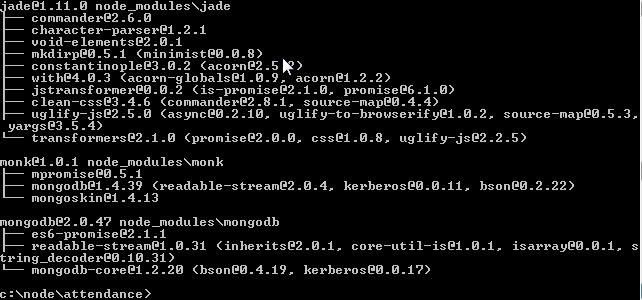
npm install<br>

Wait for a while, if you see the final output as like as follows then congratulation! You now have a fully-functioning app ready and waiting to run.
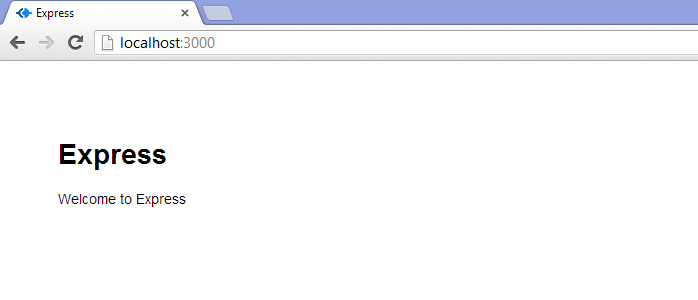
Let's test out our web server! Type the following:
npm start<br>
If everything is OK you will see following result:

Everything working? Awesome! Open a browser and head for http://localhost:3000 where you will see a welcome to Express page like following.
next
Step 7: Project Modification

Our project folder contains only basic skeleton. We have to modify some files and also have to create some more.
We need to change:
- style.css for visual interface in /public/stylesheets/style.css folder
- index.jade in views folder for creating table.
- app.js the heart of the project
- users.js in routes folder for database connection
We should create:
- global.js in public\javascripts folder for reading data from database and showing in html table
- main.js for reading RFID card and inserting data to database
Step 8: Working With Intel XDK IoT Edition

We will now write some code for RFID reader to read RFID Tag and insert data to database. I am using Grove serial RFID reader and for that I will use node serialport module. Let's start...
- Install Intel XDK IoT Edition in your PC and create a new project using UART read/write template. For details of Getting started with the Intel® XDK IoT Edition follow the Intel guide.
- Modify the main.js file accordingly or replace it by the file main.js attached below.
- Open package.json file and copy the text from dependencies and add it to our previous package.json file in C:\node\attendance folder.
Your package.json file look like this:
{
  "name": "nodetest",
  "version": "0.0.0",
  "private": true,
  "scripts": {
    "start": "node ./bin/www"
  },
  "dependencies": {
    "body-parser": "~1.13.2",
    "cookie-parser": "~1.3.5",
    "debug": "~2.2.0",
    "express": "~4.13.1",
    "jade": "~1.11.0",
    "morgan": "~1.6.1",
    "serve-favicon": "~2.3.0",
    "mongodb" : "~2.0.33",
    "monk" : "~1.0.1",
    "serialport":"latest"
  }
}
main.js file should look like this:
var mraa = require('mraa'); //require mraa
console.log('MRAA Version: ' + mraa.getVersion()); //print out the mraa version in IoT XDK console


u = new mraa.Uart(0); //Default

var MongoClient = require('mongodb').MongoClient
    , format = require('util').format;

var serialPath = u.getDevicePath(); //Default general purpose port "/dev/ttyMFD1" - Intel(R) Edison; "/dev/ttyS0" - Intel(R) Galileo
var document;

//Serialport NodeJS module declared in package.json
var SerialPort = require("serialport").SerialPort;
var serialPort = new SerialPort(serialPath, {
    baudrate: 9600
});

serialPort.on("open",function() {
    console.log("open");
    console.log("Connected to "+serialPath);
    serialPort.on("data", function(data) { //Read available data from serial port
        console.log("data received: " + data);

        switch(data){
            case "123456ABCD" :  // your RFID Tag number
                document = {"username" : "test",
                               "regno" : "12345678",
                               "email" : "test@test.com",
	                        "datetime" : new Date().toUTCString()};
                break;

            case "325456ABCD":
                document = {"username" : "test1",
                               "regno" : "12345678",
                               "email" : "test1@test.com",
	                        "datetime" : new Date().toUTCString()};
                break;

            case "223456A23D":
                document = {"username" : "test2",
                               "regno" : "12345687",
                               "email" : "test2@test.com",
	                        "datetime" : new Date().toUTCString()};
                break;

        }

MongoClient.connect('mongodb://localhost:27017/nodetest', function(err, db) {
   if (err) throw err;
    console.log("Connected to Database");
	//insert record
	db.collection('userlist').insert(document, function(err, records) {
		if (err) throw err;
		console.log("Record added as ");
	           });
          });

     });
    serialPort.write("This is a test.\n", function(err, results) { //Write data
        console.log("err " + err);
        console.log("results " + results);
    });
});
The code attached here is only basic and not so elegant. You may write the thing in more elegant way. I tried to show how the think work.
Step 9: Uploading the Developed App to Your Device

We already completed most of the work. Now you should upload the developed app into your device from the PC. For uploading I used WinSCP one of the most popular FTP client. Working with WinSCP is very easy:
Run the program and set File protocol to SCP
Host name is the Edison's IP adress. Leave port number to 22.
User name is root and password is the password that you chose before.
Then click Login.
It will ask your password again, enter it and click OK.
Done. Now you are inside of the Edison.
You can follow the video attached here for details. Complete program is attached below.
Attachments

Step 10: Run the Application From Edison


Our application is in the Edison. Now we should run it.For that connect your Edison to PuTTY and follow the steps bellow:
1. Go to the project directory by typing.
cd node
cd attedance
2. Install the dependencies by typing
npm install
3. Run the app by typing
npm start
If everything is OK, you should see like following

OK? Then type http://edison-ip:3000 to your browser address bar and you should see figure 2 like page.
4. Connect the database to your application by typing in another terminal window(note: directory named data was created previously)
rm -rf /home/root/node/attendance/data/*<br>
mongod --dbpath /home/root/node/attendance/data &
If works you should find the result as Figure 3.
5. Open one more terminal window and go to project directory and type following to run main.js file
node main.js
If everything is correct you should see following message.

Congratulation!!! Our application is ready. Now we should connect RFID reader and Buzzer with the Edison. Lat's do it and test the thing physically.
Step 11: The Final Thing


Connect Grove RFID reader to Edison. RX pin of RFID reader must be connected to TX pin of Edison and TX pin of RFID reader must be connected to RX pin of Edison. Connect a buzzer to the Edison which will beep when RFID reader successfully read the tag.
Now, run the program and sweep your RFID card to reader and enjoy the power of your Smart Attendance System.

Participated in the
Intel® IoT Invitational


