

Introduction: Smart Garbage Monitoring System Using Internet of Things (IOT)


We are living in an age where tasks and systems are fusing together with the power of IOT to have a more efficient system of working and to execute jobs quickly! With all the power at our finger tips this is what we have come up with.
The Internet of Things (IoT) shall be able to incorporate transparently and seamlessly a large number of different systems, while providing data for millions of people to use and capitalize. Building a general architecture for the IoT is hence a very complex task, mainly because of the extremely large variety of devices, link layer technologies, and services that may be involved in such a system.
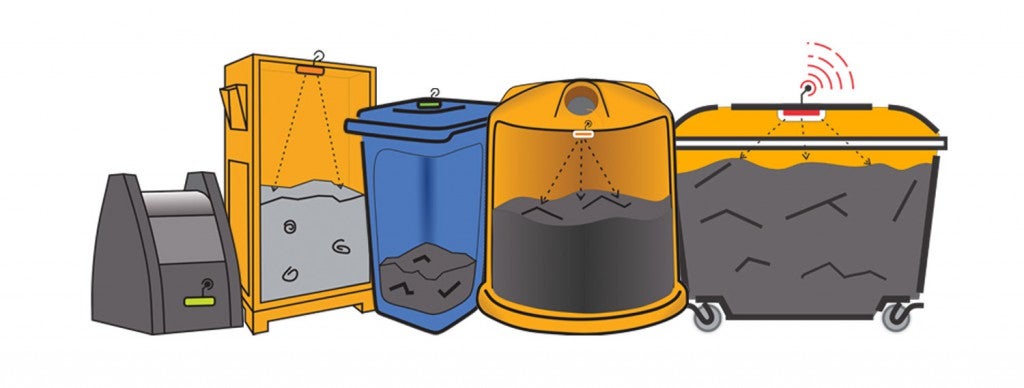
One of the main concerns with our environment has been solid waste management which impacts the health and environment of our society. The detection, monitoring and management of wastes is one of the primary problems of the present era. The traditional way of manually monitoring the wastes in waste bins is a cumbersome process and utilizes more human effort, time and cost which can easily be avoided with our present technologies.
This is our solution, a method in which waste management is automated. This is our IoT Garbage Monitoring system, an innovative way that will help to keep the cities clean and healthy.
Follow on to see how you could make an impact to help clean your community, home or even surroundings, taking us a step closer to a better way of living : )
Step 1: OVERVIEW of the Monitoring System
The idea struck us when we observed that the garbage truck use to go around the town to collect solid waste twice a day. Although this system was thorough it was very inefficient. For example let's say street A is a busy street and we see that the garbage fills up really fast whereas maybe street B even after two days the bin isn't even half full. This example is something that actually happens thus it lead us to the ''Eureka'' moment!
 What our system does is it gives a real time indicator of the garbage level in a trashcan at any given time. Using that data we can then optimize waste collection routes and ultimately reduce fuel consumption. It allows trash collectors to plan their daily/weekly pick up schedule.
Step 2: COMPONENTS IN OUR SYSTEM
The basic Model works like so...
To start with you will first have to enter the height of the dustbin. This will help us generate the percentage of trash in the trashcan. We then have two criterias which needs to be satisfied to show that the particular bin needs to be emptied :
- The amount of trash, in other words let's say if your bin is half full you don't really need to empty it. Our thresh, or maximum amount that we permit of trash, is 75% of the bin. (You could alter the thresh according to your preference.)
- If supposing a particular trashcan fills up 20% and then for a week doesn't change, it comes into our second criteria, time. With time even the little amount will start rotting leading to a smelly surrounding. To avoid that our tolerance level is 2 days, so if a trashcan is less than 75% but it is two days old it then will also need to be emptied.
 With these criterias in mind let's understand the technical part:
- An ultrasonic sensor (A.K.A a distance sensor) will be placed on the interior side of the lid, the one facing the solid waste. As trash increases, the distance between the ultrasonic and the trash decreases. This live data will be sent to our micro-controller.
- Our micro- controller then processes the data and through the help of WiFi sends it to an app.
- What the app does it visually represents the amount of trash in the bin with a small animation.
This process will indicate all the bins which require attention, leading the user to take the most effective route.
Step 3: ABOUT US

We post all of our projects on Instructables, a place that lets you explore, document, and share your DIY creations. You can also subscribe to our YouTube Channel Here. We post lots of in progress photos and have conversation on our Facebook Page Here and Instagram.
If you like what we make and wish to support us, do it on Patreon here.
For work related inquiries contact us on : technovationrobot@gmail.com
Step 4: MATERIALS NEEDED...
 HARDWARE:
- 2 x AA Batteries ( Gearbest) these batteries will power the Arduino board
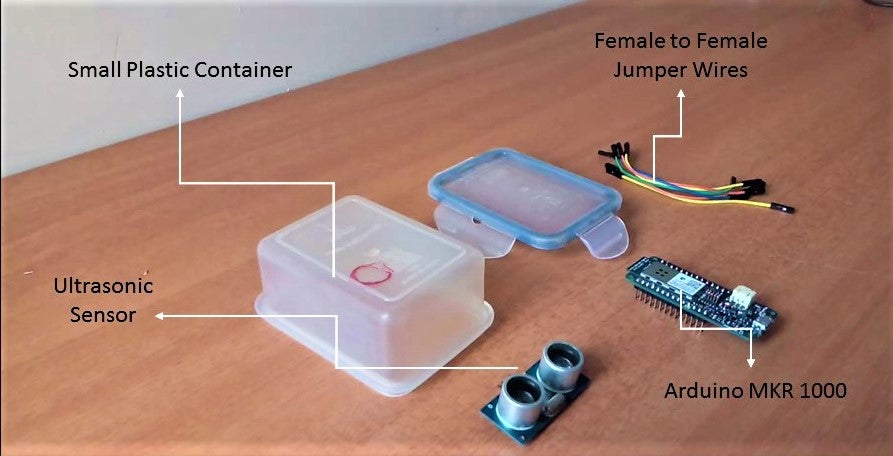
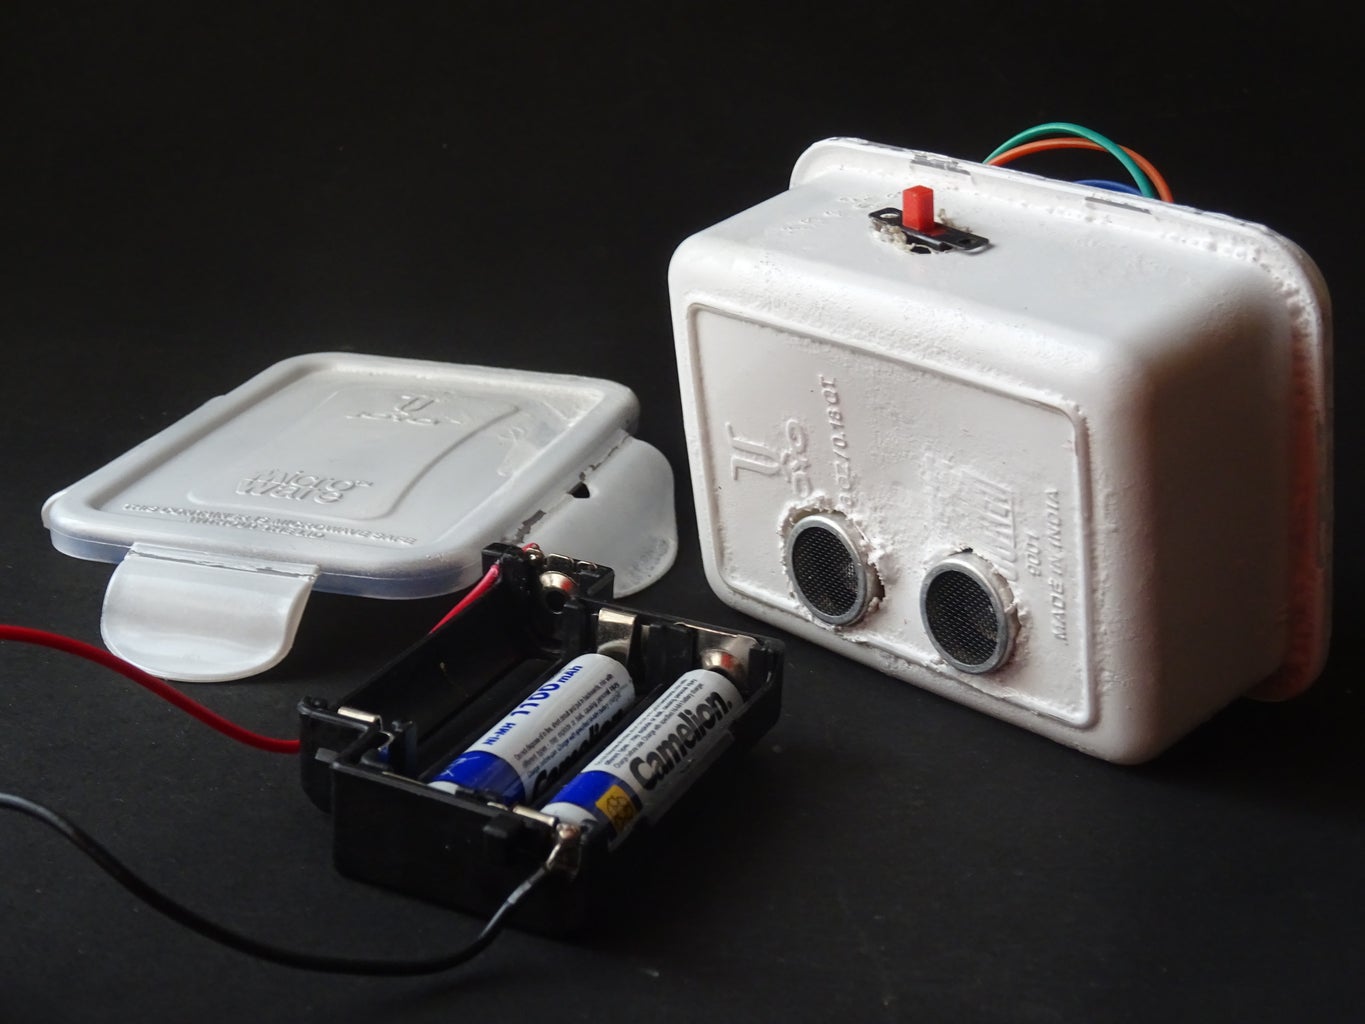
- Plastic Container (Gearbest) I found an old plastic container in which all the components could fit. The box is important as you can easily access the components and it's waterproof.
- Ultrasonic Sensor (Gearbest) An ultrasonic sensor measures distance. It will be attached to the lid indicating the quantity of trash. Our system's key component.
- Jumper Wires (Gearbest)
- Arduino MKR1000 (Amazon) The center piece is one of Arduino's latest micro-controller, which simplifies the task of connecting to the Internet using prebuilt libraries that can be downloaded.
- White Spray Paint Turn your regular box into a more professional product
 TOOLS:
SOFTWARE:
- Blynk An android app that allows communication with WiFi compatible micro-controllers.
Quick word about Gearbest, you can find all products especially for hobbyists.Cheap and good quality highly recommended, do check them out!
Step 5: Constructing the Model
It's time to make our very own system to test our concept at home on a small scale! Look for an old small plastic container and make sure your components fit.
 Now remove the lid and trace the two ''eyes'' of the ultrasonic sensor. this will be the side facing the bottom of the bin.
Take your biggest drill bit, mine was 10mm and drill out the holes. If they still are a bit small lightly file them till the ultrasonic sensor snugly fits in, completely flush to the surface.

Step 6: SPRAY PAINTING

We chose white but you could choose whatever colour you prefere apply two coats of paint both inside and out, don't forget the cover. Note: The fumes are toxic do it outside.
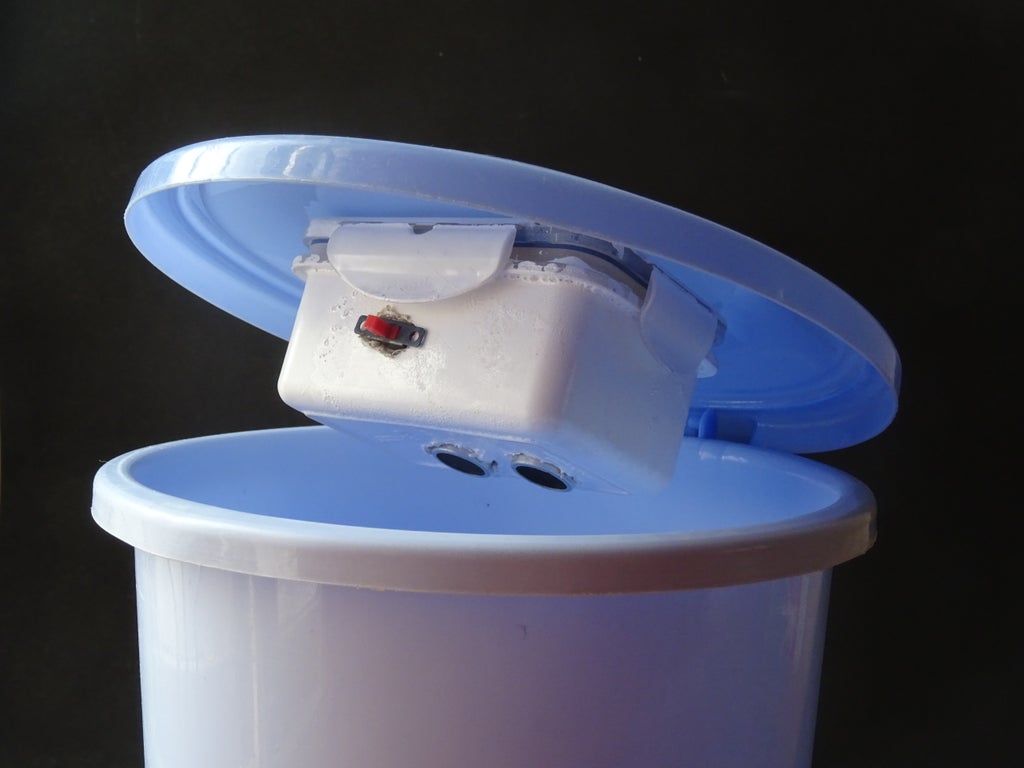
Step 7: Attaching the ULTRASONIC SENSOR


Push in the sensor and apply dabs of hot glue to secure it in place. Then make a slot for your switch and fit everything into place.
Step 8: Installing Drivers and Libraries Necessary
To be able to program the arduino mkr1000, you need to first install the drivers. To check if you already have them installed open the arduino IDE, click on tools then boards and look if either arduino or genuino mkr1000 are in the list. If they are there skip to next step, if not follow along...

To download the necessary drivers to be able to use arduino mkr1000, open the arduino IDE again, click on tools, boards, then boards manager. 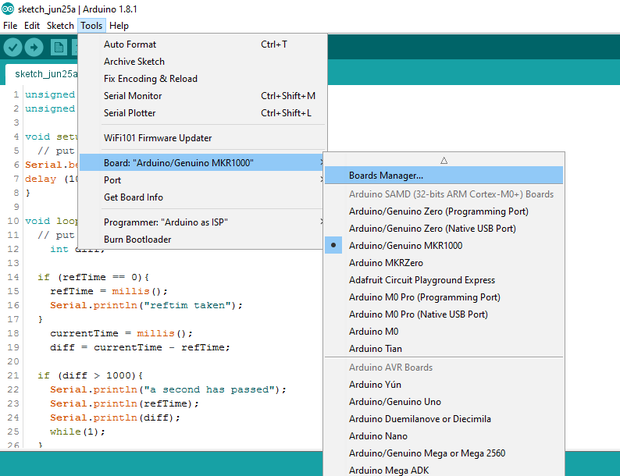 Now in the search bar, search for "Arduino SAMD board", select your arduino IDE version and download the one that comes (double check with the picture below)
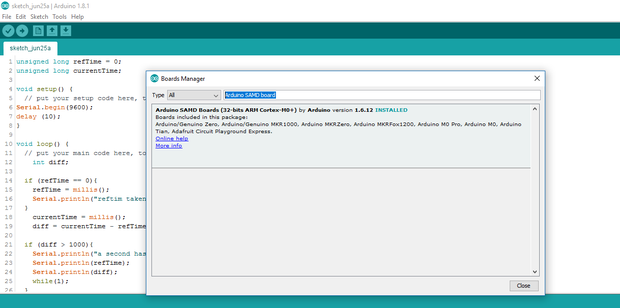
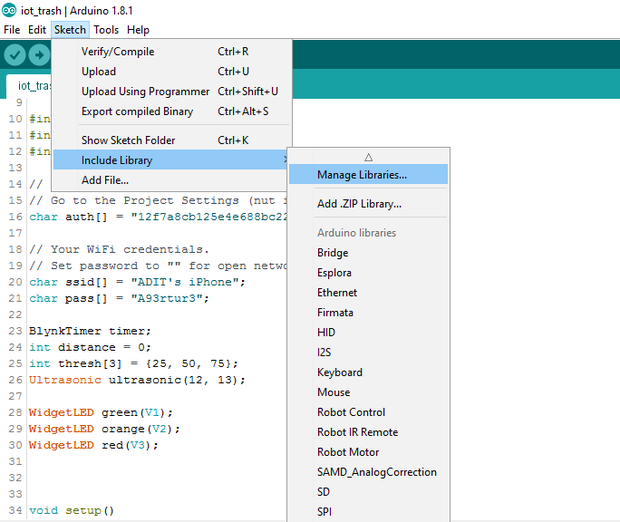
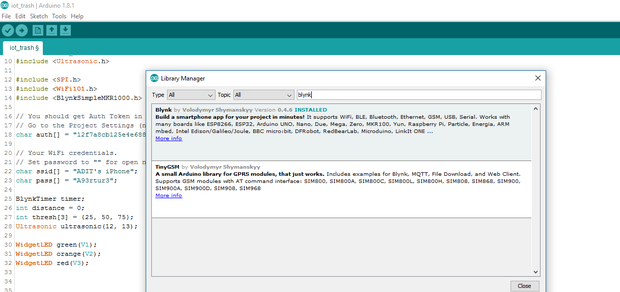
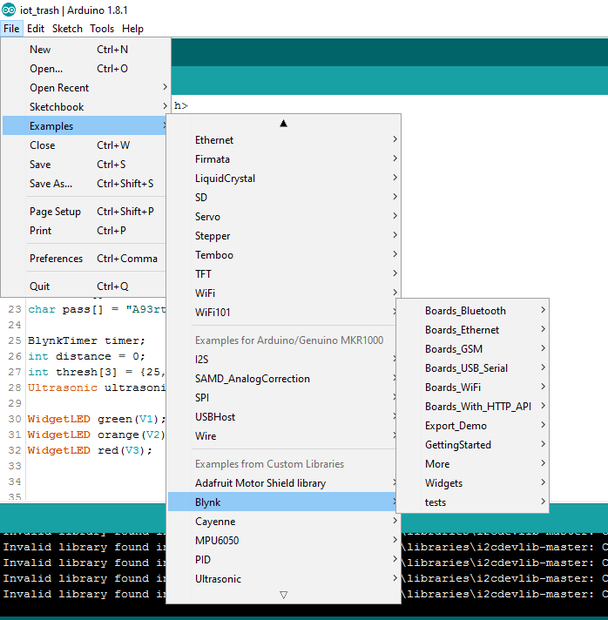
Once your drivers are installed, go ahead and download the libraries needed. For our program to run we need the WiFi101 library, the blynk library and the ultrasonic library, both can be found in arduino's in built library manager. Open to sketch then include library then library manager.
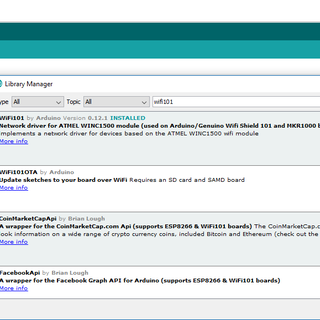
Nowin the search bar, search for wifi101, blynk and ultrasonic, choose your IDE version and install. (double check with the pictures below)

Step 9: THE CIRCUIT
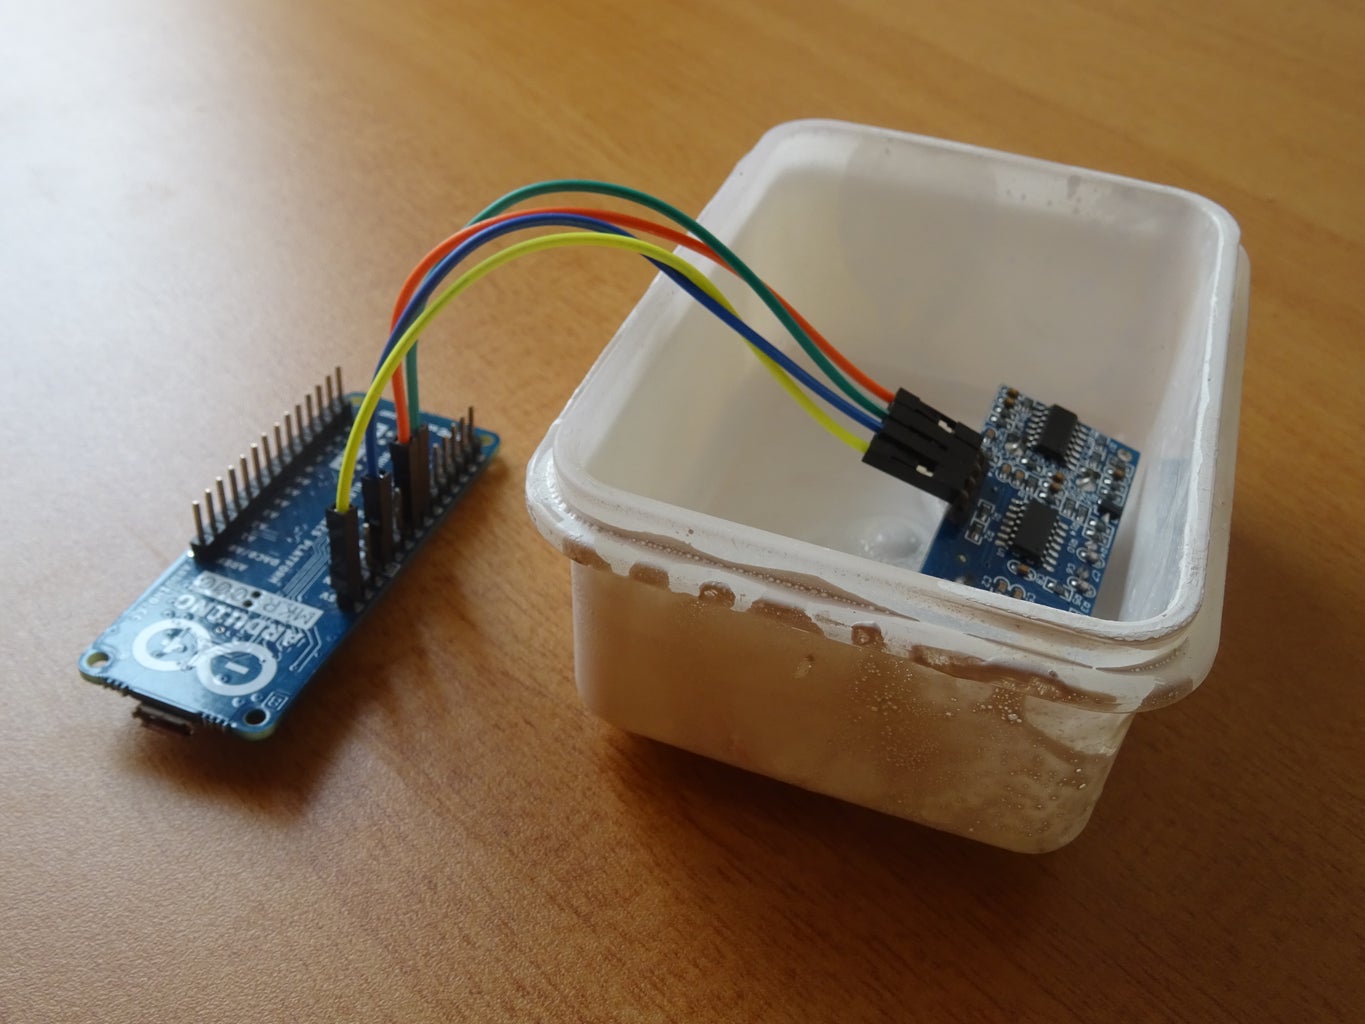

Once you've installed the libraries and drivers, connect the ultrasonic sensor to the arduino.
- vcc on sensor goes to 5v on arduino
- gnd on sensor goes to gnd on arduino
- trig of sensor goes to pin 12 of arduino
- echo of sensor goes to pin 13 of arduino
Step 10: STICK THE SYSTEM
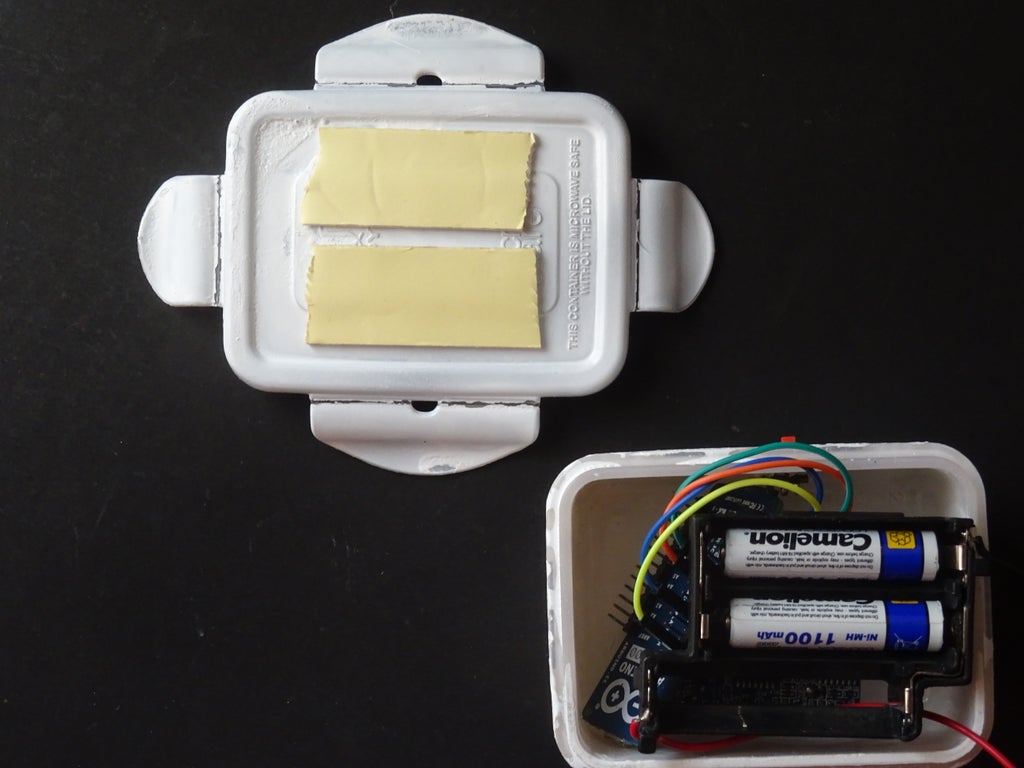 Carefully fit all the components in and close the box
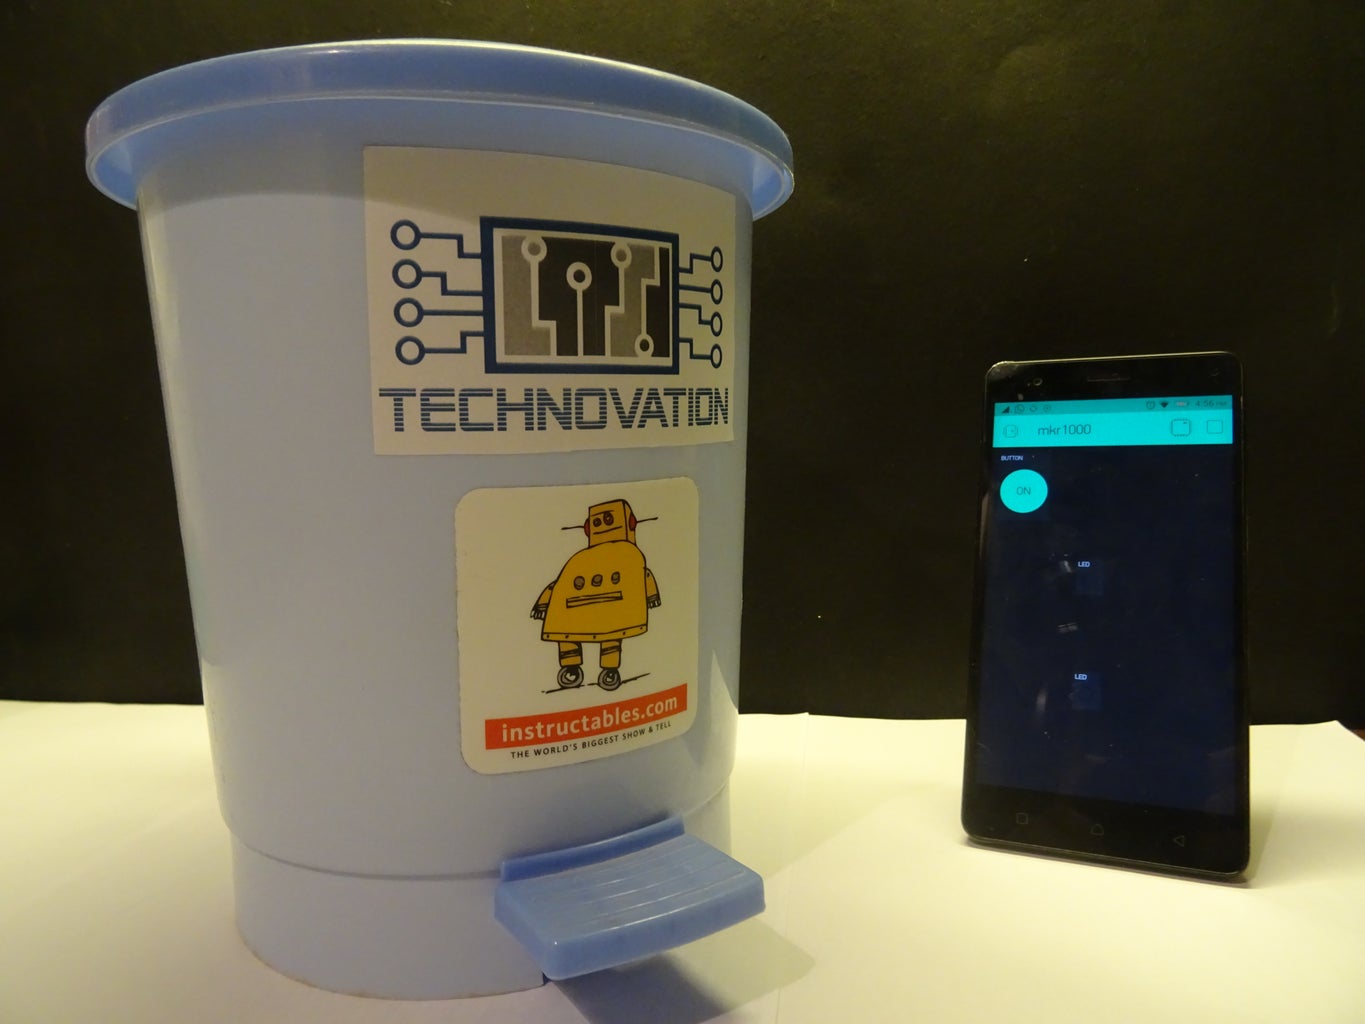
 I took the house dustbin to test my model.
 Cut and stick to pieces of double-sided tape and attach the system to the lid of the dustbin, making sure the sensor is facing downwards.
Step 11: Intro to Blynk App
To connect to the internet we use a prebuilt platform called blynk, which can be downloaded from the android play store, link below...There are countless examples on how to use the app with the arduino which are all available by heading to files in the arduino IDE, then examples and under the blynk list.
link to blynk app : https://play.google.com/store/apps/details?id=cc....
Step 12: SETTING UP THE APP & CODE
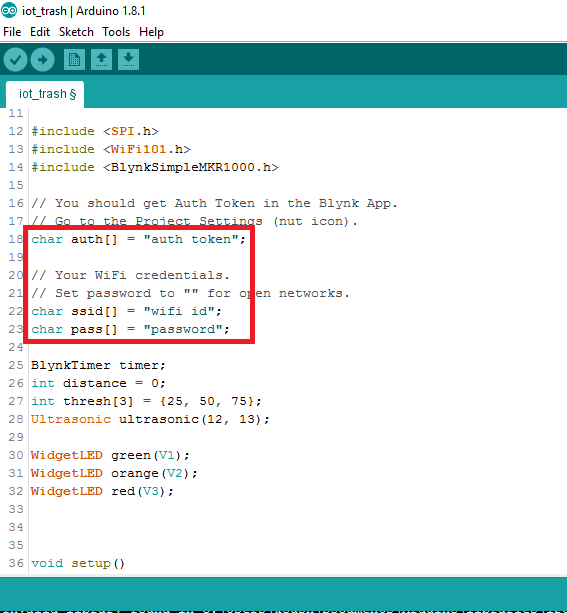
Once you are familiar with blynk and how it works, you can upload the program attached below. Some things you have to change in the program are :
- replace "wifi id" in line 22, with your actual wifi id
- replace "password" in line 23 with your actual wifi password
- replace "auth token" in line 18 with your blynk's authorization token which u should have received through mail while installing blynk
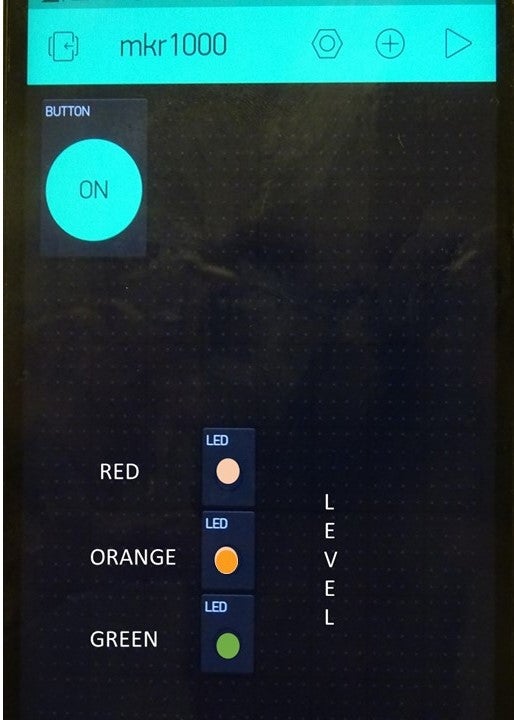
Make sure you have the right board type selected (arduino mkr1000) and the correct port. To setup the Blynk interface you need to use three virtual LEDs, lined up one on top of the other. (follow the picture below)
The program lights the LEDs from green to yellow to red according to how close something is to the sensor.
Attachments

Step 13: RESULTS!
Here you have the results of the whole concept finally working! hurray!
These are screenshots of my phone as I filled the dustbin. On the blynk application we aliggned three LEDs one on top of the other. Green which ranges from 0 to 25% full, Orange from 25 to 65% and Red from 65 to 100%

After having put 10% of trash and closing the bin we have the green LED that comes on the other two stay off.
50% full...

...and finally we put all the trash possible, and all three LEDs and a smile lit up! Congratulations the model works : )
Step 14: MARKING THE GPS SPOTS
IMPORTANT
We haven't actually implemented this step as we would have had to make atleast 20 models to install them around the town's dustbins. This would have become to expensive, so we are putting the idea forward, which when randomly simulated gave us the shortest route, the correct results! 
Now is the time consuming part. We plan to fuse our project with Google Maps. This is how:
You need to manually go about the town taking GPS locations of each trashcan. Then save it on your Google Maps. Once you have done that, in the same way we made the system in our model intead of one LED you will need to do the same for the number of dustbins there are. Let's say there are 20.
When the truck driver starts his day, he opens Blynk and sees all the dustbins that require attention then he selects each dustbin (each when having their specific number) and then generates the shortest and most efficient route!
Step 15: Widespread of Opportunities

After having made one ourselves we realized how widely this system could be used to turn this rather horrible cumbersome chore into a really efficient one!
The way it can impact the city or even a country on a big scale is understandable, and hopefully in the future it is implemented. But other than that each individual can benefit with this concept. A community, an apartment complex or even a house can all use this powerful tool fueled by the internet of things to make their life a whole lot simpler!
Step 16: Complications

That said there are a few complications that we thought would occur if we took this product on a big scale.
Challenges :
• Ensuring the Ultrasonic distance sensor are correctly placed. If the pile of dump increased in the middle the sensor could be giving misleading data.
• There could be liquid/water thrown in to the bin. The design needs to have water proof electronics and embedded software.
• The BIGGEST issue availability of 3G/4G Cellular networks. The fact that we made a model at home bypassed this issue as we used WiFi. This in fact is this only main issue, although personally I feel in a couple of years every corner of the world will have Internet Connection
Step 17: CONCLUSION
This project on the whole looks promising, but definitely needs small adjustments as mentioned above. Would love to see your versions, or even suggestions or ideas, do drop them in the comment section.
Hope you guys enjoyed this instructables, let's continue working on ideas to impact our lives and environment. As usual like share, and subscribe so that you don't miss our neXt projects.
Last thing do vote for it in the Internet of Things 2017 CONTEST and help us win!
HAPPY MAKING : )
Step 18: POPULAR PROJECTS
If you like what we make check out some of our popular uploads!
You must see the video the fully appreciate it WATCH the video HERE

Cubex the Sensor safe. Watch it HERE

And many more Here on Technovation do follow us!

First Prize in the
Internet of Things Contest 2017

Participated in the
Before and After Contest 2017


