

Introduction: Smart Vendy

Most people might agree that vending machines are one of the greatest inventions. They provide a convenient lunch option for those who forgot to bring theirs, carry a selection of beverages and can help sate rumbly stomachs with a light snack. They’re a valuable asset to any workspace or public property until they stop working, of course. In this project, it orders itself when snacks get out of stock in it. Customers can get through snacks through the cashless mode through RFID card
Step 1:


1. MediaTek LinkIt smart Duo 7688 Duo
2.Jumper wires
3.Breadboard
4.USB-A to Micro-USB Cable
5.RFID reader & Cards 6.Keypad
7.SeeedStudio Gear Stepper Motor with Driver
8.16X2 LCD and I2C LCD module 9.PCF 8574A for making I2C for Keypad
10.1cm thick metal wire
11.3D printed circular plate
12.Hot gum Gun & Gum stick
13.Fevicol 14.Knife, scale
15.Soldering machine and wire
16.Female & Male Berg strip
17. General purpose breadboard
Step 2: Introduction of Amazon Dash Replenishment Service


Amazon Dash Replenishment service(DRS) enables connected devices to order physical goods from Amazon when supplies are running low
Devices can automatically order physical goods from Amazon when supplies are running low. Customers link their Amazon account and select the products they want to automatically reorder. DRS enabled device measures and tracks usage and when the supplies are running low this device places an order using DRS and amazon ships the product to the customer on manufacturer behalf. Dash Replenishment Service uses Login with Amazon (LWA), Amazon Simple Notification Service, and RESTful API endpoints to allow your device or cloud to integrate
In this project
The manufacturer will set up LWA and registered with Amazon Dash Replenishment service and also add products in DRS slots
Customer or Vendor(In our case) will register with LWA and subscribe product which he/she wants to re-order
I have given steps how to set Amazon DRS(Manufacturer does) and how to subscribe their products(consumer side).
Step 3: Dash Replenishment Service Setup : Step 1


1.Login With Amazon
Go to Amazon Developer website and sign into account(If you are new user proceed for Signup).Under section of Apps & services ,click on security profile. Create security profile fill up necessary details and submit it .You will redirected to page where you can see Security profile ID, Client ID and Client secrete , copy them in one place. Go to settings Icon at right side on same page where you see four options , opt for web-settings, there are two categories 1.Allowed Origins & 2.Allowed Return URL on basis on authorization types supported amazon , one of them is Implicit grant and other is Authorization Code Grant which is only required in Amazon DRS , enter return URL( the URL which is also going to redirected by Amazon after completing setup of DRS in our case.) P.S: Note exact entered URL because we have to use same URL in authorization request in UTF-8 format.
Step 4: Dash Replenishment Service Setup(Step 2)


2.Amazon Web services : SNS (Simple Notification Service)
Create an SNS Topic for DRSVisit Amazon Web Services under section of Messaging , opt for SNS then click on the get started button. Create new topic and add Topic Name & display name then submit details.Topic Name - Used to create a permanent unique identifier called an Amazon Resource Name (ARN), which will be used to configure your SNS Notifications. To Allow DRS to Publish MessagesClick the ARN for the topic you’ve created then Click Other topic actionsand then click Edit topic policy.From Basic View, under Allow these users to publish messages to this topic, select Only these AWS user and enter your AWS Account ID and the DRS AWS Account ID.To access your AWS Account ID, go to the AWS Console.Copy ARN ID which will be used in DRS registration process
Step 5: Dash Replenishment Service Setup(Step 3):Dash Replenish Device


Go to Amazon DRS page , sign in if session is expired . You will be redirected to main page of DRS site. Read the instruction of DRS program Requirement if you want to otherwise skip them. Then you pass through two step process to set DRS. On 1st page register with LWA, paste security profile ID which is copied in step 1.Login With Amazon.Then in 2nd page you need enter SNS ARN topic ID and click to next button.
After Setting up DRS with your account/security profile ID , then you need to create Device in DRS. So click on "Create Device" , choose name of your device and click on generate,model ID will get automatically created copy it. Add Logo of your device too. Click on next button. Next page is where you need to add products , remember add similar or same category products in same slot so that customer can have maximum number of options to choose of them. If you are only one product manufacturer then add products on basis on quantity or quality. To add products it needs ASIN(please refer this website to know more about ASIN).Go to Amazon , click on the product which you want to add in slot. At the bottom page of product you will see Product details , in that description you'll notice ASIN , copy that number and go back to DRS device setup page and paste it. Same product will be filtered in results then click on add button to pass it in slot. After that Click on next to complete DRS device setup. Note: copy Slot ID and Device Model ID.
Step 6: Setting Up Software: 1.Web Page
Frankly saying no need to host your(manufacturer website) until unless you go for full fledged DRS associate manufacturer/ seller. I have tried many websites where you can host web sites but some may not support any programming on it they simple provide HTML modifications NO Javascript or Node JS support platform.
After lot of search I came to know you/manufacturer can host your/his own tiny server in LAN , Yes it is true , Is that simple Right ?? But one point we need to remember in this case that this server/web page need to have Private Keys and Certificates to make website secure and LWA also need HTTPS web URL as its redirect URL after DRS setup. It is very costly to get such Private Keys and Certificates Luckily there are online sites which generates keys and certificates get our work done, One of them i have used is Self-Signed Certificate Generator , it very simple website where we will get these stuff. I have created server in my LAN with private address of 192.168.1.133
Step 7: Setting Up Software: 2. Main Local Server


Since MediaTek 7688 Duo MPU has OpenWRT OS , since it support Node JS and python also.In my project I have created two servers , one by requiring ‘http’ node module and other by ‘https’. You should need https server as Amazon redirect user/customer to only secure server (i.e https).So to create https server you need Private Key and Certificate , main purpose of key and certificate is explained here. Process of generating key and certificate is mentioned in snapshots, These files are stored in same folder where I am running MediaTek_DRS.js file.
Note: localhost name in key and certificate is not have any relation with redirect URL , they are only name of file
Step 8: I2C Keypad & I2C LCD


I2C keypad
The main issue was a lot of I/O pins used on MediaTek 7688Duo after the main setup & actually, need extra I/O to run 2nd servo in my project. So I came with the solution is to use an I2C keypad. It is pretty simple to implement and no revision of code at all. For this I opted out PCF8574A and made A0, A1 and A2 dump to ground to configure address of 0X38H on I2C line.you can see
I2C LCD
I have used I2C LCD module to connect 16X2 LCD, Both I2C add-on which made use only 4 pins (SDA, SCL of keypad & other SDA and SCL of keypad) from 16 pins( 8 pins of LCD and 8 pins of keypad)
Step 9: Making Vending Machine Prototype
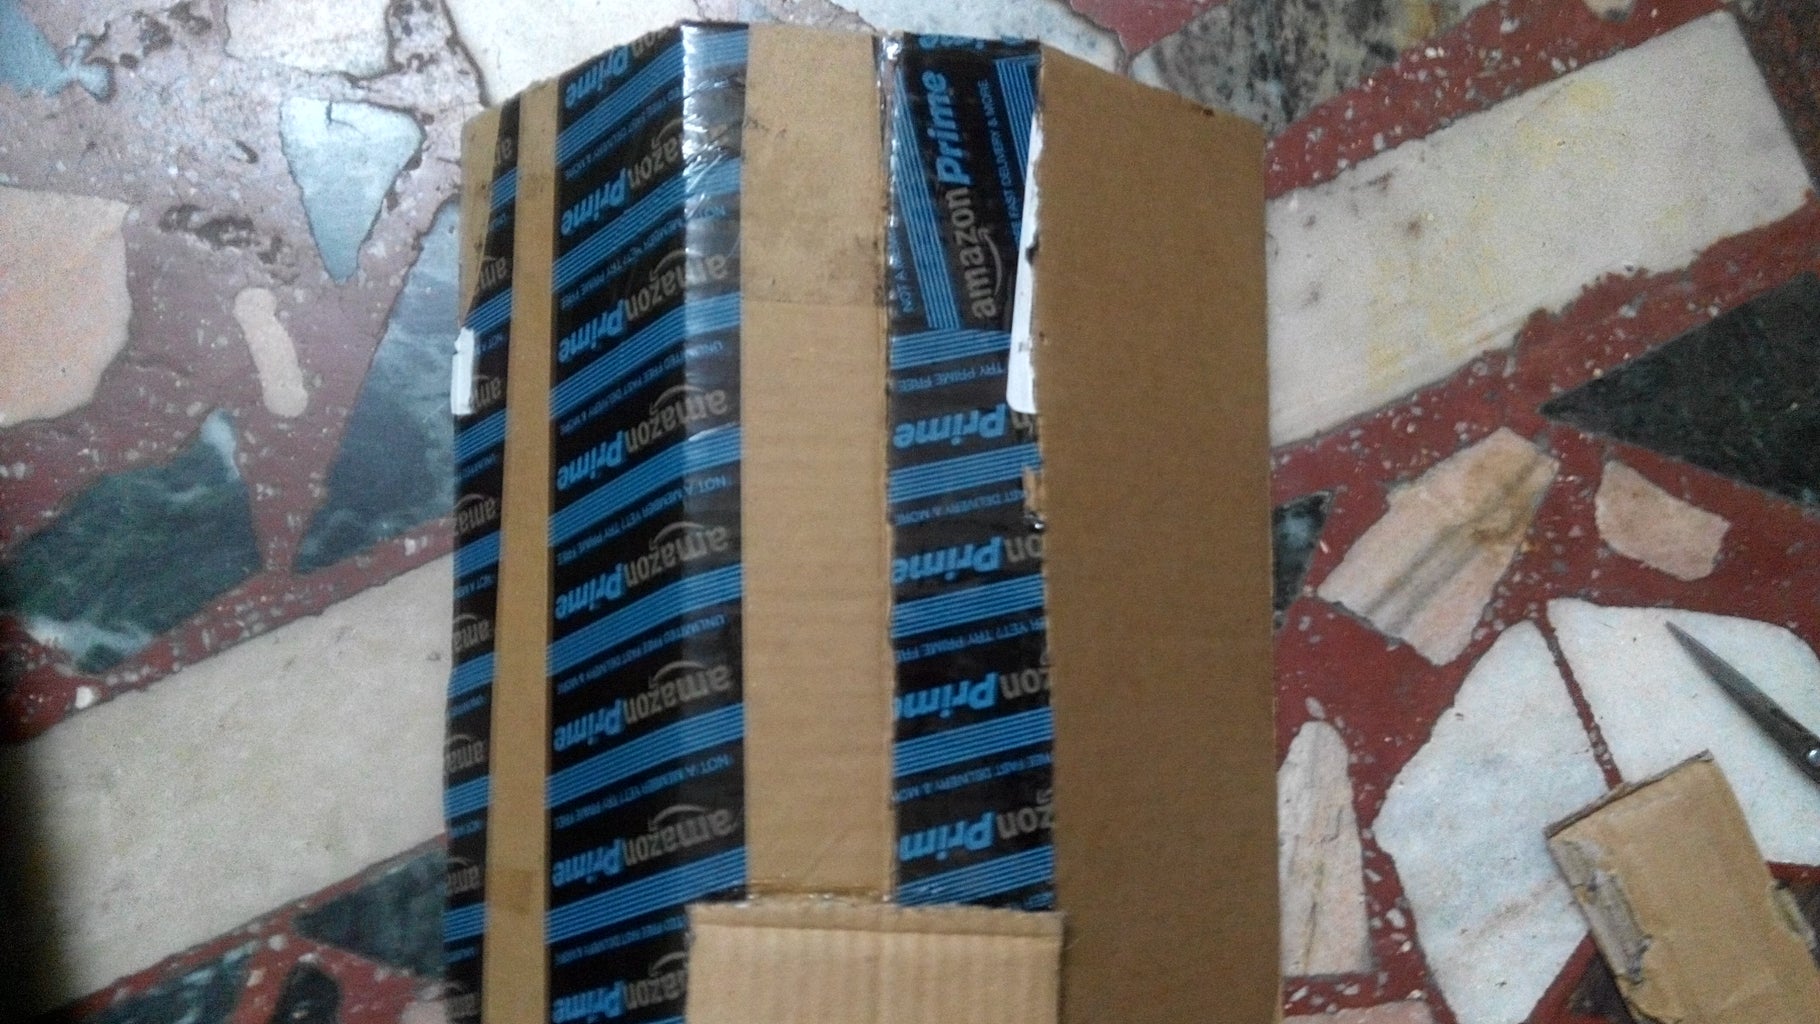


I have used cardboard and black to create a simple vending machine with two slots. Every Slot has spring with made by bending a 1cm thick wire over the cylindrical surface to get a good curve or circular-like shape throughout the whole slot length.
Each slot hooked into the empty side of the cap so that it should not be disturbed while rotating itself. Another side I have attached 3D printed circle plate with hot gum This circular plate is printed such that it has small circular hollow slot having size exactly equal to stepper motor tip point. Made fit into it using hot gum.Such two stepper motor with springs are made for two slots To give somewhat exact vending machine I used LCD, Keypad and RFID for this I used cardboard exactly adjacent to slots.Only Keypad and LCD are visible and RFID is placed behind the vertical cardboard
Step 10: Setup of Smart Vendy


As you can see the main setup is the backside of vertical rectangular box. All components are in photo itself
Step 11: Login With Amazon: Access Token & Refresh and Its Use
- To subscribe products through Amazon DRS on behalf of Vending machine Re-filler/Retailer must go through Login With Amazon(LWA) process.Which is one-time signup/sign-in with Amazon DRS and Vending machine retailer Then it will redirect through product page in slot wise. After choosing products, which customer/vending owner wish to order automatically, he/she will get notification of products subscription.So in my case, there is main HTML page on which I have Login With Amazon button by clicking on it above-mentioned procedure will be followed.At the bottom of the page, there is Re-fill button which is mainly for entering count/quantity of predefined products in that small pop-up page. Remaining buttons to check slot status, Device Status and Subscription status
- .After LWA, the Authorization code is generated to from HTML page passed through socket event into MediaTek_Amazon_DRS.js. With this Authorization code, a request is sent to Amazon to get an access token and saved it in a predefined variable so that it will be used to call DRS Replenish API. ( Amazon uses OAuth 2.0 framework, which is explained here
- An access token is an alphanumeric code 350 characters or more in length, with a maximum size of 2048 bytes. Access tokens begin with the characters 'Atza |'. Access tokens are only valid for sixty minutes and are specific to the user logging in and the data the app requested when it triggered the login. When you receive an access token, it is a structure in JSON format with three pieces of information: the access_token,the token_type, and expires_in (the number of seconds before the token expires).
- Remember, this access token is have limited active time, after that, it gets expire. To avoid this OAuth 2.0 introduced refresh token, Refresh tokens follow the same format as access tokens, except they begin with the string 'Atzr | '. As per Amazon LWA documentation, refresh token has valid indefinitely unless the user has removed the website or mobile app from the list of allowed apps for their account. Refresh tokens have a maximum size of 2048 bytes and it is specifically assigned to one client and cannot be used by another client.Refresh tokens are returned only in the Authorization Code Grant, this type of Grant type is used in Amazon Dash Replenishment process. The detailed explanation of Login with Amazon documentation explained here.
- All this procedure will have to do by vendor/Retailer i.e end user of DRS where his/her products will get reordered
Step 12: Working of Smart Vendy
- A RFID is used to Authorise actual customer and showing his.her balance in LCD screen. If he/she wish to do Topup/recharge for RFID then the vendor can do it through the website.This recharged balance is stored in EPROM of MCU i.e ATmega32U4 in my caseA vendor refill vending machine contents when new stock comes. Same number has to be entered in Refill snacks HTML page for that MCU&MPU will keep track of each count decreasedAs this count of products is read from socket event and serially write to MCU ATmega32U4 through serial write function and on another side, this MCU read this through serially read and assign it to counter variable.This counter is decreased by value '1' when purchase made from slot/machine Then using newly obtained access token DRS function will be called order product automatically.
Step 13: Fritzing Sketch of Smart Vendy

Step 14: Code of Smart Vendy
Github code : click here to download the code of smart vendy
https://github.com/Sainathkomakula/Smart-Vendy

Participated in the
Cardboard Contest 2017

Participated in the
Internet of Things Contest 2017

Participated in the
Microcontroller Contest 2017


