

Introduction: Smart Home With Arduino


Hello.
I will show you how to build your own smart home. It shows the temperature both inside and outside, if the window is open or closed, shows when it rains and make alarm when the PIR sensor senses move. I made the application on the android to display all the data (you can also watch it on browser). You can see temperature in your home and other information from all over the world! Application is translated to english and polish. I built it because I wanted to make my own smart home and control it. If you want, you can make your own smart home, all you need is parts (listed below) and a lot of desire. So let's get started.
Explanation of acronyms for beginner:
GND - ground
VCC - power
PIR - move sensor
Step 1: Parts
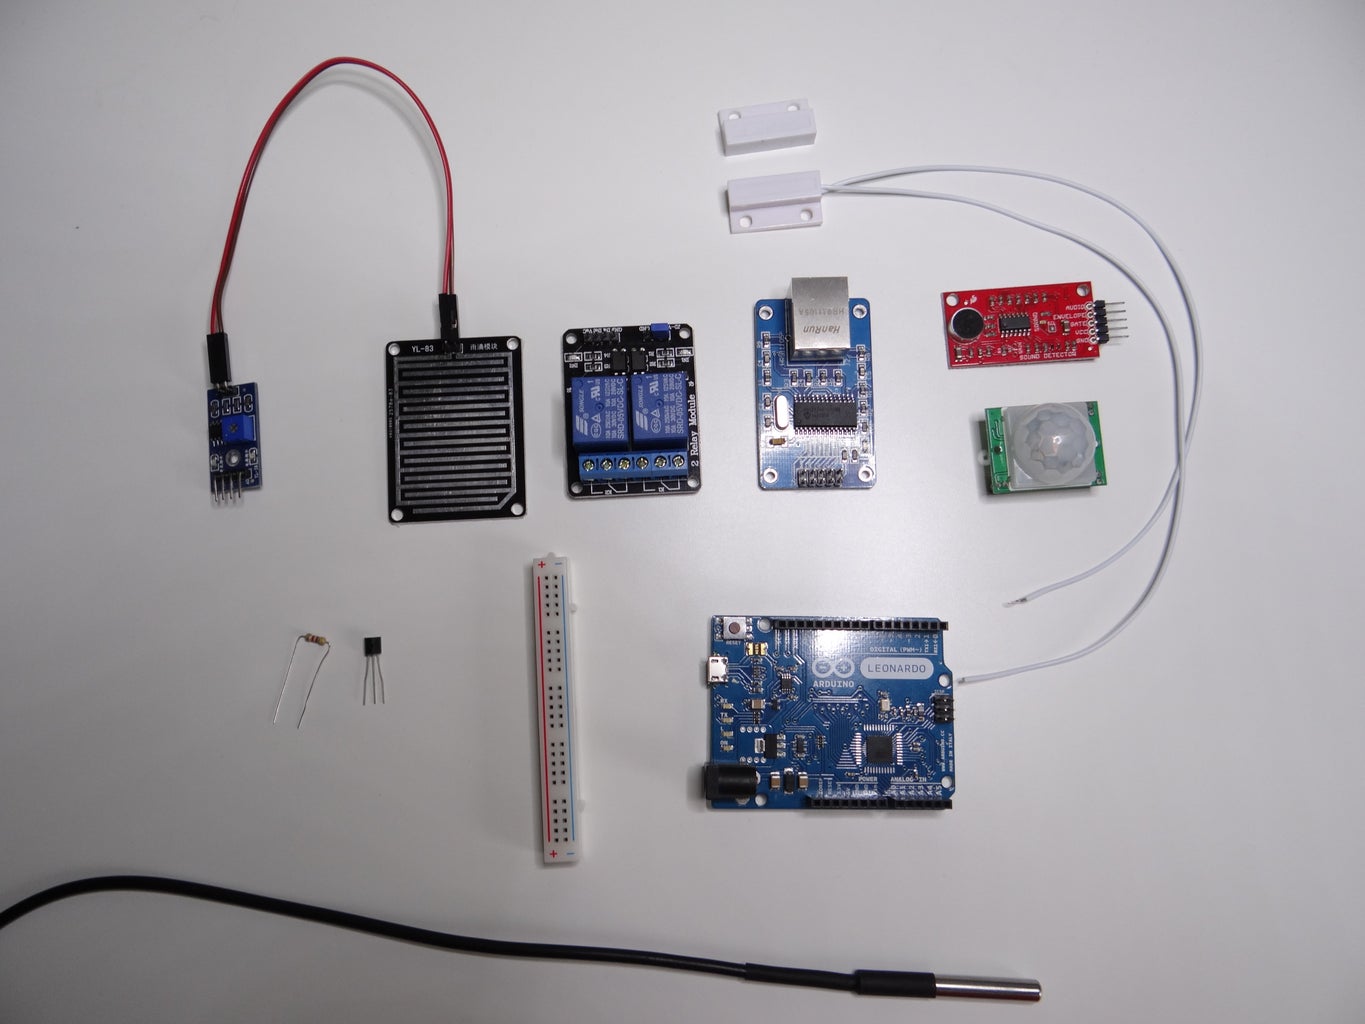

All the parts cost me $90
- Arduino
- Ethernet module ENC28J60
- Thermometer DS18B20 x2
- Microphone module
- Rain sensor
- PIR sensor
- Reed switch
- Relay
- Resistor 4,7k Ω
- Twisted-pair cable
- Ethernet cable
- Tools (soldering, screwdriver)
Step 2: Connection
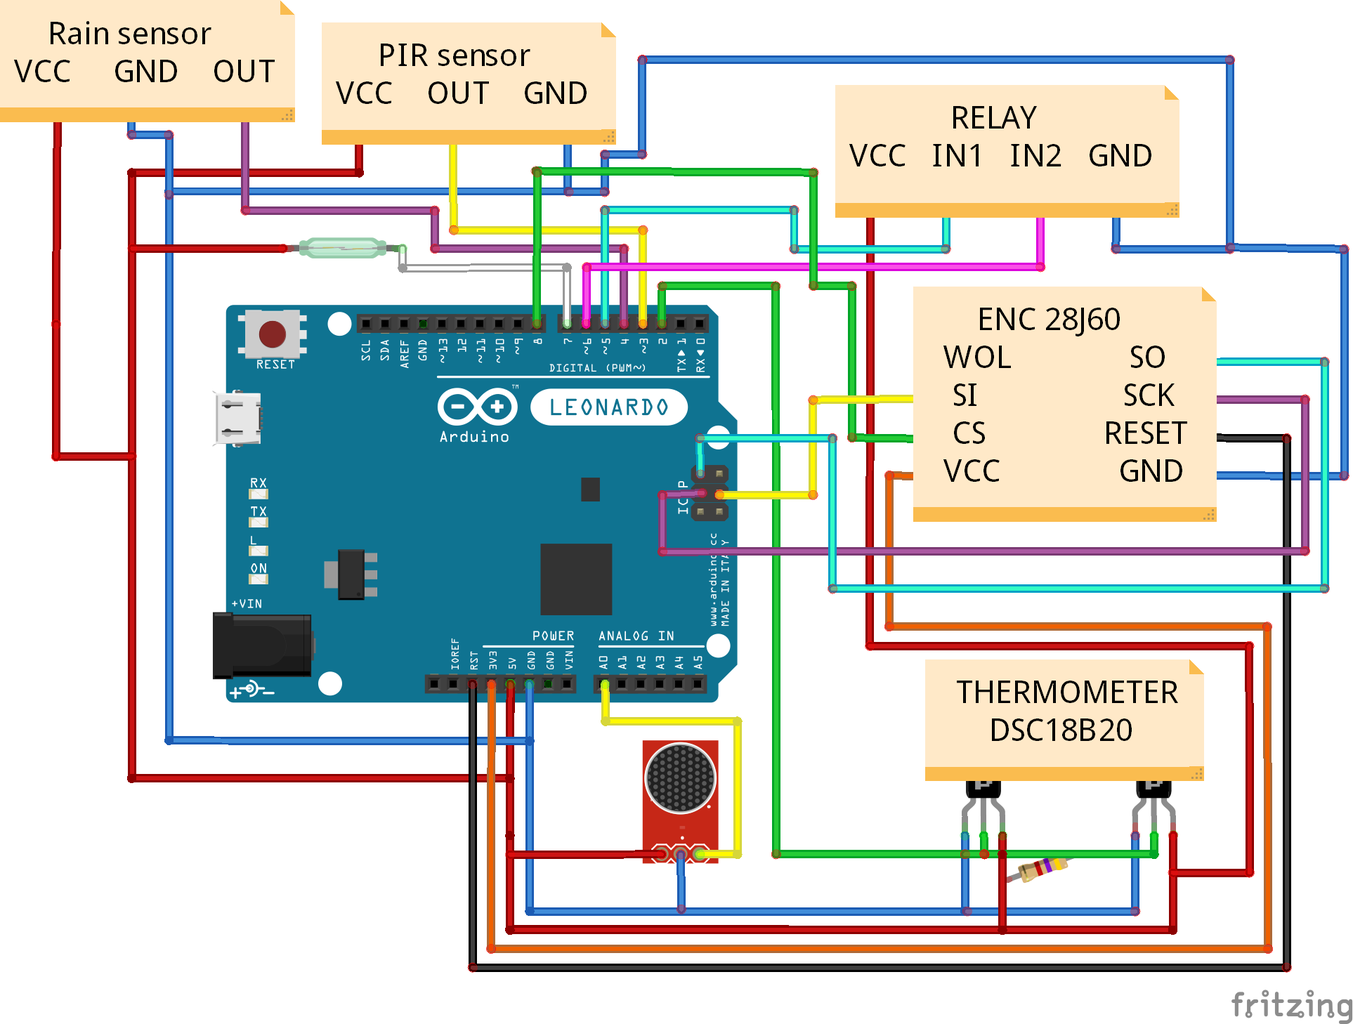


Above I added picture from fritzing with connection. If you have a problem with it leave a comment.
Step 3: Program
First you need to do is download, extract and import this library to arduino IDE. And download 1Wire library from here, Dallas temperature from here and import them to arduino IDE too. You can upload this program to your arduino. In the comment is an explanation of the code.
Attachments

Step 4: How It Works?

When you click refresh in your app or in browser Arduino sends data to smartphone/browser. Application gets source code from each page ( /tempin, /tempout, /rain, /window, /alarm) and displays it on your phone.
Step 5: Appliaction for Android.


To instal app on your android phone you need to make this (you can see it on the picture above):
1. the firs first step is download smartHome.apk file
2.Send apk file to your phone
3.Open file manager and locate smarthHome.apk file
4.Click on it and click install (if you have enabled the option to install applications outside the google play you need to turn it on)
5.You have finished the installation, you can enable the application
Application is translated to english and polish. In browser you can turn on and off light but in app not because I can't do that, sorry.
Attachments
Step 6: Application Configuration
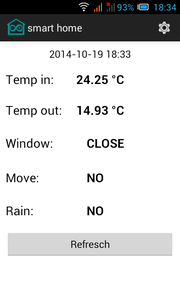

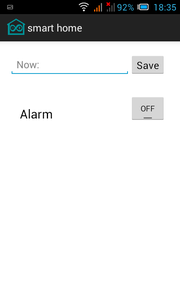


I'll explain how the application works. It's shows all data from your home. You can click on settings icon to edit your IP address and turn on or off alarm. When you turn on alarm, app get data from PIR sensor in service and if it's detected move in your home it's make a notification. App retrieves the data from the motion sensor every minute. In IP field you must enter your IP address. You can check it here.
Step 7: Browser

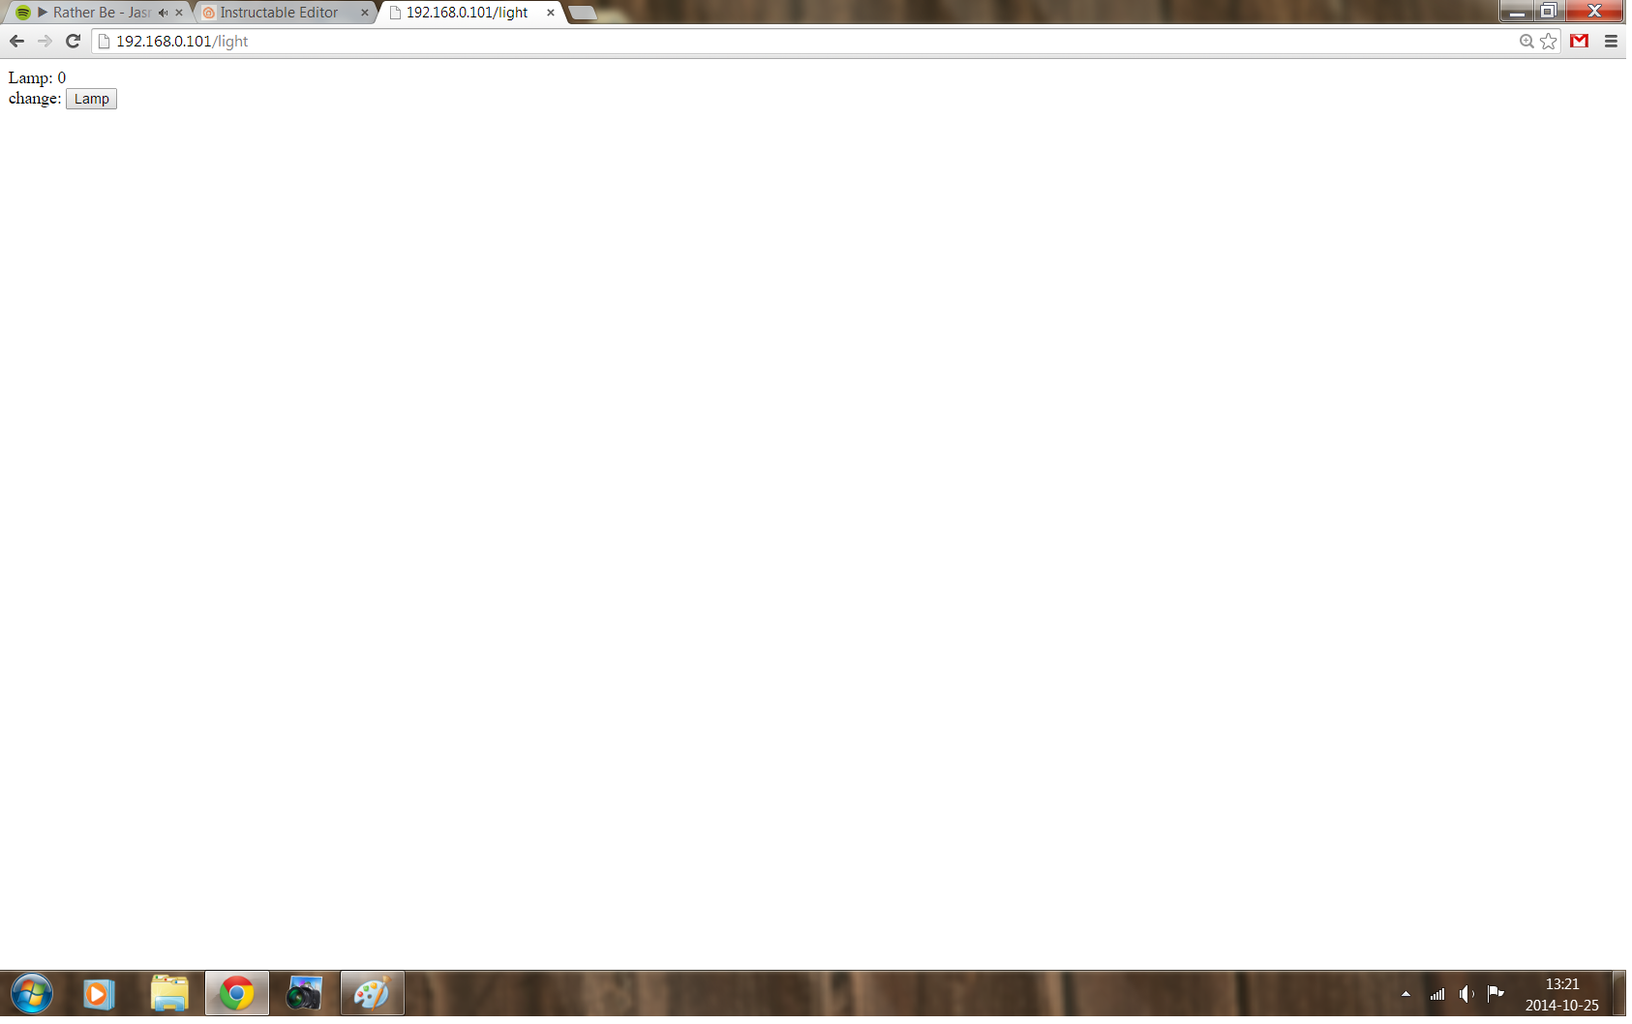
Type in your browser your ip / all. There you can see all the data and turn on and off light.
You can use this instead of the application on android.
Step 8: Port Forwarding

You need to open port on your router. Open your router configuration and set arduino ip and open port 80. You can see it on image above.
Step 9: NO IP (optional)

You can set up an account at no ip but this is not necessary. In the picture above you can see how to configure it.
Step 10: Test It!
If you want to see the data on your computer you can do this by typing into your browser yourip / all (e.g. 12.345.678.901/all) or use android application.
Remember to leave a comment and click favourite if you like my project :)
Step 11: EDIT: Android App Source Code
Because many people asked me about android source code I add it below.
Attachments

Participated in the
Microcontroller Contest

Participated in the
Formlabs Contest

Participated in the
Tech Contest


