

Introduction: Social Bug: Bluetooth Dancing Robot


Social bug is simple bluetooth robot which dances if there's a new notification on your phone. Facebook, Twitter and any kind of Android apps can be used to dance this bug.
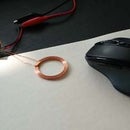
To make this tiny bug you don't need many parts. BLE module, small vibration motor and power source like coin battery are sufficient. Of course to look like a bug, prepare a few steel wire and etc.
If you miss messages on phone very often, make your own dancing bug!! Though my son doesn't have a phone, he likes this too much.
Step 1: Get the Parts


- BLE module(HM-10 or HM-11) : This is core part of social bug. BLE module communicates with phone and controls vibration motor to dance the bug. You can select HM-10 or HM-11 module. In my experience HM-10 with breakout board is most easy to make and stable. Keep in mind that your BLE module must support same features with datasheet in below link.
http://www.jnhuamao.cn/showNews.asp?id=83 - Vibration motor : Select small one as possible to reduce current consumtion.
- Transistor : Prepare a transistor, KN3904. This controls the vib motor. (Do not power the vibration motor from BLE's GPIO pin. Thanks Ladvien!!)
- Power source : At first I used coin battery(CR2032) and holder for convenience. But it lasts only 1~3 days. I recommend you to use LiPo battery and charger module.
- 3 resistors : These are not functional part. I used it to make bug's legs. Any kind of stuff is ok.
- 2 steel wire : for bug's feeler
- Body plate : Any kind of plate is ok. I reused other e-bug DIY kit.
- Etc : Wires, glue gun, soldering iron and accessories, tape and etc.
- Android phone v4.3 or over
Step 2: Setting BLE Module


The initial mode of BLE module is 'mode-0'. This means that we can change BLE module only by wired communication(UART). We wish to do is remote control the BLE module, so we have to change mode into mode-1 or mode-2.
* HM-10 works in mode-1 and HM-11 works in mode-2(in my case). But this can be different according to your module's firmware.
To change the mode we need a FTDI module and 4-wires connection to BLE module. Solder 4 wires (if you are using breakout board, use dupont cable) and connect to PC.
Download the 'PCComAssistant' program at below link.
Launch the program, select COM port and open COM port. Type 'AT' at input area and press 'Send' button. You have to see the 'OK' response. If you have no problem, send below command.
AT+MODE1
If you are using HM-11, use "AT+MODE2". If you can see the 'OK+Set:x', mode is changed successfully.
Step 3: Make Bug's Body - 1


Attach 3 resistors to body plate. It's bug's legs.
Locate coin battery holder at opposite side. If you are using LiPo battery, connect LiPo battery to charger module's BATT+, BATT- hole. And attach at same position.
Vibration motor is bug's head. Before attach it, expand (+), (-) line long enough.
Here's another difficult stage. You have to solder 3 wires to BLE module. If you are not using breakout board you have to do the precise soldering. Anyway you need 3 wires out - VCC, GND, PIO2(or PIO3 in HM-11).
PIO2(PIO3) will be controlled from phone. And this line,PIO2(PIO3), controls vibration motor using transistor.
Step 4: Make Bug's Body - 2


Connect the lines like below.
- PIO2(or PIO3) from BLE module ==> transistor's B(Base)
- Battery + ==> transistor's C
- vibration motor's (+) ==> transistor's E(Emitter)
- vibration motor's (-) ==> battery (-)
- BLE module's VCC/GND ==> battery (+), (-)
Set the BLE module on bug's body after wiring.
Connect feelers at head position. This make the device look more like a bug. Decorate as you wish.
Ok, now you are ready to dance it!
The last picture attached in this step is my final version. I used below parts.
- Use HM-10 with breakout board. Though it's little bigger and consumes more power, it's much more easy to make.
- Use LiPo battery with charging module. Coin battery last only 1~3 days in my case.
- At first I used stick type vibration motor. But it consumes current over BLE module's output limit. Use small motor as possible. I used tiny coin type motor.
Step 5: Download Blinky App


I made 'Blinky' app for other project but you can use this for Social Bug. Download the app at:
Set the app with below guide.
- Launch Blinky app
- Go to 'Settings' tab
- Select your BLE module type
- Check 'Run in background'. This keep the background service running after app termination.
- Select (i) icon at right top corner
- Allow notification access permission to Blinky app. Now Blinky app can collect notifications.
- Go to 'Message List' tab.
- Press menu key and select 'Refresh contents'. List will be refreshed with current notification messages.
- Click any message you want. (Facebook, Twitter or any kind of app)
- Select 'Enable this app's message all'
- From now on Blinky will notify to remote when there are messages which is made from app you selected.
- Select 'eye' icon at right top corner
- Scan you BLE module and pair with it
- Test if your bug is dancing or not
- To stop dancing, remove notifications.
Step 6: Test Social Bug


Linked video shows how to dance the social bug. (Turn on the caption for detailed description)
Enjoy it !!
If you made your own Social bug, please send pictures to me.
References :


