

Introduction: Speech Recognition With Arduino (Bluetooth + LCD + Android)


In this project, we are going to do speech recognition with Arduino, Bluetooth module (HC-05) and LCD.
let`s build your own speech recognition device.
Step 1: Watch the Video
Step 2: Components


Components:
- Arduino UNO
- HC-05 Serial Bluetooth Module
- LCD 16*2
- 1x 1K POT
- 1x 1K ohm resistor
- 1x 2.2K ohm resistor
- Wires
- Jumpers
Step 3: Connect to Arduino
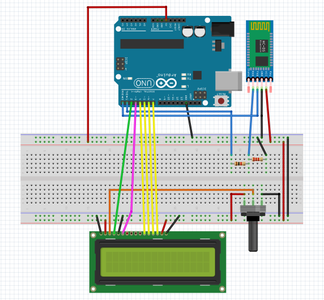
Connect LCD with Arduino
- VSS to ground
- VCC to +5V
- VEE to potentiometer
- RS to pin 2 in arduino
- RW to ground
- E to pin 3 in arduino
- D4 to pin 4 in arduino
- D5 to pin 5 in arduino
- D6 to pin 6 in arduino
- D7 to pin 7 in arduino
- A to +5V
- K to ground
connect HC-05 to arduino
- tx with rx in arduino (note: don`t connect tx while uploading the code)
- rx with resistors and then connect to tx in arduino (note:don`t connect rx while uploading the code)
- +5V to +5V
- GND to ground
Step 4: Programming the Arduino
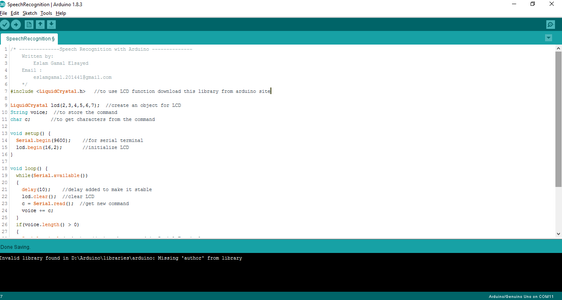
first you need to download LCD library from here
note: don`t connect tx and rx when uploading the code
CODE:
Attachments

Step 5: Download the Application
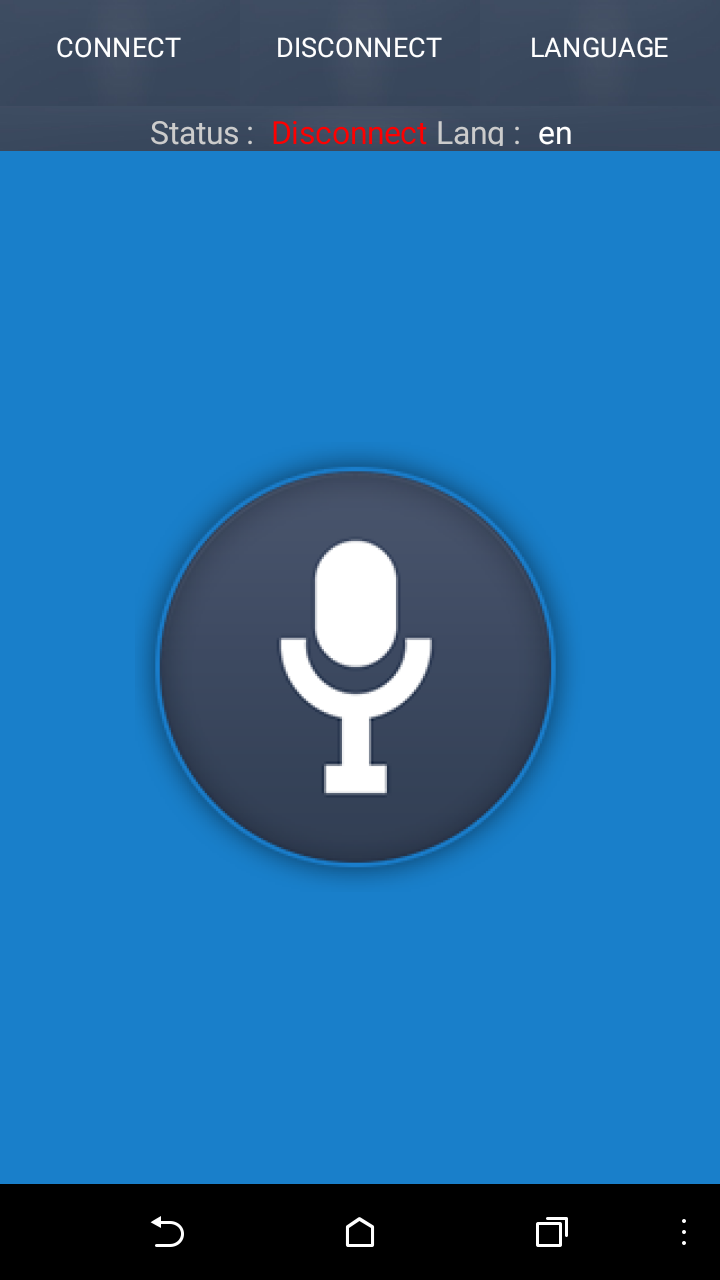
Download the free App here: Arduino Voice Control
Steps:
- Download the app from Google PlayStore
- Tap on Connect button
- Click on your bluetooth module (in my case it`s the HC-05)
- Wait until it says connected to bluetooth module (HC-05)
- Tap on the mic icon and state your command
Step 6: Problems Are Solved
- if LCD doesn`t display anything, adjust the value of POT (variable resistor)
- if code doesn`t upload, don`t connect Tx and Rx in Arduino

Participated in the
Arduino Contest 2019


