

Introduction: Speed Control for Brushless Motors With an ESP8266


Learn how the brushless motors works, how to control them with PWM using a speed controller, an ESP8266, and Ubidots.
Main article: https://ubidots.com/blog/speed-control-for-brushle...
Subscribe to my YouTube Channel.
What are Brushless motors?
Also known as synchronous DC motors, they are an special type of motor that consist on a stator and a rotor as most of the motors out there, but with a difference, "brushless motors" ,as it name tell us, do not have brushes electrically connected between the stator and the rotor to reduce friction, vibrations, inefficiency.
How do they work?
These motors are associated with an inverter. The inverter makes the supply voltage to the coils sequentially, thus the poles of the rotor move according to the magnetic field generated by the coils sequentially. The speed of the rotor and its axis, will depend on the speed of sequencing of the variator. We can find them normally on RC airplanes or cars, also drones. In the follow tutorial we are going to learn about Brushless motors, how to control them with an ESP8266 (NodeMCU) and Ubidots.
Application requirements:
- NodeMCU ESP8266
- Speed controller
- Brushless Motor
- Breadboard
- Wiring cables
- Ubidots account
- 12v Battery or Power Supply
Step 1: Hardware Setup:


Connect the 3 output wires from the ESC to the motor (doesn't matter the order by now).
Then, use 2 wires to connect Gnd and signal to the respective input of the ESC.
Back wire - GND
White wire - D5 (Yellow wire)
In this case we do not use the red wire of the ESC because it supplies 5v and our NodeMCU works at 3.3v, so we can damage it.
Step 2: Ubidots Device and Variable Creation.

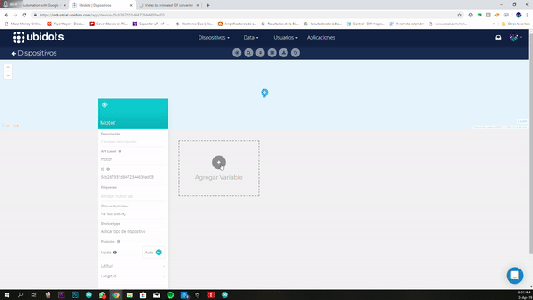
Go to the Device section of your Ubidots account create your device called "motor".
Inside your "motor" device, create a variable called "speed".
Step 3: Ubidots Dashboard and Widget Creation.


Once our device and variable are created, we can create a dashboard and widget to control the motor from a web or mobile dashboard.
Now, create a control widget to set the speed of the motor associated with the variable "speed".
Then you are ready to program and test your project.
Step 4: Programing With the Arduino IDE.


1. If not done yet, download the Arduino IDE.
1a. Open the IDE and select Files -> Preferences
1b. Add the url below into the Additional Board Manager URLsfield. You can add multiple URLs by separating them with commas. http://arduino.esp8266.com/stable/package_esp8266...
2. Open and Install the ESP8266 board in the Boards Manager: Tools -> Board -> Boards Manager
2a. You can easily find the board by typing “ESP8266” in the search bar.
3. Now select the NodeMCU 1.0 board from Tools -> Board menu
4. Define or double check the Port of your PC which the device is communicating with. Go to Tools -> Port: -> Select the port
4b. Ensure your IDE Upload Speed is 115200 by going to Tools -> Upload Speed -> 115200
5. Download the UbidotsESPMQTT library if you haven’t already. Now, click on Sketch –> Include Library –> Add .ZIP Library and choose the Ubidots ESP8266 MQTT library
If properly uploaded, you get the response: "Library added to you libraries."
6. Close and open again the Arduino IDE.
Step 5: Programming the NodeMCU ESP8266:
Once your ESP8266 is set up, we can post and get data from Ubidots in order to control your Brushless Motor.
1. Copy and paste the following code in the Arduino IDE. Don’t forget to customize the Wi-Fi SSID and password and your Ubidots Token.
Now, verify your code is correct by clicking the check button in the Arduino IDE above the editor.
Once the code is verified, you will receive a response similar to the one below, indicating that it is properly set up.
Next, your have to upload the code into your NodeMCU. To do this, choose the right-arrow icon besides the check icon.

Step 6: Testing Session:


Connect the battery or power supply to the ESC.
Then, everything is ready, just swipe the slider on your web or mobile dashboard.
Step 7: Summary:
In this guide we just learned how do Brushless motors works and how to control them with the ESP8266 NodeMCU and Ubidots. This project could help us to design electronics control systems for mechanics devices. Ex: Automatic Curtains, a thermo-controlled fan for summer, and everything in wich your imagination can get into with motors.


