

Introduction: Spider Robot With Arduino - Araña Robótica Con Arduino


This instructable is created to build a spider robot with arduino UNO and basic homemade pieces, There's an option to connect it by bluetooth
Este instructable es creado para construir una araña robótica con arduino UNO y materiales básicos, se tiene la opción de una conexión de bluetooth.
Lista de materiales/ Materials list:
- Arduino UNO x1
- Servo Controller 16 pins
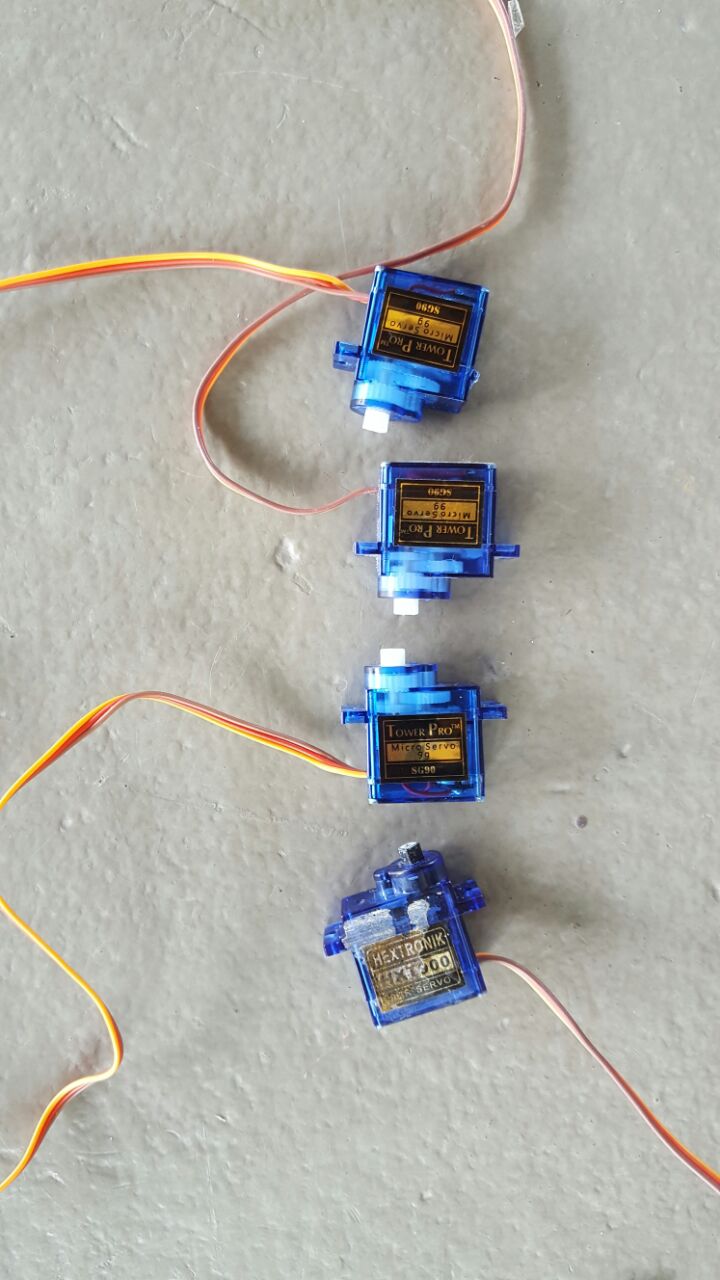
- Microservo 9G (SG90) x12
- Balsa wood - Madera de balso
- 12v battery or connector with ground - Batería 12 v o conector con polo a tierra
- Wood screws - Tornillos para madera
- Crazy glue or similar - Pega loca o similares.
Step 1: Step 1: Cut and Prepare the Wood

First, you need to cut a 10cm x 8 cm piece of balsa wood, the arduino UNO will be assembled to this piece, it will be the center of the spider and it has to be stable.
Then, cut 8 pieces of 7.5cm x 2.5 cm, those will be the spider legs
You also need to cut 4 pieces of 6cm x 1cm, those will be the spider articulation parts.
Se debe cortar una pieza de 10 cm x 8 cm de madera de balso, en esta irá ensamblado el arduino UNO, esta será el centro de la araña y debe ser estable.
Luego, cortar 8 piezas de 7.5cm x 2.5cm, estas serán las patas de la araña.
También cortar 4 piezas de 6cm x 1 cm, estas serán las articulaciones de la araña.
Step 2: Step 2: Assemble the Arduino
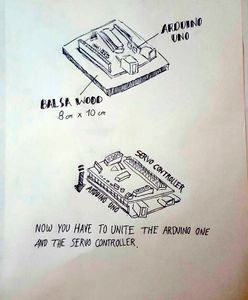
First, Assemble the arduino to the central piece of wood, you need to use 4 screws to attach it.
It has to be stable and centered
Primero, Ensamblar el arduino a la pieza central de madera, se necesitan 4 tornillos para ensamblarlo.
Debe ser centrado y estable
Step 3: Step 3: Ensemble the Legs

Each leg servo needs to be glued to a wood piece, the first group of 4 servos that makes the horizontal movement goes to the central wood piece.
Then, glue a leg piece to each servo of the second group of 8 servos, those will be the inferior parts with vertical movement, 4 with the servos left-oriented and another 4 with the servos right-oriented
Cada servo de las patas debe ser pegado a una pieza de madera, el primer grupo de 4 servos que orientan el movimiento horizontal va pegado a la pieza central de madera.
Luego, pega una pieza de madera a cada uno de los 8 servos restantes, estos serán las partes posteriores con movimiento vertical, 4 servos orientados a la izquierda y otros 4 a la derecha.
Step 4: Step 4: Assemble the Movible Parts

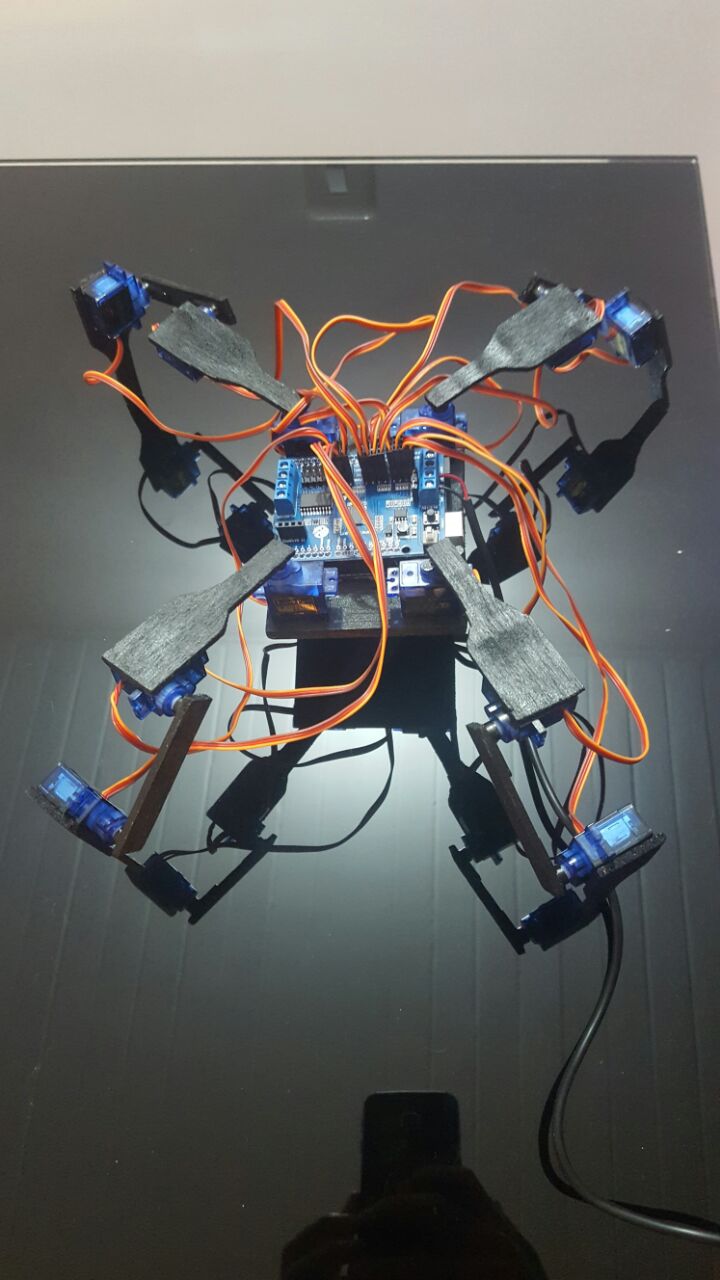
Step 5: Step 5: Join Everything and Wire


Now, you have to attach each of the legs to the body, as the image shows, and wire it to the arduino controller, each leg in one of the ports. Each servo group must go in 3 different pins, the base goes in 1,4,7 and 10, the first articulation goes in 2,5,8 and 11, and the last one goes in 3,6,9 and 12
Ahora, debes vincular cada una de las piernas al cuerpo central, como la imagen muestra, y cablearla al controlador de servos, cada pata en uno de los puertos. Cada grupo de servos debe ir en 3 pines diferentes, la base se conecta a los pines 1,4,7 y 10, la primera articulación se conecta a los pines 2,5,8 y 11, y la última articulación se conecta a los pines 3,6,9 y 12.
Step 6: Step 6: Code.
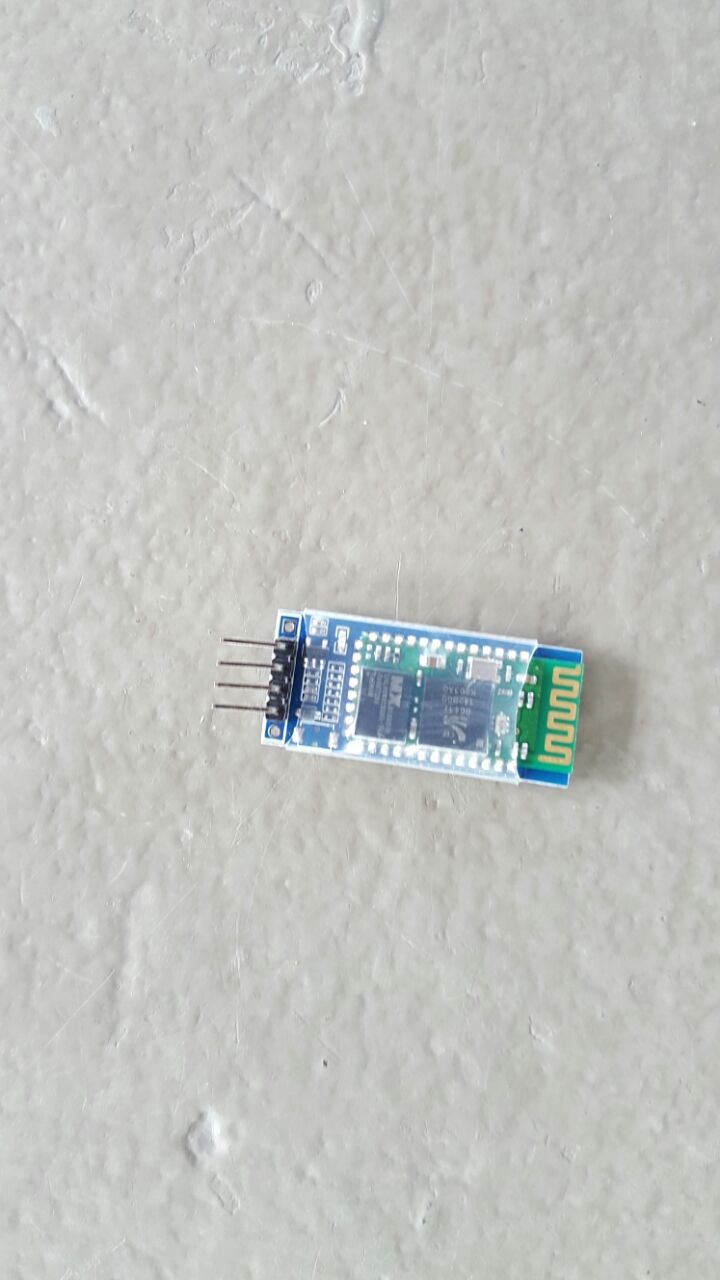
Now you have to put the code on the arduino, you must assure you don't have plugged yet the servo controller, plug in the arduino to the computer and upload Spider_open_v1, if you have experienced before with the bluetooth, you can also use the spider_open_v3 to controll it via bluetooth.
The code is programmed to do the following basic movements in sequence
- stand up
- move forwards
- move backwards
- shake the left hand
- turn
Ahora debes correr el código en el arduino, para esto debes asegurarte que el controlador de los servos se encuentre desconectado, conectar el arduino y subir el código spider_open_v1, si tienes experiencia con el bluetooth puedes utilizar el código spider_open_v3 para controlarla via bluetooth
El código está programado para realizar los siguientes movimientos básicos en secuencia
- Levantarse
- Moverse adelante
- Moverse atrás
- Agitar la mano derecha
- Girar

Step 7: Final Look
After painting it looks like this, now wire the servo controller to a 12v battery or DC module
Luego de pintar, debe lucir así, ahora conecta el controlador de servos a una batería o una fuente de poder de 12 V


