

Introduction: Spun Steel and Waterjet Cut Sculpture #2


This is a sculpture that I designed and built during my residency at the Autodesk Pier 9 Workshop. The piece was inspired by the examination of how molecules are held together by covalent bonds. If you'd like to re-visit some high school chemistry lessons, here's a Wikipedia entry on covalent bonds, also known as molecular compounds:
https://en.wikipedia.org/wiki/Covalent_bond
The concept is fascinating, but what I'm really after is making a good sculpture that has compelling formal qualities. Onward.
Step 1: Modeling the Sculpture


I began modeling the sculpture by intersecting hemispheres and performing several boolean operations to arrive at a composition I liked. The piece turned out to be pretty complicated, especially if you look at the exploded model in the second photograph in this step. That's a lot of parts! After the modeling was done, I contacted Roy at RW Metal Spinning in Hayward, CA to spin the hemispheres. Here's a link that shows Roy Gonzales spinning a part in his shop. After the parts were made it was time to start fabricating.
Step 2: Making Patterns


By taking the dimensions and location of the intersections from the model, I was able to generate a series of flat patterns to mark the hemispheres for cutting. Intersecting hemispheres will always create a 2 dimensional circular pattern. I used the laser cutter at the Pier 9 Workshop to cut a series of 1/4" wood patterns that I used as templates to mark the hemispheres for cutting. I carefully marked the flat edge of the hemispheres in degerees, measured from known points to locate the circular patterns and marked it with a sharpie (still one of the best tools around).
Step 3: Tool Paths and Test Cuts


The sculpture consists of sections of 6 hemispheres in 3 different sizes: 16", 10", and 8". Circular patterns needed to be cut in some of the hemispheres to allow a corresponding dome to "nest" in place at predetermined positions. I did some tests to determine if multi axis cutting was necessary and set about cutting through some small hemispheres at 90 degrees to the bed of the machine. As the cutting jet moved away from the center of the dome, the quality of the cut rapidly deteriorated. You can see what looks like a bad torch cut in the first photo. So, multi axis cutting was necessary after all. There was initially some discussion with the shop staff about using Intellicam, an advanced Computer Aided Machining application that can generate 2D and 3D tool paths but we decided that cutting with the A jet would do the trick. The A Jet (OMAX actually refers to it as "Tilt a Jet"), allows the cutting head to tilt and swivel to create beveled cuts which is what I needed. Generating the tool paths was easy since the shapes being cut were simple circles. The tricky part was determining the angle of the cuts and creating fixtures for the pieces that would solidly hold them at the proper level. The Z travel height is less than 5" on the Pier 9 Water Jet Cutter and most of the parts that I had to cut were taller than that.
Step 4: The a Jet and Testing


After the paths were generated, the A Jet needed to be enabled and a taper offset entered into the proper field. Note that a negative offset taper bevels the cut so that it is wider at the top of your media. The OMAX literature stated the opposite so always do tests or at least dry runs to make sure you're beveling the right way. I was pretty certain that I was going to break the cutting tip of the water jet cutter by colliding with a steel dome. So, one of the awesome shop staff members (Martin Horn) suggested making a dome out of light weight plastic that would simply slide along the slats of the machine if the head hit it. You can see the lovely plastic thingy in the second photo which was made by heating the plastic with a heat gun and laying it over a hemisphere. If you wanted to be super cool, you could vacuum form the part but I haven't learned how to use the vacuum former. In any event, the plastic dome like thing at least let me run the tool path without being too concerned that I would break the machine.
Step 5: Fixtures and Work Holding


I didn't anticipate this step being as onerous as it was. The first jig was made out of angle that, after tack welded to the hemisphere, resembled a Battle Bot of sorts. It was a bit time consuming but the flanges sat evenly on the cross bracing of the machine and easily clamped in place. Then I realized that I had a heavy steel plate with a circle cut out from an earlier failed cut. That part was cut so close to the edge that it "peeled" away during the cut to create a spiral pattern which was actually really nice but wasn't going to work for the sculpture. I tacked the flat pattern to the dome and had it clamped in place in minutes. If I make more of these, this is the way I'll fixture the parts to the table.
Step 6: Dry Runs and Cutting

Now that the tool paths and fixtures were done, I was ready to cut my parts. Getting the cutting tip lined up for my first cut was tricky so I developed a crude but workable solution that became fairly efficient by the time I moved on to my second part. Since the part to be cut was higher than the head, I had to be cautious not to 1) break the tip and 2) make sure that the rotating head would not collide with the part during its homing and cutting operation. So, I moved the head above the center of the dome and fired a low pressure, water only test stream to get a rough idea of how close I was. From there I could send the head to it's home position where it would begin its initial traverse. I then sent the head to various spots on the cutting path while staying above the part to be sure no collisions would occur. At each spot on the path a test stream was fired and I was able to move the head in small increments along the x and y axes to make sure the cut would occur at the correct location on the piece. Keep in mind that the A Jet had not been enabled yet. Once the cutting path was verified on the x y plane, I moved the head to a spot on the path and lowered it (Z down) to establish a good standoff. The A Jet was then enabled and I ran numerous dry runs an 1/4 and 1/2 speed which allowed me to get a good look at the standoff of the tip around the entire piece. I made a few more slight adjustments on the xy plane and finally was able to establish a good distance from the part to the cutting tip. Finally, the time had come to cut the part.
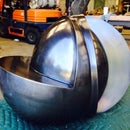
Step 7: Fit Up


I gathered my parts and began to fit them together. One of the trickier aspects of this sculpture was that it needed to be built from the inside out. The inner most element is "captive" and couldn't be slipped through an outer hemisphere. So I tack welded the center together and began assembling outward. I used a 3D printed model and measurements as reference to locate the pieces. It was important that the hemispheres looked like they were interpenetrating and to insure that was the case, I drilled some small pilot holes in one some of the larger hemispheres so they could be used to register corresponding sections.
Step 8: Fabricating


After making sure everything fit together, I can began tacking the entire piece together. There was one spot that required a little extra work as the cut hole was a little too big to receive the corresponding hemisphere. To fill the space, I placed a welding rod in the joint, tacked it in place, and bridged the gap. One of the things I love about metal fabricating is that material can be added to your work piece, making it a forgiving medium. I continued to skip weld the entire piece, evenly distributing the heat to prevent hot spots, until the sculpture was fully welded. On to grinding. Ugh.
Step 9: Metal Finishing


A good fabricating job can be totally screwed up by poor metal finishing. As a result, I tend to be compulsive about this step of working the sculpture. I started dressing the welds with a 120 grain sanding disk and a 4 1/2" angle grinder. This makes quick work of the welds that are accessible by a large tool. For areas that were more difficult to reach, I made use of the best metal finishing tool in the world: The Dynafile. The Dynafile is a mini belt sander with a variety of attachments that can dress all sorts welds and shapes. By using a 4" wheel with a 1/8" wide belt, I was able to grind interior fillet welds with relative ease. I also used a pneumatic angle grinder with a 1 1/2" disk to reach some of the interior surfaces. I sarted dressing all the welds with 120 grain disks and belts and then moved to coarse and finally, medium scotch brite abrasives. The last step before patina will be to hand finish the piece with a coarse scotch brite pad.
Step 10: Stripping Mill Scale


There was still a little mill scale on part of the sculpture that needed to stripped prior to applying the patina. A solution of muriatic acid works well by dissolving the dark gray scale and exposing the bare metal beneath. Muriatic acid is is gnarly stuff so wear rubber gloves, use in a well ventilated area and have clean water ready to rinse the piece. I started by adding 1 part muriatic acid to 3 parts water (always add acid to water and not the other way around) and liberally applied it to the piece. Using a coarse scotch brite hand pad, I scrubbed the surface and the scale started to slowly dissolve. After the piece was stripped, I thoroughly rinsed and dried it. The big draw back of using muriatic acid is that the steel starts to immediately rust. If possible, be prepared to apply your finish as soon as you've completed this step.
Step 11: Naval Jelly


Since the sculpture was rusting before my eyes, I decided to use some Naval Jelly to remove the rust. Naval Jelly is referred to as a "rust dissolver" but that's a little misleading. The active ingredient in the jelly is phosphoric acid and instead of dissolving the rust (iron oxide), it converts it to iron phosphate which is much more stable. Apply it by using a brush and lightly scrubbing with a scotch brite pad or cloth. Let it dry for a few minutes (longer if your trying to remove heavy rust) and rinse it well. You can repeat this step until the rust is gone. If you don't move to your patina quickly, the piece will get rusty again in short order as a result of all the water that has been applied to the bare steel.
Step 12: Patina


Well, this is the part where I describe and document how the patina, gun bluing in this case, was applied. But, while preparing my bluing solution, I dropped my iphone in a bucket of water rendering it useless. So, I've used a video link from an earlier Instructable that shows how I applied the bluing to another piece. I often use Birchwood Casey Presto Black to darken steel. It's concentrated so you can dilute it with water to the strength you prefer. A strong solution will reveal darker and cooler bluish tones, while a weaker solution will bring out more browns and a warmer look. I recommend wetting your piece first which allows the bluing to sluice over the piece to reduce streaking. If the piece is small enough, dipping is a good way to achieve a uniform finish. If it's too big to dip, the bluing can be applied by spray bottle, brush, soft cloth, steel wool, scotch brite or any other technique that you want to try. I used a fine scotch brite pad to apply the solution, working the entire piece and scrubbing it until I arrived at the look I wanted. It's very important to thoroughly rinse and dry the piece to prevent unsightly rush from appearing again! And if you drop your phone in a bucket of water, here's a link on what to do: https://www.gazelle.com/thehorn/2014/05/06/gazelles-guide-water-damage-truth-rice-galaxy-everything/
Step 13: Waxing

After the piece was dry, I gently heated it with a patina torch to make sure all of the moisture was off the sculpture. I generally wax my scuptures with a carnuba based wax but linseed oil or shellac also works well. To apply the wax, brush a light coat on the entire surface, let it dry for a few minutes and buff it out with a soft cloth. Repeat this step and your piece will be looking good. To maintain any metal sculpture, waxing once or twice a year will do wonders to preserve the patina.


