

Introduction: Stack-Able LED Cubes (RGB)


I made this project for the make it glow contest 2018. The idea is that the would be a base where you could put little LED cubes on top of and they would light up. They would stick together with the use of magnets.
Step 1: Thinking the Idea Through
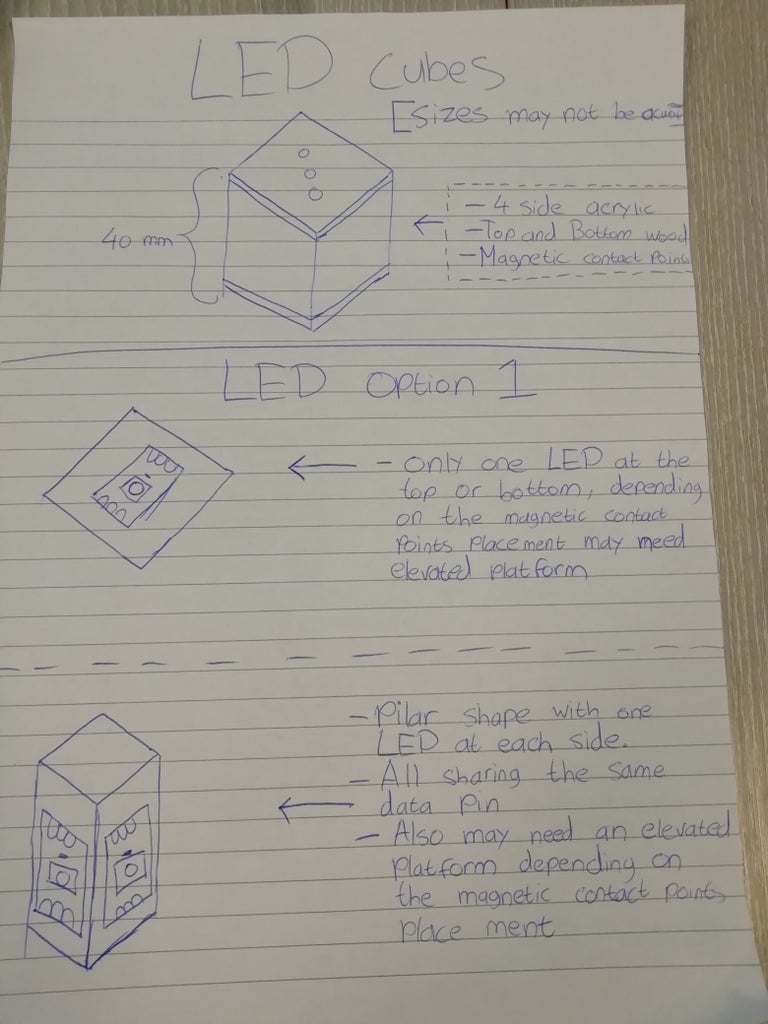

I thought through a couple of ideas and wrote them down. I was quite certain about the base design, a 50mm x 50mm x 50mm cube, an acrylic rectangle with a piece of wood (in this case MDF) on the top and bottom. To make the cube as bright as possible I thought that it would be best to make a pillar in the middle with on each side a LED. This turned out to be way too tiny to work with (for me).
Step 2: Cutting the Acrylic


This was the first time using acrylic so I didn't know what the best way to cut it was. I tried it with a jigsaw and with a knife. I found it was easiest for me to cut it using the jigsaw with a fine blade and a slow setting. I cut for each cube 4 peaces of acrylic(3mm thick). 2 pieces of 38mm x 50mm and 2 pieces of 38mm x 44mm. the height was 38mm because the MDF I used was 6mm thick, I used one piece on the top and bottom so that's 12mm in total.
Step 3: Cutting the MDF and Making Holes


As I mentioned earlier the MDF I used was 6mm thick. every piece I cut was 50mm x 50mm. I drew a diagonal line and marked the center point, from that point I drilled 2 holes, 30mm apart from each other. From those points I drew a straight line and drilled another hole where the two lines met.
Step 4: Cutting Was Done

I cut 4 piece of MDF and 8 piece of acrylic in total to be able to make 2 cubes.
Step 5: Frosting the Acrylic


I wanted the light to be a bit diffused so I sanded down the pieces of acrylic to make them appear a bit frosted. I made sure the the sanded down faces were the on the inside of the cube.
Step 6: Gluing the Acrylic Pieces

To glue every piece together I used epoxy, this was the first time I used it and it worked remarkably good.
Step 7: Attaching a Magnet to a Nail


This was a tricky part. You can't solder a magnet because a magnet will lose its magnetic ability when heated above 80 degrees. I tried to using hot glue around the edges but every time I connected another magnet and pulled them apart the magnet wouldn't stick to the nail. To fix this I used epoxy again instead of hot glue. I only used magnet for the bottom of the cube. On top I used nails with a larger flat head so there would be more surface for the magnets to connect to the nail.
Step 8: Adding the LED and Wires


I started with using thermoplastic connectors to easily connect the wires to the nails. Soldered the wires to the LED which I cut from a WS2812B LED strip. I almost always checked if the connection was attached correctly after attaching a new wire using a multi-meter. Because the LED will be shining one way I used silver foil on the MDF pieces to try and reflect as much light. after everything was put in place I secured it all with hot glue for good measure.
Step 9: Putting Together the Cubes and the Base


This was pretty straight forward, putting epoxy on the the bottom of the acrylic to secure the base and afterwards securing the top. For the base I made one MDF piece with the 3 contact points. This one was put on top of a simple cardboard box where the arduino uno was hidden. To power the arduino I used the included usb cable, also used to program the arduino uno. For the code I used the strandtest example from Adafruit neopixel.
Step 10: Testing!


After all those steps it was finally time to put together the full tower. and it works!!
Step 11: Version 2.0

I wanted to make this project a lot bigger but because of the time I'm going to make a version 2.0
The plan is to make a 3x3 grid from wood with contact points, including a on/off switch and an input for power. For this platform I want around 20 cubes so you can stack them in different configurations. Also the cubes need improvements:
- Because there are 3 contact points the one corner with no contact point is weak and so the tower becomes less stable.
- Cutting the acrylic with a circle saw may allow to make a better cube with less obvious corners.
- You can only place the cubes on way on top of each other, for version 2.0 I want to think of a way where orientation doesn't matter anymore.
If you have any thoughts or suggestions for version 2.0 feel free to tell me :)

Participated in the
Make it Glow Contest 2018


