

Introduction: Stove Top Flatbread


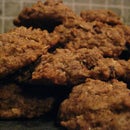

There is nothing like the taste of freshly made flatbread. My great grandmother came from Beirut, Lebanon and brought with her this recipe which she shared with my grandmother who in turn shared it with my mother and then it came to me. It is very simple to make with inexpensive ingredients and can be used as a wrap, as flatbread pizza or as an accompaniment to any meal.
It's made on top of the stove with a non-stick pan and a lid. The bread cooks completely in about one minute. I usually get roughly 20 - 8" diameter flatbreads from this recipe. The amount will differ depending on how large you make them and you can roll them out thick or thin. Whatever is your preference.
Here's the recipe:
- 3 Cups Warm Water
- 1 Tbsp Active Dry Yeast
- 1 Tbsp Honey
- 2 tsp Kosher Salt
- 6 1/2 to 7 Cups All Purpose Flour
- 2 Tbsp Extra Virgin Olive Oil
Other needed Items:
- Bowl for mixing
- Pot that mixing bowl fits on to use as proofer
- Non-stick pan with lid
- Rolling Pin
- tongs
- large towel to hold finished bread
Step 1: Activate the Yeast


This is my tried and true method for getting yeast ready for use in baking. I admit that I ignore any recipes that have me placing all the ingredients together and letting them sit. I always activate the yeast in a recipe this way.
- Fill your pot with the hottest tap water that comes out of your faucet. (make sure the water is not high enough to touch the bottom of the mixing bowl...that would make the mixture too warm)
- Place your mixing bowl onto the pot of hot water.
- Place the 1 Tbsp yeast in the mixing bowl.
- Add the 2 Tbsp of honey.
- Add the 3 cups of warm water. (Don't worry if the water is not warm enough, the heat from the bowl below will warm it to the correct temperature)
Now let your mixture sit for about 10 minutes to get frothy.
Step 2: Mix in the Rest of the Ingredients

Now that your yeast mixture is frothy, it's time to mix in the rest of the ingredients.
- Add in 2 tsp Kosher Salt.
- Add in 2 Tbsp of Extra Virgin Olive Oil.
- And finally add in the flour a little at a time. You want the dough to remain soft but be a little sticky.
Now you can use either your hands or a dough hook on your mixer to knead the dough for a few minutes.
Gather your finished dough into a ball. Coat the bottom and sides of your bowl with oil and roll the dough around so it is coated completely with oil. Cover your bowl with plastic wrap and set back on a fresh pot of faucet hot water.
Step 3: Making the Flatbread


Now that your dough has doubled in size it is time to make the flatbreads.
Gather your needed equipment. I place the board that I roll my breads on next to the pan and then my towel off to the side. Like an assembly line. I do this because these breads cook so fast that as the one bread is cooking you can roll out the next one. You won't have time to answer the phone or run to switch the wash. By the time you get back your bread will be burnt. I know from experience.
- Turn the flame on high beneath your non-stick pan and let it heat up.
- Punch down you dough.
- Sprinkle your work area generously with flour and sprinkle some on the top of the dough to make pulling pieces off easier.
- Pull off a piece of dough and tap it down into the flour. Flip it over and tap it into the flour again.
- Roll the dough out to as thin as you like. These will rise a little in the pan but not a lot.
- Place the rolled out dough into the pan and cover.
- It will only take about 30 seconds before it is time to flip the bread.
- Turn it over and cover again.
- After another 30 seconds your bread should be done.
- Place the bread onto one half of your towel and fold over the other half to cover your bread.
- Place the next breads on top of each other in the towel. The steam from the breads help to keep them soft.
- When you're finished with the entire amount of dough, place your flatbreads out for a few minutes to let them cool down. Then place them into a plastic bag and seal.
- These freeze and thaw great if you need to.
ENJOY!

Participated in the
On a Budget Contest


