

Introduction: (17) Subaru Forester L Solar Camper


Ooo Ooo For My Subaru !
This is the car without the crossbars that make up the rack.
My Forester L is a 5 speed stick all wheel drive from 2002.
It has 204,000 miles on it +/- and looks pretty good if you don't look at where that Miscreant Deer messed up my fender. Still it is not bad. I saw another Subaru Forester that has 300,000 miles+ on it so I have a ways to go with it.
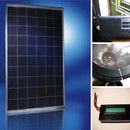
Step 1: Drilling and Mounting Panels


The car came with a Bicycle Rack I did not want so I drilled out the locks and tossed it.
I took a trip out to the junkyard and picked up a set of crossbars for the rack for $40. They are a pair with the thick side forward and the thin side aft like aircraft wings and slightly curved left to right being high in the middle.
Because the bars are curved the Solar Panels will be looking at 2 different parts of the sky. Do I care? No. I know the results of the panels not looking directly at the sun so if it don't bother me it should not be a problem for you.
This is an ok thing For Me.
I measured back from the leading edge an inch and scribed a line along the length of each crossbar. Then I determined where to drill holes to match the holes on the solar panels. Four 1/4 inch nuts and bolts tie the solar panels to the cross bars forward and aft.
The grey box in the middle was a telephone interface and was used in a previous project as a combiner box because I was too cheap to buy a real one. It is out as of now.
The four panels needed to be combined without the grey box so a Butt Joint was soldered to connect the four panels to positive and the four panels to negative leaving just two wires, a Positive (red) and a Negative (Black). The red and black wires needed to be lengthened. I stripped the ends and soldered butt joints to the short ends of each wire Black and Red.
Step 2: Mounting the Solar Rack

The Solar Rack assembly needed to be placed where it was going to live so that the place for the hole in the roof could be identified. Right now the Solar Rack is too far forward and needs to be pulled back to the rear of the roof. When that is done a black dot under the exact center of the 4 panels (+/-) is put on the roof with a permanent marker. The dot will serve as a marker for drilling purposes.
Next the Solar Rack is removed from the roof. With the dot exposed the drilling can proceed.
Step 3: Drilling the Hole in the Roof

This is a Milwaukee 1 1/8 (29mm) Hole Dozer.
It cuts holes in mild steel
Step 4: Mounting the Conduit Box

The 1 1/8" hole in the roof is just the right size to allow a snug fit to the down pipe on the conduit box.
This is the conduit box I am using to pass wires through the roof to the cabin of the car. I'm used Silicon RTV to stick the box to the car and a bolt through the bottom of the box to hold it tight to the roof. Small pipe is used to hold the waterproof packing material around the wires at the entry point. The hole in the roof is now waterproof.
Step 5: Next the Seats Go


The seats are out of the car now and it opened up the whole area to a lot more room.
The cargo area of the car will be for a kitchen area for inside or outside cooking.
Isolated from the cooking area will be the catbox as I am traveling with a cat.
Step 6: Plywood for the Bed Platform
The bed platform will be about 8 inches up from the floor of the passenger side front. The bed surface will just lay on top of the frame to allow access to the interior where canned foods will be stored. I used 2x8 wood for the frame. The wood was part of a very heavy headboard from a waterbed.
This is tall enough to handle quart canning jars I do pressure canning with.
There are no photos use your imagination to come up with something that says "You".


