

Introduction: Sun Printing Silk or Bamboo Scarves or Fabric


Dharma Trading Company has the Pebeo Setacolor paint, scarves, and much more. You will need a sunny, cloudless, calm day for it to print nicely. Mid-morning seems to work the best. Cold days do not work well either because it takes too long for the fabric to dry.
Note that the inside of the fabric will be lighter than the outside. Flat fabrics are the best to work with so if you want to make something like a bag, sun print the fabric first and then create the item. T-shirts can be difficult to match the front to the back and take a lot of paint. However, if you want to try it, put a flat board inside or stick contact paper to the inside so the paint doesn’t soak through both layers of fabric. Sun print the back first and then the front.
Step 1: Supplies

• Fabric such as cotton, silk scarves, bamboo rayon scarves
• Freezer paper for scarves
• Pebeo Setacolor transparent paint
• Foam brushes
• Bowls for paint such as Styrofoam or disposable food containers
• Objects for printing such as pressed plants, card stock cut-outs, etc.
Step 2: Gather Plants and Objects
Gather objects that you want to use for printing. If you want to use card stock shapes such as butterflies, print them out from clipart to card stock. Glue another piece of card stock to it to make it heavier and then cut out. I bought snowflake ornaments to make the blue scarf. Collect fresh plants, leaves, ferns, and flowers and press in a large phone book or use a plant press like I have shown. You only need to press them for 15 minutes or so. For larger plants, try pressing them between two large plastic box lids and setting a heavy object on top. I often use a case of drinks because it’s handy. Don't leave the plants between the plastic for more than a day because they will mold. Completely dry plants are not as nice to work with because they can be too light and will blow away. Also, thick flowers don’t work as well and may look like blobs on your fabric instead of flowers. Pay attention to the flat surface area of the item that will come in contact with the fabric. Ferns come out beautifully and show lots of detail.
Step 3: Prepare Fabric

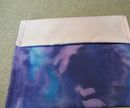
Iron your fabric. If you are using a cotton, lay it flat on a waterproof surface such as an old plastic lid or freezer paper. For the silk scarves, iron it to freezer paper leaving a few inches on both sides so that you can weigh it down outside. The bamboo scarves will not stick to the freezer paper so staple it right at the hem on all four corners. Make sure it lays flat.
Step 4: Painting


Pour a small amount of paint into a bowl. Pour about two or three times as much water as paint into the bowl and mix. Just eyeball it. You want to make it dye consistency. If you make it too diluted, it will not print as nice. However, you don’t want to waste the paint either since it can be pricey. You can buy Pebeo Lightening Medium to make pastel colors without losing its printing ability. The paints are mixable for an endless palette of colors and wash up with water. Unfortunately, they do stain fabric and it will not come out. This is great for color-fastness of the intended item but not great if you accidentally get it on the clothes you are wearing or in the wrong place. Paint the fabric with foam brushes. Feel free to use more than one color and make swirls, stripes, whatever. However, if you paint one color, you cannot go over it with another color and expect it to dry that top color. The first color will show through when dry. Cover the fabric completely.
Step 5: Printing


Carry the fabric outside and weigh down the edges of the freezer paper with something heavy so that it will not blow away. Make sure it is out in the sun and not shaded. Arrange your objects on top. Press the plants into the fabric so that it will stick better and not move before it is dry. I printed my name by using cutters in polymer clay. There is no need to bake it and you can reuse it over and over again. The card stock butterflies and dragonflies look black only because they were used hundreds of times and picked up color from the paints. You cannot set a rock on light items or you will get the print of a rock. Wait for it to dry. Silk scarves will dry as quickly as 10 minutes. Other fabrics may take an hour or more.
Step 6: Finish


Remove your objects and carry inside. Carefully remove the scarves from the freezer paper and remove any staples by hand so you do not ruin the fabric. Iron the fabric again to set the color. If needed, rinse the fabric to remove some of the stiffness, dry, and iron again. I did these projects November 1st with temperatures in the 50's. They took longer to dry and I did get impatient with it and removed some of the leaves before it was completely dry. Please note that wrinkles will print too. I still think it came out nice. You will get a nice blending of colors so even if you think you don't like your color combination when it's wet, you may be pleasantly surprised. I plan on making a sandwich bag out of the fabric. I have been selling scarves and other sun printed items at a local farmer's market. My website is www.wildcreekgardens.com.


