

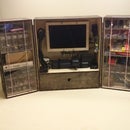
Introduction: Super Solid Minecraft Redstone Lamp


UPDATE: I've changed the design to match the template required by Ponoko for those that want to try the service. However, the cost was quite high (around $100!). So I've made a second version without the etched lines (but still with the cutouts) to try to get the costs down. The cost to have the NoLines version cut is about $50. I was thinking maybe the lines could be drawn on after painting. The spacing is 1cm apart in each direction. The material is MDF - Natural 6.4mm P3 - 790.0mm long by 384mm wide.
Disclaimer: I have never used this service, and I can't make any promises about what the final product will look like, or if it will fit together. The thickness of the material indicates that it should work, but try at your own risk.
Intro
There are many excellent Minecraft lamps out there. Most of the designs I've checked out have been made out of cardboard or foam, which have a lot of benefits, but I wanted to build something a little more durable, and perhaps a bit larger.
Design
This lamp is made to be built with a laser cutter. The pattern could done with a scroll saw and drill if you're a masochist, I suppose.
Aside from wanting something solid, I also wanted to be able to access the inside of the box on occasion (to change the light bulb, or even change the colour if you want). Like my other laser cutter projects, this was designed using the free Inkscape software .
I have a good description of installing Inkscape and the Maker extension on one of my other instructables that should have enough info if you want to modify my design, or make your own from scratch.
Step 1: Tools and Materials


Tools
Laser cutter! - we'll use this to cut and etch the sides
X-acto knife - used to trim the edges of any uncut plywood
Scissors - used to the cut the red plastic
Small file - We can touch up the tabs on the box to make sure the fit is perfect.
Multibit screw driver - to screw in lamp and attach the small bolts to hold in the bottom plate
Spray glue - to attach the red plastic pieces.
Materials
1/4" baltic birch plywood 500mm x 340mm (~$25 this was left over from another project)
Can of Tremclad Rust spray paint - obviously we don't need to worry about this rusting, but there's an additive in this paint that gives the surface a very nice texture. ($12.00)
Red translucent 'View Folders' - these are basically thin see through red plastic folders. ($3.00)
Light socket and cord - I used the Gransta LED light from Ikea ($16.00).
#8 3/4" wood screws x 2 - these will attach the light to the bottom plate.
#4-40 nuts and bolts x 4 (optional) - these can be used to secure the bottom plate on more if require
Small piece of adhesive Velcro (optional) - this is used to keep the small power supply box from rattling around inside
Small adhesive rubber feet x 4 - for the light to sit on!
Step 2: Cut and Fit the Parts


This Instructable will use the box_solidbottom.dxf file. Note that I've included two additional DXF files for folks that want to try having this cut with the Ponoko laser cutting service - one that includes the etched lines, and one that doesn't. The only difference between box_solidbottom.dxf and box_solidbottom_Ponoko.dxf is the layer names and the border around the box parts.
This DXF file is in millimeters. The resulting cube is roughly 16cm on each side (or just over 6 inches). This design is for 1/4" baltic birch. If you scale this up or down, the tabs will no longer fit properly.
Send the file to the laser cutter. On the 80 watt laser at the Vancouver Hackspace, I used speed of 50 and power of 20 for the green etching (done first), then power 70, speed 7 for the blue outlines (done second), and power 70, speed 70 for the black edges (done last).
If you don't have a laser cutter, you have two options:
1) Go seek out and join your local maker space! They'll give you access to a whole new suite of tools, and the skills to use them! Really. Do it now!
2) Use an online service like Ponoko to have the wood cut and shipped to you.
Once the pieces have been cut, give them a light sanding to remove the laser residue. If any of the parts did not get cut all the way through (this happens sometimes due to glue or other irregularities in the plywood), use the x-acto knife to cut through.
Do a test fit without glue. It's ok if the top parts are a bit tight, but you might want to use the file to take a bit off the tabs if they're too tight. Make sure the bottom plate is not overly tight.
Now glue the sides and top of the box together. There are two things to remember when putting this together:
1) The bottom plate is not glued on. It is held in place with screws. If you glue it on, you're going to have a rather difficult time getting the light on there and getting the plastic in.
2) Since the bottom plate is not glued on, you have to pay attention to the sides that have the cutouts for the screws. The tabs with the holes in them line up with the slots on the bottom tab. Other than that, the sides can go in any orientation they will fit.
With this in mind, glue up the top and bottom. Apply wood glue to the tabs and fit the pieces together. Once it's all together, tap the edges gently with a hammer to ensure everything is in place. Stick the bottom piece on there to ensure that the the cube will maintain it's shape, but again, no glue.

Step 3: Paint!


Once the glue has dried, we can paint the box. Attach the bottom with the screws. Hang it by a corner in a well ventilated area. Give it a light, even coat all over. Once that dries, go over it again. I find about three coats does a pretty good job.
Notes:
1) I paint the whole thing one colour, but to really add a bit of detail, you could hand paint some of the squares different shades of grey with some model paint and a brush.
2) I've found that this particular paint has a great texture, but it also seems to rub off a bit even after it's dry. If you want, you could coat it with a bit of urethane to protect it.
3) If you plan on using a different light with different mounting holes, you can fill the two small holes in the base plate with a mixture of glue and sawdust before painting.
Step 4: Install the Light


Now that the box is assembled and painted, it's time to screw the light to the bottom plate. Remove the bottom plate. I used a chisel in the picture. Screw the #8 3/4" wood screws in the existing holes in the bottom plate. The holes are a bit small, so be gentle. Screw them in just until the tip pokes through. Then line the light up and continue putting in the screws. The holes will match up perfectly with the mounting holes on the Ikea puck light. The power system is a bit odd. I just try to keep the weird power block thing inside the box.
Feel free to use any other type of light you want. The holes in the bottom plate were left small on purpose so that they could be easily filled with a little wood glue / sawdust mixture. Keep in mind that the inside of this box will be covered with plastic, so any lights that you use should not generate a lot of heat. I have built one with a smaller incandescent bulb in it, and it seems fine.
Put the bottom aside for now.
Step 5: Glue in the Translucent Sheets


The inside of the box will be approximately 140mm x 140mm. Though most of the sides can use smaller pieces. Remember, you really only have to cover the openings. Mark and cut the pieces to size with scissors. Keep an eye out for any weird decals or cut outs in the plastic. Then I carefully sprayed the inside with glue and stuck the plastic in there. This is the hardest part. My process was to do each side, then the bottom. If the plastic touches the wood, it will stick instantly. You can remove it, but it'll leave glue residue on the plastic.
You can use any colour you want of course. Because the bottom is solid, no plastic is required.
Step 6: Attach the Bottom Plate


With the plastic installed, we have a few more small details to take care of. First, I decided to stick a little bit of Velcro on the mini power supply box to keep it from rattling around inside. Then route the rest of the power cable out through the little cut out. At this point, you can pressure fit the bottom on. This is probably good enough unless you have really rough kids. If you do, you may want to attach the 4 4x40 1/2" bolts.
Slide the bolts through the holes in the tabs, but don't push them all the way through. Stick the nuts in the slot, then push the bolt through until it makes contact. Then screw it in until it pulls the nut (and consequently, the whole tab) in tight. Be careful not to over tighten.
Finally, you may have noticed that the two screws that hold in the lamp cause it to be slightly off balance. If you can't live with that (like me) then stick a few adhesive rubber feet on. I put a tiny little dab of gorilla glue to help them last longer.
Enjoy your awesome new lamp!!

Participated in the
Fandom Contest


