

Introduction: Table for Circular Saw - 55$


I want to describe you my process of creating the table for circular saw, after what I will show you how I built starting fence, dust collector, how to see if everything is square. We will go step-by-step and I will try to explain the best I can, and everything is going to be covered with images or videos. Before this setup I was using a bad table, 50-60 years old, and everything I put on top was dancing around. The idea was to build durable table for circular saw, but the only problem is if you want to build more rigid, than you need to get a thicker top for circular saw, but if you have for instance 25mm MDF than you'll lose height for cutting. I chose to go with 25mm MDF laminated on both sides.
Costs (without machines):
- Pine: 20$
- MDF 1x1.1m: 30$
- Screws 200pcs 4x50mm: 5$
Tools you need:
- Circular saw
- Table saw
- Drill/Driver
- Orbital Sander
- Measuring devices and square
- Planer
- Thicknesser
Step 1: Preparing Wood Legs and Marking


At the moment I don't have enough cutting height on my Makita 5704R circular saw, so I take pine beams to my friend Božo to help me cut everything to size. Stipe is in woodworking over 20 years and I really like go to him to see on what project start working so maybe I can help him. The table legs we chose to be 90cm in height and beam is 100x100mm (4x4 inch), it's easier for me to push wood on higher table maybe you will need to change the height for you, also you need to count in the height of the table top that you are going to put on the complete construction.
We mark everything for cutting holes for tenons.
Step 2: Drilling Holes


Božo was in metal industry before he started to work with wood, and he built himself a tool from one motor and crossing table, tool that has only one purpose - drilling mortise. So he set me a machine and I drilled everything. Just to mention, we marked mortise 100mm (4inch) from the bottom. Also we were drilling all the way through wood so we could put the wages on the other end for the joint be as tight as possible. You can see the process on images or video.
Step 3: Cutting Support for Table


Next on the list were tenon support sides 80x50mm (3x2 inch). We cut everything on the table saw, and used file to create rounded shape so it can be placed inside the hole on wood legs. We used 8 of that, 4 longer and 4 shorter pieces. Table top is going to be 1000x1100mm (40x44 inch). Next was gluing, first we glued the shorter sides and than the longer ones.
Just to mention, the top support is designed to connect in the middle part of pine beam, because of that we cut at 45°. The bottom support is connected with wedges.
Step 4: Base Construction Is Finished


Base construction is done, so I give it a little bit of sanding just to remove the glue from joints.
Step 5: Table Top Flex With Thinner Material


This step is only to show you that if you put thinner material for the table top you are going to get the flex, especially in the middle part, this is why I choose to go on the 25mm MDF. This is from my old table where I was cutting wood. I payed for this Indicator about 10$ and find it really helpful to have in the workshop.
Step 6: Mounting Circular Saw


Time has come to try the circular saw on the thin plywood, just for testing. It's easier to destroy something that you will throw away anyway, than a new MDF. So I drilled 4 holes on the circular saw and put the screws. The next step was to create some sort of dust collector. I found some old bucket and drilled the top for the hose and one on side, it's better than having nothing. The hose was about 2-5$ for 1 meter. What we need to check now is the blade from circular saw 90° to the table. After you check everything for a few times you are ready to start :)
I put a power extender and connected the circular saw and vacuum cleaner on the same cable and by pressing on/off switch I powered both machines.
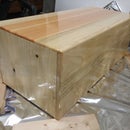
Step 7: Table Top


This step is probably the easiest one because you need to call the company who sells the MDF or some plywood and tell them the size of the piece that you need. After that you need to place the board on top of the construction, drill the holes countersink so that screwheads going under the top layer so the wood does not get stuck on your screws. If you're building the smaller size for your circular saw you can choose the thinner board but if you're going to do it like I did, on 1x1.1m, it's good to choose 25 mm MDF to prevent warping.
Step 8: Building Fence


It was time to build some fance that will be close to 90 degrees and that needs to have an option to adjust alignment of the fence if it's not good. So we started building it from hardwood. Design is really simple - you have one longer-thicker piece and one square hardwood where you need to create an L shape that was going to sit on this longer piece of wood. You can see in the pictures how it looks. I don't have any pictures of the building process, because it's a really simple job. It's probably better to have some friend or company that can help you put this piece of wood on a jointer or thickneser to get the perfect flat side.
Step 9: Some Weight and Shelfs


It's good to have some weight in the bottom of table to have minimal vibration when cutting. I built a few shelfs and one vertical board to get dust out and not falling on tools. Also I used wolcraft doveling jig (15-25$) to connect everything.
Step 10: Slidding Drawers


I had to buy an air compressor and nail/staple gun, I had some stuff to do on the house. This part can also be done with screws but I just put few nails to be faster. Drawers going in the table are for storing pushing stick, clamps and some other stuff. Tools are Bavavaria Bac 200/20 OF (170$ with 10m hose) and staple/nail Gun is Metabo DKNG 40/50 (220$).
Step 11: After a Month


At this moment I was really satisfied with everything, cut was perfectly straight, dust collector was working. I cleaned the workshop and took a few photos.
Step 12: Test Cuts on New Table


This is a few test cuts to see how straight it is.
Step 13: Vacuum Cleaner Die


This vacuum cleaner was given to me, because they bought a new one, and I was watching on him and cleaning regularly, but one time I forgot to empty the bucket from dust and vacuum cleaner started to suck dust. The bag exploded. I tried to fix it but with no luck, so it was time to buy a new one. I chose to buy a Parkside which is three times less expensive than a similar ones but with same specs, I even get the longer warranty than some better ones.
Also check the video what can do with the plastic bucket, you will probably need to purchase some sort of metal bucket.
Step 14: Bigger Bucket


Now it's time to create a bigger bucket. I put the 2 buckets one into another and on the top of the one I cut the bottom, and started to build better suction system, because on the old one I was losing a lot of air between hose and connectors.
If you don't have option to create big circle like me, I was cut one on the circular saw, look the video.
Step 15: Finished


What to say, if you build similar setup I want to see, maybe I can upgrade my table from you. For my table I plan to build a system like Biesemeyer Fence, Iron, drill bits, tapping and some oiling sit in workshop but I don't have enough time to start. My point is that you can't build this in one day, I was building this for about a month. So if you are a hobby woodworker, just pay attention to everything. This is how it looks after a few months apart from building it. :)
Step 16: Sketchup


For builders I create a Sketchup file with everything in this instructable, Pine legs are subtract so you can inspect everything and learn from this...if you find out some problem with file please type in comment and I will fix it. If you like what you see in this instructable you can also see my cherry coffee table that was build with this setup.


