

Introduction: Target for Mini Crossbow


Hi - this instructable adds to the mini crossbow a target. To encourage children playing with it, each arrow that hits it will be enough to let the target fall. Have fun !
You will need:
1) a sheet of paper (small, abt 3x3 inches).
2) glue
3) pens (feel free to make it colorful)
4) 1 toilet paper roll
5) a scissor
6) a way to mark circles (free hand or with lids as I did with the Pringles lid)
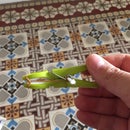
Step 1: Marking and Cutting the Target

As easy as this sound - see the picture. Feel free to mark as many circles as you want, a bulls eye, etc. I did only two circles and the bulls eye, enough for this small target.
Step 2: Make the Base for the Target


Cut the toilet paper roll to a size where the target fits in size / height. (You can use the full size if you wish).
At the bottom, cut the front and the back of the base as shown in the picture. This doesn't need to be accurate. The purpose is to let the target fall easily once hit by the arrow, so you will need to try with your fingers simulating the hit.
Step 3: Glue the Target to the Base


Now that you have the base and the target, glue them together.
Note to glue it on the front of your base, eg where you did cut the base to make it easier to fall backwards. See the picture.
Now you are ready - have fun ! ;)


