

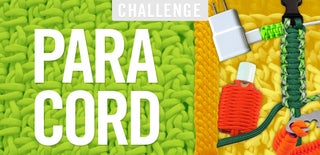
Introduction: Paracord Dog Leash - Team Colors


Who doesn't want to represent their favorite team when they take their dog for a walk? What dog doesn't want to show their true colors? This instructable, my first, will show you how to tie a paracord leash with your favorite team's colors.
This instructable represents a "Denver Broncos" leash, who unfortunately just suffered a large, season ending defeat. Oh well! Manning still rocks and I still want to show you how to make a leash.
I have made several of these in the past, but these photos simply are to show the procedure and do not actually show the building of a full leash. Rather they represent the steps to make one.
To get started you will need 550 paracord of your team's colors (Mine Orange and Blue). Where 550 represents the breaking strength in pounds of the cord.
There are many places that you can purchase paracord. I get mine from the local Army/Navy outlet store in spools of 1000'. I tie lots of projects mostly with the cobra pattern. If you do not fully follow along with my instructions rest assured that there is plenty of instruction on this site and others to help guide you in tying a cobra pattern. I will do my best though.
Materials needed are very minimal. Thus making this a project that anyone can complete.
I used blue and orange paracord (you chose your team's colors to replicate), a leash clip, a sharp scissors, and a pocket lighter. That is all that is needed.
Step 1: We Need to Cut Our Paracord to Length


I like to have my leashes at around 5' long and we need both ends to have at least 6" woaven into the leash to provide strength so we need to cut two lengths of cord at a minimum 6' long. I like to cut one length of each color just so that I am using up my reels of paracord at the same rate, but it does not matter. You can use any color you have available as this is for the core (center) and will not be seen.
I prefer to melt all of my cut ends so that they do not pull out. I do this with a lighter and hold it close to the end until it melts and then lightly touch the metal end of the lighter to the melted paracord end to seal it. This is probably the only thing to be careful of when doing this project. Molten synthetic cord is very hot and should not be touched with bare skin. It will burn immediately don't try it. The only other thing to be aware of is that tying paracord will cause blisters.
So we have arrived at a 6' core length times two ropes and now we need to cut one blue and one orange cord to create our outer cobra pattern. General rule of thumb is that 5" of untied will yield 1" of tied cobra pattern. This will vary depending on how tight you pull your knots. I like to really pull them tight.
With that said we will need to have a minimum of 25' of each color to fully cover our center lines and seal our handle and clasp to the leash. This is equal to 1" tied for every 5" of cut length. I would recommend going with 35' of each to give extra to work with and the scrap pieces if any can be used for bracelets and other projects.
Step 2: Knot It to Start


For this project we want to leave at least 6 inches of tail so that we can tie it back into the leash to make the handle structurally sound so that it does not pull out if you have a large dog. My little guy is only 15 pounds.
We add our orange 35' line to the middle of the two 6' lines and tie one end of the 35' blue line in a knot at 6" down the center lines to secure the two long lines to the center lines. I did my best to represent this is photos.
Start with the blue line underneath and wrap it over the front and over the op of the short tail. Come under and back through the hole and pull tight. REALLY TIGHT.
Cut the long orange and blue lines short right at the knot and seal with the lighter. Again holding the flame near the cut ends until the paracord melts and then seal it with the metal end of the lighter and not your fingers.
Step 3: COBRA Pattern


Now we tie the COBRA pattern for the entire length. Except we are going to interrupt the pattern to form the handle and further down the clasp. With the color pattern illustrated take the long blue line and fold it over the front of the center (core) lines. The orange line will then wrap over and under the blue line as illustrated. The orange will go behind the center lines and pull through the loop of the blue line on the opposite side. You will be pulling 35' of line through this opening so it takes some time and practice to perfect the method. This entire leash will take over an hour to tie even when you get the process down due to the length of the ropes you need to work with. Now our blue tail is on the left and we repeat the process. Blue line across the front, orange line over the top and pulled behind the center lines, then through the blue loop on the left side. See photos for help. If this does not make sense try to look up cobra pattern on this site to see if others better illustrate how to tie the pattern.
Continue to tie the same knots until you reach 12" from our starting knot and then stop to form the handle, covered in the next step.
Step 4: Forming the Handle


The reason that we left 6" of tail on the start of our tie is to form the handle. Now we take and wrap the tails back and hold them next to our center lines. See photo for help. I tied this example much shorter than the 12" handle length I recommend so this photo is not to scale, but the final photo in this instructable is to size if you need a visual.
So now that we have the tails wrapped back and held next to the main core (center) lines we are going to continue to tie our pattern. For the next 6" we will be tying over 4 lines instead of two lines. This will give plenty of strength to our handle. Remember to continue to pull all of your knots tight. I get blisters on my fingers every time I tie a lot of projects.
Continue to tie until you have passed the tails of the handle. In fact, continue to tie until you get down to about only 12" of the center lines remaining.
Step 5: Final Step Adding the Clasp


Now we will finish off the leash.
With about 12 inches remaining of the center lines add the clasp and wrap the lines back 6 inches. We will then continue to tie our pattern now again over the 4 lines instead of the two strands we have been tying over. This will lock on the clasp and complete our leash. I like to tie it down for a couple of inches and then cut the ends and pull them into the pattern until they disappear for a cleaner look. I hope the photos illustrate this well. I also like to tie down until I almost reach the top of the clasp.
The last knot is important, so make sure to give it a really good pull before cutting. It is the same as all of the other cobra knots. Just make sure that it is a tight one as it will hold everything together. Cut off the extra length and then we will seal and lock the knot with a lighter.
Lastly I have included a photo of a completed leash. The finished product looks great and is very functional.
All comments and questions are welcome. Thank you for viewing.
Step 6:
Participated in the
Paracord Challenge


