

Introduction: Teardrop Trailer


It seems that somehow the links to most of my build log pictures aren't working anymore on instructables, but you can see them all on my website https://sites.google.com/site/buildingateardroptrailer/ or, if that doesn't work, here is the link to the original album: https://photos.app.goo.gl/JXTDMPSGYRsSoCzE7
I contacted instructables and I'm working with them to fix this problem.
Each step is one day.
First of all, my day job is software programmer. This is my first build. I have basic knowledge of wood working and I have some tools. The build is going to take a while (a month? two?). I only have time to work on it from 8PM until I go to sleep (about 3 hours) and in weekends when we have nothing else planed.
My plan is to keep the price under $1500 $2000. You can buy already made teardrops for $4000-$11000.
My Hyundai Sonata can pull a trailer of 1000lb max. My plan is to make the teardrop be under 700lb with all the equipment inside.
The only size of plywood that I can bring home is 4'x8', so everything that's made of plywood should fit in that size.
Here is how the side wall of the trailer should look like.

A list of parts with links from where I got them:
- Trailer. I'm going to use the 4x8 Super Duty Utility Trailer from Harbor Freight Tools to built the teardrop on. On the time of creation of the website, the trailer was on sale for $350. I got in mail a %20 off coupon and that made the price $280. Note: If 4' wide is not wide enough for you, you can use this trailer . It's a little more expensive, but 1 foot wider.
- Doors. You can build your own door. I won't. I'm afraid that I'm not going to be able to make it water tight, so I'm going to use already-built doors. I was lucky enough to find two brand new doors for $230 both, from someone who builds teardrop as a business. Here is his business website, he sells anything you need for a teardrop, including kits and custom made teardrops ( http://www.dnmteardroptrailers.com/ ). Note: You can use only one door on one side, and a window on the other side. I got two doors because they were cheap and I won't have to step over my wife if I have to pee at night. You also can get them from eBay .
- Vent. I need a vent to put on the top of the trailer. I need one that's able to move lots of air (the door windows won't open on my doors). From my research the best vent is " Fan-Tastic Fan ". I already ordered one from eBay for $120.
- Hatch hindge. For the big door that lifts open at the back of the trailer. This should be water proof. I'm using a " Hurricane Hinge ". Already ordered from eBay for $71. You also can get it from here .
- Porch Lights. I need two porch lights to install above the doors. Ordered 3 from eBay for $63. 12V LED.
- Dome Light. I also need some dome light for the inside the teardrop. Already ordered from eBay for $17.99. 12V LED.
- Water pump. The best pump I found is the 12V Whale GP1352 submersible water pump. You can buy it from eBay for as low as $25.
- Hatch handles. Got those from eBay .
- Aluminum. I called around all the sheet metal places that I found in my area until I got the best price. I got mine from http://www.ircalum.com , they are from Portland Oregon.
- Aluminum Molding. Go here and click "Online parts catalog" then go to "Moldings"
- Sink/Stove combo. Got it from here .
Tools I use:
- Box cutter
- Pencil
- Framing square
- Wrenches. Big ones. You'll need for the trailer 16mm, 17mm, 18mm wrenches (I suppose this depends on what brand of trailer you are using)
- Wireless drill
- Jigsaw
- Chop saw
- Table saw
- Sander
- Belt sander
Cost so far:
| Trailer | $280 |
| Doors | $230 |
| Vent (Fan-tastic Fan) | $120 |
| Hatch hinge (5' hurricane hinge) | $71 |
| 12V LED Porch lights (3 pcs) | $63 |
| 12V LED Dome light (1 pcs) | $18 |
| Black spray paint (2 bottles) | $12 |
| 1/2"x4'x8' Birch plywood x 3pcs (one for the floor and 2 for the side walls) | $120 |
| 5mm Utility plywood 4'x8' x 2pcs (for side walls interior) | $23 |
| 2x4x96 x 8pcs (for the frame, not sure if I'll use all 8 of them) | $22 |
| Exterior screws (1box) | $8 |
| Henry Asphalt Emulsion (1 gallon) | $12 |
| Brush | $3 |
| Bolts & washers & lock washers & nuts to bolt the floor frame to the trailer (3/8" x 3" 20pcs) | $26 |
| Bolts & washers & nuts for spare wheel (1/2" x 6" 2 pcs) | $6 |
| Hard foam insulation 1/2" 4'/8' (one sheet) | $10 |
| Hard foam insulation 3/4" 4'x8' (3 sheets) | $30 |
| Sink-Stove combo | $187 |
| 12V Cigarette lighter socket (2 pieces) | $16 |
| Automotive Fuse Holder Box Holds 6 Blade Fuses | $14 |
| Electric Facet & Pump System | $50 |
| 1/8" birch plywood (3 pieces) | $70 |
| Molding | $16 |
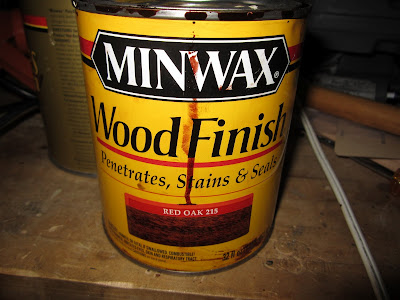
| Wood stain | $12 |
| Aluminum sheets 4x8 (1 pcs) 4x12 (2 pcs) | $170 |
| Aluminum molding, plastic insert for molding, External Drip Cap | $160 |
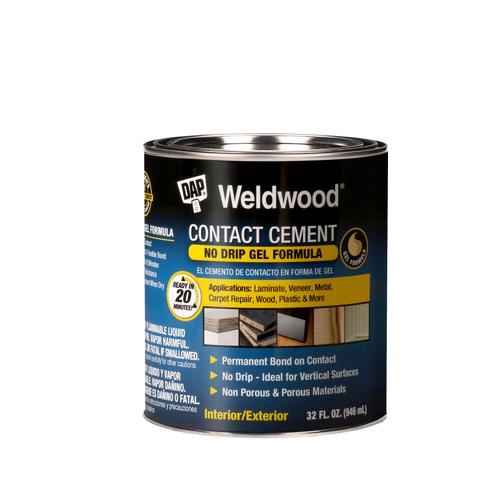
| 1 Gallon Contact Cement | $10 |
| TOTAL | $1759 |
Step 1: Day 1 - February 8th 2012
Feel free to click on the pictures to see them in full size for more details.
The trailer box opened. Looks small.

Lots of screws and parts.


Hmm. All the trailer parts look the same.

The trailer starting to get shape .

I had to go buy some more wranches, mine are too small. Enough for tonight.

I woke up in the morning with muscle pain everywhere. I discovered some muscle that I didn't know I had. Crawling on the floor trying to put a trailer together is not easy :-)
I'll have to paint the trailer frame black. Red with aluminum gray won't go nice.
Step 2: Day 2 - February 9th 2012


Step 3: Day 3 - February 10th 2012
The trailer is done. I installed the wheels and the trailer jack. I didn't attach the fenders yet, I'll do that when the teardrop is on top of the trailer.
To make sure the trailer is square, check all the corners to be 90º, and also measure from the tip of the tongue to the center of the wheels (the green lines in the image bellow). The measure should be exactly the same.

Here it is:

And the trailer jack:

And a detail of the wheels install:

Step 4: Day 4 - February 11th 2012
I'm hopping for good weather today. I have in plan to go and buy 3 sheets of 1/2'' 4'x8' plywood and 6 2''x4''x8'.
One sheet of plywood is for the teardrop's floor and two for the side walls.
If the weather stays dry and I can get them home, tonight I'll start working on the frame for the teardrop's floor.
Wish me luck.
----------------------------------------------
The weather was good. I got the plywood and the 2x4s.
I used the table saw to split the 2x4 in 2x2s:

And then the miter saw to cut them to length:

The floor frame (the plywood under the frame is there just to have a flat surface, is not connected to the frame):

Held together by metal angles. I got some good advice that I should use exterior screws (last longer when in contact with humidity), so I replaced all the drywall screws with exterior screws.
The picture shows the drywall screws.

... and a long screw:

This is how the frame turned out:

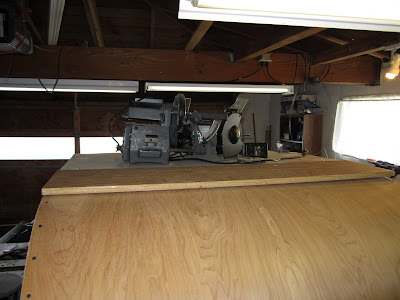
The 1/2" plywood that would be the flood of the teardrop on top of the frame, just to check the size and looks.
I had to cut a little piece on the side. The floor looks good!

Step 5: Day 5 - February 12th 2012


The following video shows the new speed control:


Step 6: Day 6 - February 13th 2012


Step 7: Day 7 - February 15th 2012
- Put the wood frame on top of the trailer, clamped to stay in place
- Tap it with a hammer where the frame rests on top of bolt heads that keep the trailer together (this will mark where the trailer's bolts are and you'll need to carve some spaces so that the frame will lay flat on the trailer)
- Use a 1" spade bit to make space in the wood frame for the bolt heads.


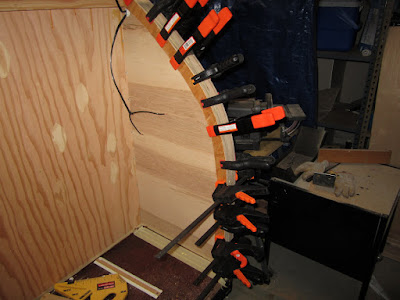
Warning: do not try to cut both walls in the same time, stacked together. Doest't work. One by one, slowly, works the best ;-)


Step 8: Day 8 - February 16th 2012
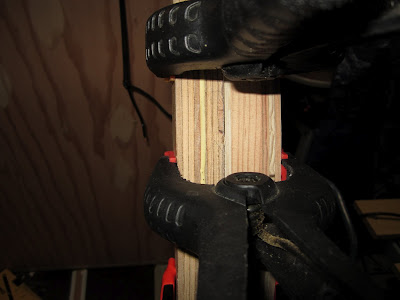
- The exterior walls are going to be the 1/2 plywood
- Hard foam insulation
- The 5mm plywood on the interior.


Step 9: Day 9 - February 18th 2012


Step 10: Day 10 - February 20th 2012


Step 11: Day 11 - February 21st 2012


Step 12: Day 12 - February 22nd 2012


Step 13: Day 13 - February 23rd 2012


Step 14: Day 14 - February 25th 2012


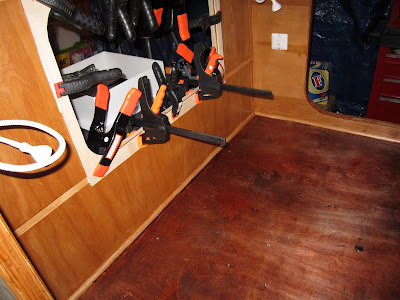
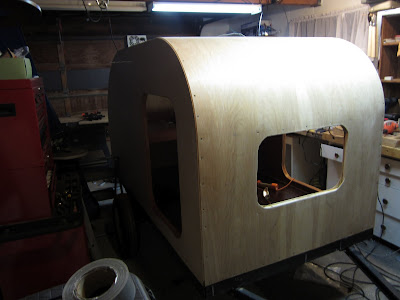
One wall done.


Step 15: Day 15 - February 27th 2012


Step 16: Day 16 - February 28th 2012


Step 17: Day 17 - February 29th 2012


Step 18: Day 18 - March 1st 2012


Step 19: Day 19 - March 3rd 2012


Step 20: Day 20 - March 4th 2012


Step 21: Day 21 - March 5th 2012


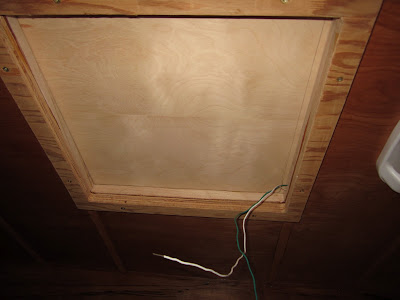
- wires for the porch light
- wires for reading light
- wires for the speakers


Step 22: Day 22 - March 8th 2012


Step 23: Day 23 - March 13th 2012

Step 24: Day 24 - March 22nd 2012

 '
'
Step 25: Day 25 - March 24th 2012


Step 26: Day 26 - March 29th 2012

To install the molding and be able to bend it around the curves of the teardrop, I'll need to soften the aluminum first (annealing). This is done by heating the aluminum to very high temperature and then letting it cool down slow. Aluminum doesn't turn orange when hot like steel, so you'll have to decide when is hot enough without melting it.


Done for today!

Step 27: Day 27 - April 7th 2012


Step 28: Day 28 - April 10th 2012


Step 29: Day 29 - April 18th 2012


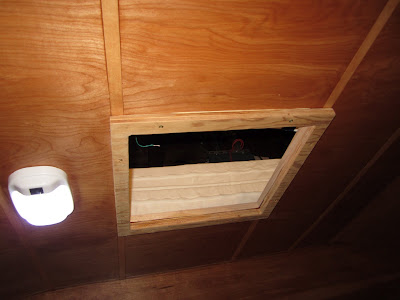
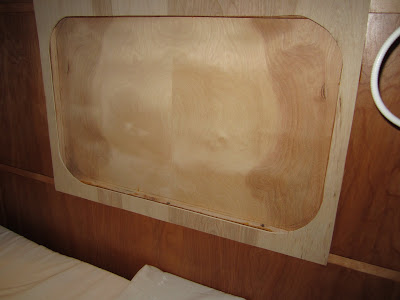
The hatch insulated with 3/4 hard foam insulation from Lowes.

Step 30: Day 30 - April 27th 2012


Step 31: Day 31 - April 29th 2012


Step 32: The Kitchen


The stove is connected to a propane cylinder.


I saw some comments proposing solutions on how to charge the battery. Here are two ways you can charge the battery with the towing vehicle while driving.


Who knew that there are Teardrop Gatherings and Teardrop-Friendly Events... here is a list I found:
http://www.teardrops.net/destinations01.html
My wife said that now I proved myself so I should start remodeling the kitchen. :-)
"Let no good deed go unpunished."
Thank you for reading my build log and ... go make some sawdust!
Post scriptum 2:
I added another page with pictures from our first trip to "TearJerkers Birthday Bash 2012, celebrating 15 years of TearJerkers" in Grants Pass, Oregon. It was lots of fun. Check it out.
Attachments

Step 33: First Trip


Runner Up in the
Make It Real Challenge

First Prize in the
Woodworking Challenge

Runner Up in the
Wheels Challenge


