

Introduction: The Arduino Hang Guardian - Arduino Watchdog Timer Tutorial


Hi Everyone,
It happens to all of us. You build a project, enthusiastically connect all of the sensors, and all of a sudden, the Arduino hangs and no input is processed.
“What is going on?”, you’ll ask and start digging through your code, only to realize that you’ve got stuck in an infinite loop. Thank God the Arduino was on your bench and not in a remote location.
Today, we’ll look at how we can use the watchdog timer on the Arduino to prevent this from happening.
Step 1: What Is This Watchdog Timer?

The Arduino watchdog timer as the name implies is a timer that runs separately from the main CPU on the board. This timer can be used to periodically check the state of the board and in circumstances where the board got stuck in a software loop or got stuck because of hardware failure, the watchdog timer can reset the Arduino and have it start all over again.
By default when not in use this timer is disabled on all projects and only when we enable it, we need to make sure to periodically tell it to not reset our board if it is still operating as expected.
To be able to use the watchdog timer, we first need to include the avr/wdt.h file in our Arduino sketch. This is the standard library that holds the watchdog actions.
Step 2: How to Enable the Watchdog Timer?


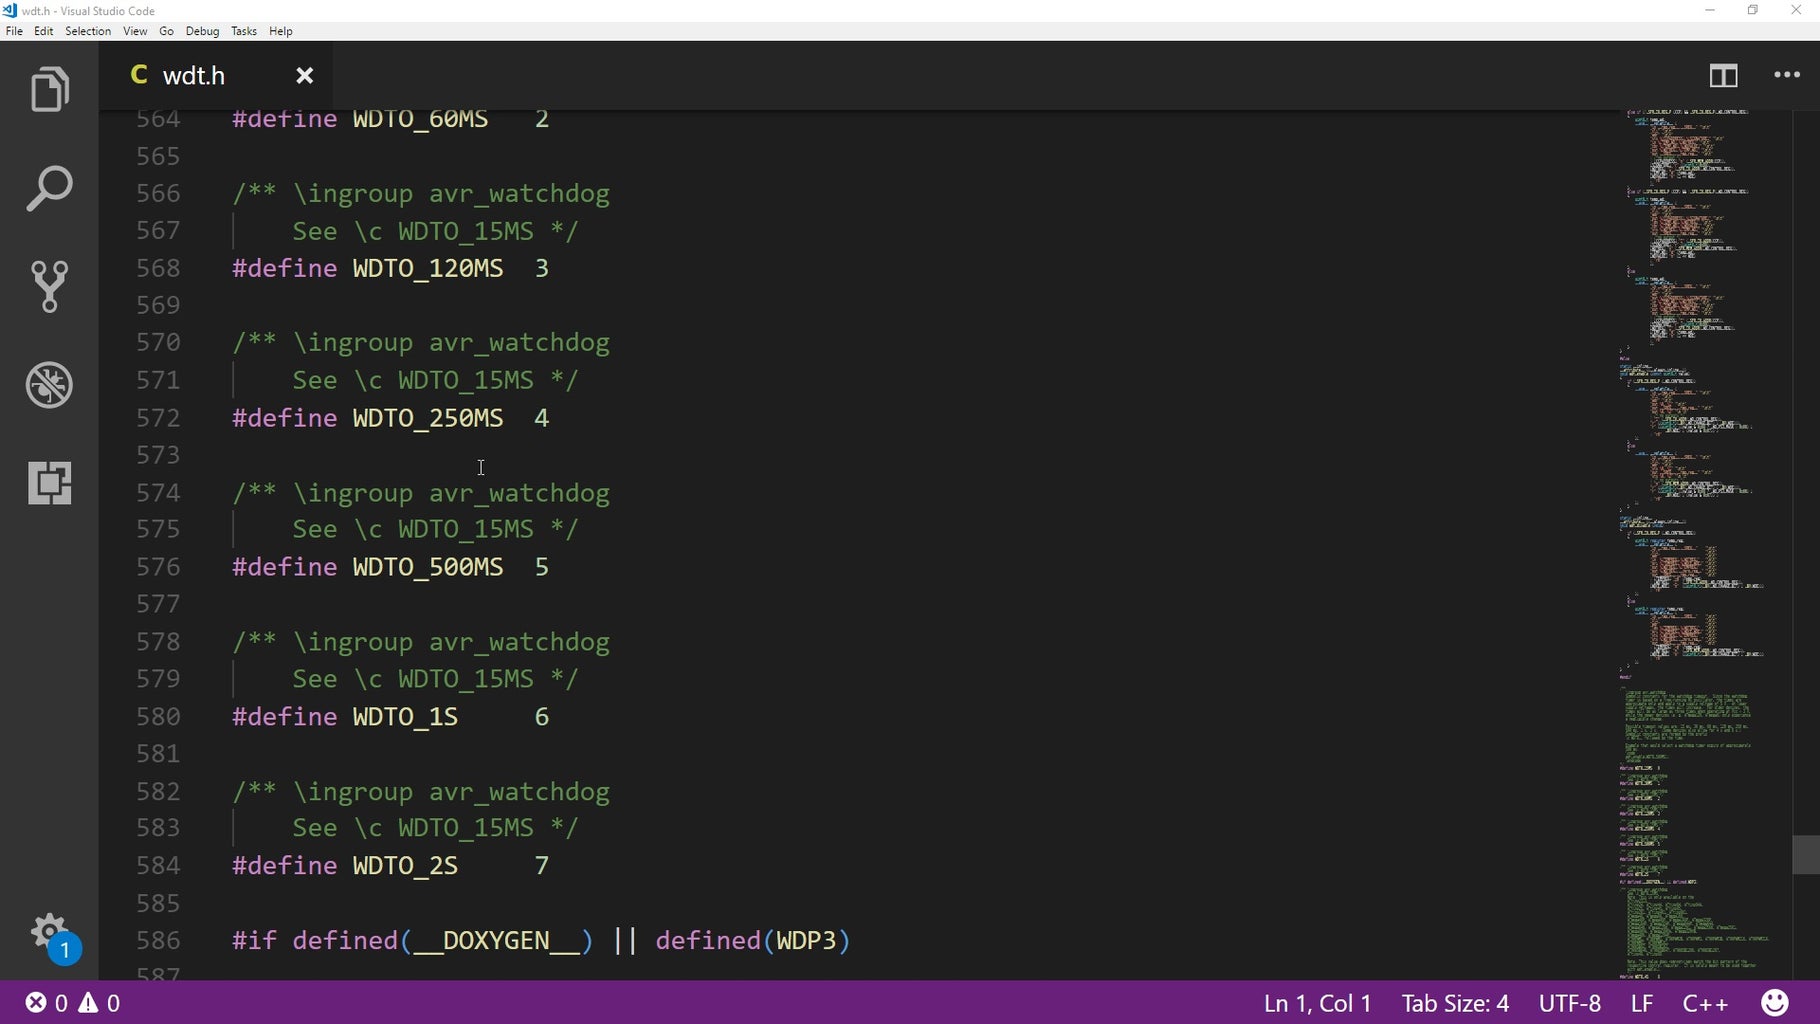
To enable the timer, we use the function “wdt_enable” where we need to pass in the threshold interval at which the board will be reset. Depending on our use case, this can be anywhere from 15 milliseconds to up to 8 seconds in pre-defined settings that are contained in the watchdog library.
THRESHOLD - CONSTANT NAME
15 ms WDTO_15MS
30 ms WDTO_30MS
60 ms WDTO_60MS
120 ms WDTO_120MS
250 ms WDTO_250MS
500 ms WDTO_500MS
1s WDTO_1S
2s WDTO_2S
4s WDTO_4S
8s WDTO_8S
Step 3: Keep Your Program Running

Now, with the timer enabled, to prevent it from resetting our Arduino we need to periodically call the “wdt_reset” function to reset the watchdog timer before the threshold interval expires.
When choosing a reset interval, it is crucial that we take into consideration any lengthy operation like reading or sending data or connecting to external sensors. The reset threshold should be at least one and a half times greater than these times to prevent any accidental resets.
Step 4: Example Usage
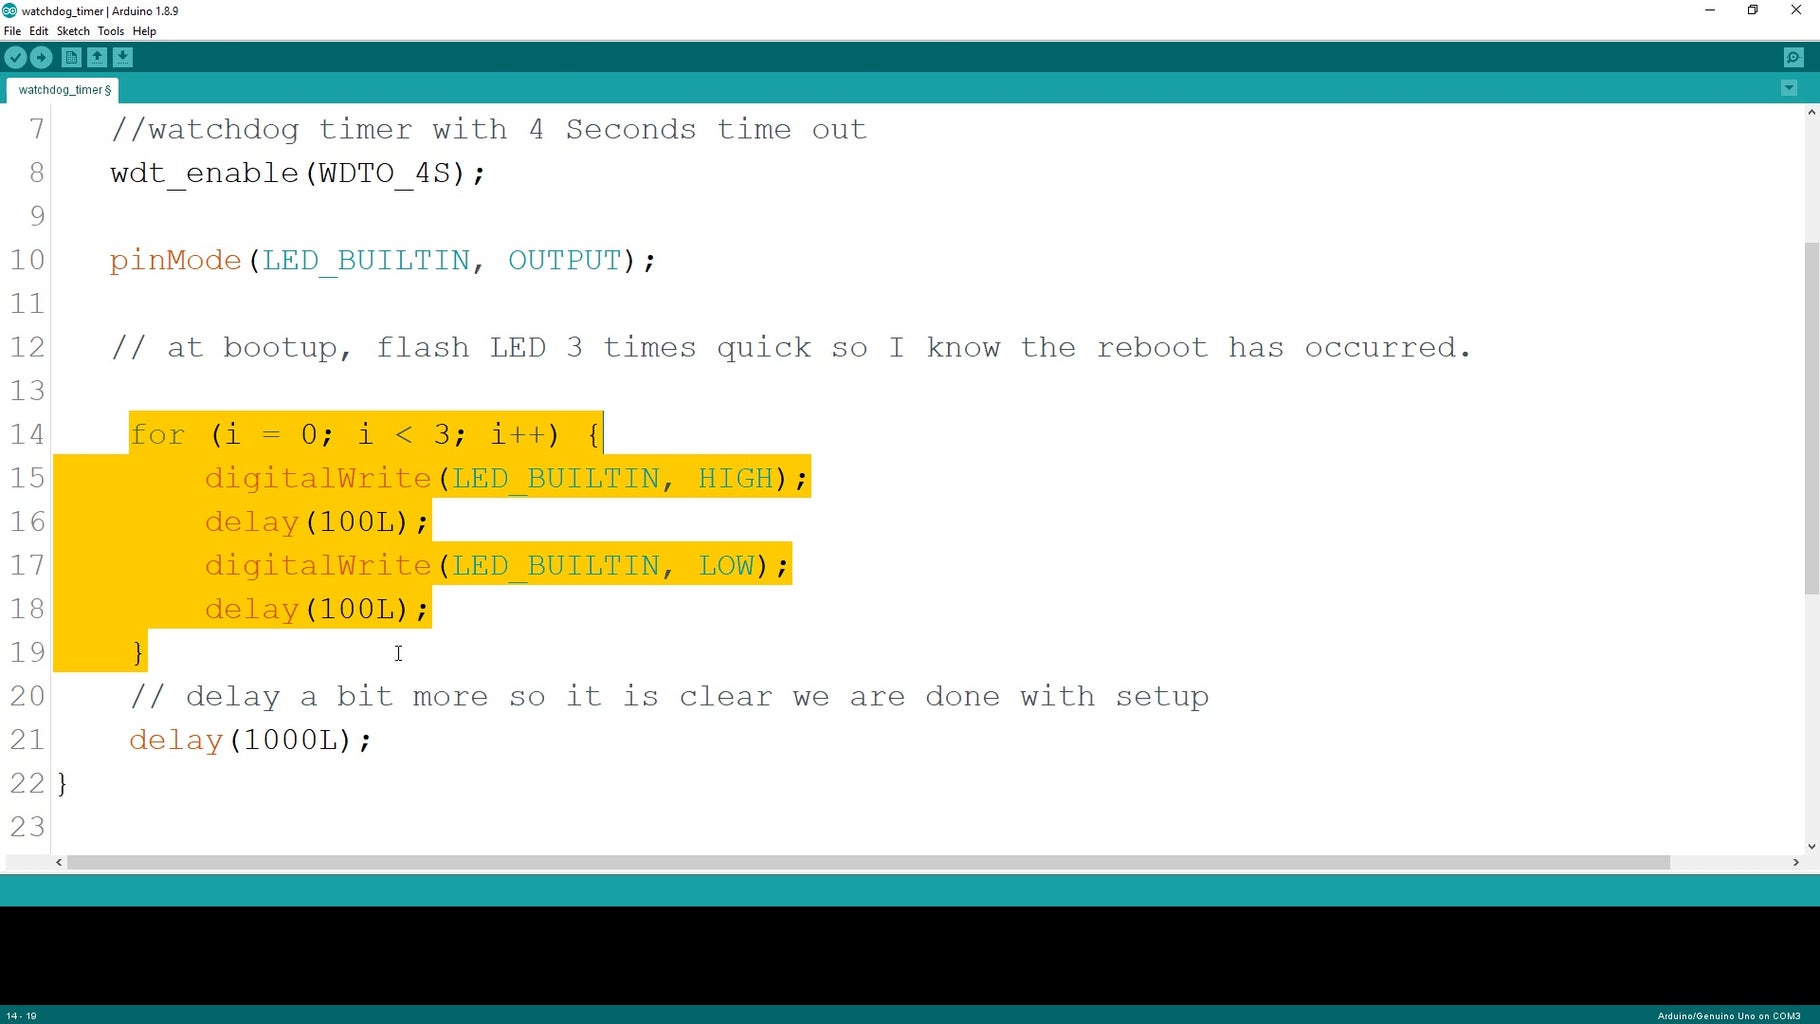

In the example program that you can download here, we first set up the watchdog timer with a reset interval of 4 seconds. Then to know that we are in the setup function, we flash an LED for 3 times quickly and then in the main loop we first reset the timer, light up an LED with progressively longer intervals and then we turn it off. The next loop resets the timer again until the light-up time is longer than 4 seconds.
When this happens, the watchdog timer resets the board and the setup is executed again.
Step 5: Watchdog Timer Issues
One possible issue with the watchdog timer, depending on the bootloader of your Arduino is that if the watchdog timer value is too low and the bootloader does not reset the timer when uploading new code, you may end up damaging your Arduino board in a way that it will always be stuck in the boot phase. The bootloader will try to start, but the timer will keep resetting the board, never allowing it to properly start. To prevent issues like this, make sure to always use threshold intervals of 2 seconds or more.
Step 6: Enjoy

If you have an example of where you have used the watchdog timer in a real project, let me know down in the comments, make sure to like the video and don’t forget to subscribe.
Cheers and thanks for reading/watching!


