

Introduction: The Coil Lamp


Not so much an instructable in photos but a brief on how to drive yourself nuts!
Step 1:


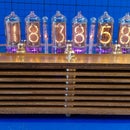
This lamp was a germ of an idea after I made the Nixie Clock No.2 as I had quite a lot of 8mm copper tubing left over.
Bending the copper tubing is probably the easiest part of the construction.
Make a circular former to the diameter you want the coil to form, I used the same one as I had used for the clock curves. Bending of the tubing without it collapsing on itself is done by first filling it with salt. It takes a lot of tapping to get 3M of tubing filled with salt but this stops it collapsing on itself as you bend the coils.
Leave a tail when you start the first coil as it will be needed later. To get the even spiral I let the coils get pushed up from the former by the next coil in the spiral until I had about 8 coils formed. The most difficult part is to get the return at the top of the coil which holds the E27 lamp holder for the Edison Lamp. I made a smaller circular former for this to get a nice bend. Take your time with this as you want a 90 degree bend upwards first followed by a 180 degree bend into the center of the coil without collapsing the tubing. Get all of the salt out of the tubing by tapping it and flush with water as it is corrosive with copper. Allow the tubing to dry fully or blow out with compressed air to remove the water droplets that remain. Adjust the spacing of the coils to your liking and align everything up before the next stage.
So far so good. Now comes the bit where cursing the idea starts!
I used 5M of gold coloured 0.5mm 3 core flex of which about 3M is contained inside the coils!. Every attempt to get the flex pushed through just ended in failure until I stripped the outer covering off 2M of it and with the aid of a draw wire that I pushed through from the top return and vegetable oil, eventually get it routed through the tubing and out of the return bend.
I used the compression nut and the olive from an 8mm straight connection to attach the lamp holder. I set the distance for the olive and used the male part of the fitting to clamp it in place with the nut above it. After removing the fitting I had to reduce the external diameter of the entry of the lamp holder and using the other nut from the coupling I forced a thread onto the aluminium. Your choice of E7 lamp holder will determine how you fix it to the tubing and how you connect the wiring to it.
The one I used had a threaded spigot on it so I could not connect the wires and just screw it on. I had to feed the wires through the casing and then connect to the lamp holder. Once this was done I had to screw the casing onto the lamp holder and then connect it to the tubing with the compression nut with the olive locking it all together.
I locked the flex to the tail of the lamp with heat shrink and then put an inline double pole switch on the flex near the lamp and a 13A plug with a 2A fuse on the end of the flex. I tested the completed lamp for continuity and insulation and all was fine.
Screw in the Edison lamp, plug it into a socket and operate the switch and then there was light!
As with all projects involving electricity a level of competence is required and any item should be fully tested before connecting to the electricity supply.
A word of warning:- Due to the construction of this lamp there is a tendency for the lamp holder to get quite warm as the lamp is below it. Ensure that the flex used is heat rated and that the lamp is not left on for excessive periods of time or left unattended.
Step 2: Materials & Tools
MATERIALS
3M of 8mm OD copper tubing
1 x 8mm straight compression fitting
1 x Antique brass E27 Lamp holder assembly
I x 240V 60W
5M of 0.5mm 3 core flex
1 x 2 pole Inline or Torpedo switch
Clear Heatshrink
1 x 13A Plug Top
TOOLS
Salt
Draw Wire
Mini Tubing Cutter
Circular Former for Coil
Circular Former for Bends
Screwdriver
Craft Knife
Wire Strippers

Participated in the
Full Spectrum Laser Contest 2016


