

Introduction: The EASIEST Way to Calculate a 45° Offset


In this article and video, i'll clarify how to calculate a 45° offset for all your plumbing tasks the EASIEST way possible!
Step 1: BACK TO SCHOOL

Alright so let go back to school for a second and remember what a hypotenuse is. In geometry, a hypotenuse is the longest side of a right-angled triangle, the side opposite of the right angle. The length of the hypotenuse of a right triangle can be found using the Pythagorean theorem.
The Pythagorean theorem can be used several ways but today, I’ll be showing you the easiest possible way to do it.
Step 2: REMOVING THE FITTINGS

Another important step is removing the small portion of each fitting from your equation like you see here. For now, we’ll mark a small reference dot in the middle of the fitting as such and come back to it later.
Step 3: THE PLAN (MEASURING BETWEEN BOTH PIPES)


So let’s take a look at a schematic that I drew earlier that represents a pipe being off-setted at a 45* angle to get passed a hot water tank as seen here. Let’s just say that this pipe is a 1” copper drain line from a steam boiler that needs to go from point A to point B.
Now the one thing you have to remember when using this technique is to always measure the center of the pipe and fittings as a reference for it to work.
The first thing you need to do is find a straight reference point such as a wall or whatnot to use for measuring the distance between both pipe centers. If you could do this without a reference point due to them being very close together, use this method as it removes any falsifying that could occur if measuring from a crooked reference point. You could also use a laser or straight edge on the pipe to accomplish this.
Step 4: PYTHAGOREAN THEOREM


Once you’ve found the measurement between both pipes, multiply that number by 1.4142 to get your hypotenuse or diagonal pipe measurement.
Step 5: REMOVING THE FITTINGS FROM THE EQUATION


Here’s the part where some people tend to block when using this technique and, it’s when removing the fittings out of the equation, so let’s clarify this part together once and for all.
Since your measurements were taken from center to center, it’s now easy to remove the fittings out of the equation and here’s how to do it. Grab your fitting and lay it on its side to be able to properly see how much you need to remove. Now, you remember that mark we drew earlier, well we’ll use it as a reference point so we could better understand why we need to subtract from our diagonal pipe.
The reason why we do this is if we don’t, the length of the pipe will be too great and your measurement will be off. So calculate from the center of the fitting or the black mark in this case to the end of the hub portion. This measurement needs to be subtracted 2 times since you have 2 45* fittings and you’ll be left with your final pipe which is now the correct length.
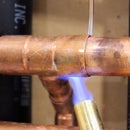
Step 6: DONE!


This technique works on any fitting that needs a 45* offset whether it’s up on a ceiling or if it’s an underground pipe. You could get away with doing this type of work by eye, but it’ll never give you a precise result like this. It’s a much more professional way of completing this task and should be in your book of things to know.
As a bonus, I put together a series of fitting specification charts such as Cast Iron, copper, PVC and Asbestos for storm drains etc., that give all the dimensions to all the fittings in case you don’t have them on hand.
Cast iron soil fittings for drain, waste and vents:
https://goo.gl/DJZis8
Copper fittings : https://goo.gl/b8CmsM
SCH-40 PVC fittings: https://goo.gl/UFnVKx
Logard storm drain fittings : https://goo.gl/rCvcf4
ABS fittings: https://goo.gl/rTGdau
SDR-35 underground system fittings: https://goo.gl/7h6H1H

Participated in the
Water Contest


