

Introduction: The Royal Game of Ur (travel Edition)


Lets make the worlds oldest board game. Travel sized.
Step 1: Prep

You will need:
- A appropriately sized piece of leather. I like 1 inch squares on my board with a 1 inch border. This means you will need a piece of leather about 5 inches wide by 10 inches long.
- A wood burning tool.
- A ruler.
- A piece of 7/8 in copper tubing. 6 inches long.
- 4 d4 from your friendly local gaming store.
- Some modeling clay.
- Craft Paint.
- Cutting utensil.
- 2 wine corks.
Optional:
- 4 nails
- Leather hole punch
- Sand Paper
Secure your leather to your work surface and lightly draw on your pattern. I used a pencil and a straight edge here.
Step 2: Start Burning


Using your wood burning tool carefully follow the pattern you laid out.
There is no erasing mistakes so take your time.
Warning: This is going to stink. Do this outside. I will accept no responsibility for the outcome if you do this at the kitchen table.
Step 3: Add Spaces


The Game of Ur is the oldest known board game. As such there are dozens if not hundreds of styles you can do the spaces in. This is the style i like for my boards. It is simple but attractive. Google the Royal Game of Ur if you are looking for inspiration for a different style.
Sketch in your spaces with pencil and then burned over them.
Step 4: Trim


With your straight edge and a cutting utensil trim your board down to size. Mine is 5 inches wide.
Step 5: Game Pieces

I made my pieces out of oven bake polymer clay. They are as simple as can be. Just circles with indents pressed into them and then painted white and black with craft paint.
Each player needs 7 pieces so you will need 14 total. Make them as fancy or simple as you like.
Step 6: Dice

The dice are the hardest part. The are tetrahedrons with 2 of the 4 points marked. I used D4s from my friendly local gaming store. I sanded them smooth while doing my best to maintain the original shape. Then with craft paint I painted them black with 2 white points per die.
Note: This is what worked for me. I tried epoxy putty, oven bake clay, and press molds to create the dice from scratch, but I could not get them right. If another method works for you I would love to see it.
Step 7: Piece Storage


Now take the copper and stopper one end up with a half of a wine cork. Taper the cork to make it fit better and hammer it in flush.
Drop in your pieces and dice and cork up the other end with a whole cork leaving enough cork sticking out to be able to remove it.
Optional: here you can clean and polish your copper tube with sand paper and steel wool if you like.
Step 8: Prepare It for Travel


Take some of the leather you trimmed off earlier and cut two thin cords from it.
Punch a hole in the two top corners of your board large enough to thread the cord through.
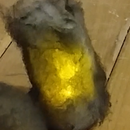
Thread the cord through and tie a knot at the end of the cord on the "Inside" end as shown above.
Place your tube containing the pieces and dice on the board and roll it up. Use the cords to tie to bundle and stick it in your pocket for your next camping trip or what ever.
Step 9: What Now?

The rules for the Royal Game of Ur were discovered on a clay tablet written in cuneiform. An ancient writing style using triangles (look it up, it's neat), so you can imagine there are many ways, simple and complex, to play this game. Here is a link to some of the most common rules variations.
https://www.mastersofgames.com/rules/royal-ur-rule...
There are also several YouTube videos explaining the game and it's history. This one is rather long, but one of my favorites. It is from the British Museum
Participated in the
Leather Contest 2017


