

Introduction: The Three Card Monte - an Origami Wallet


[This instructable appears here under the Instructables.com Terms of Service. It also appears here under my terms of service. Mine say that this content is free as in speech and free as in beer. If you paid to see this content, you've been imposed upon. Ask for your money back and buy yourself a beer.]
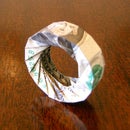
a) The Three Card Monte is a wallet made of letter paper. When made from paper with a card design printed on it, it has the trompe l'oeil effect of being three playing cards in a spread, the ones commonly used in a street hustle called, three card monte.
b) When open, the wallet gives easy access to three credit or identification cards and a finite amount of cash.
c) When closed, the model fits nicely into the breast pocket of your shirt.
Step 1: The Crease Pattern


Download a crease pattern and print it out. There are two to choose from, depending on where you live. If you live in the United States, choose the American letter paper version; if you live in another part of the world, one afflicted with Napoleonic era scientism, you'll want the A4 version. (Both are below, for your convenience.)
a) In the printer dialog for Reader or kpdf or whatever your flavor is, please note that Page Scaling should be set for none. You want the lines to go all the way to the printable margins.
b) Note that mountain folds are signified with dash-dotted lines, valley folds by dashed lines. (For those unclear on the distinction).

Step 2: Mountain Fold the Top and Bottom of the Sheet


a) Fold the top of the paper away from you, using the mountain fold as a guide.
(Yes, the rightmost part of this is marked a valley fold -- you may safely ignore this. We'll be reversing it shortly.)
b) Rotate your paper 180 degrees and mountain fold again.
Origami is all about symmetry and repetition. So am i. (I am so.)
Step 3: Mountain Fold the Sides of the Sheet

Mountain fold the leftmost and rightmost vertical crease marks.
Step 4: Making Pockets and Flaps


a) Now the model looks like this: a 3 by 2 x sqrt(3) rectangle.
b) Flip it over, front to back.
c) Unfold the left flap.
d) Unfold the top flap.
e) Valley fold the left flap back. This will reverse a part of a crease. That's okay.
f) Valley fold the top flap back. This will reverse another part of a crease. Likewise, okay.
g) Like this. Now, rotate the model 180 degrees and repeat c-f on the diagonally opposite corner.
h) You have pockets and flaps! Flip the model over, back to front.
Step 5: Precreasing


a) Mountain fold along the vertical lines through all layers and unfold again, so that you still have this rectangle in front of you.
b) Valley fold along the diagonal lines through all layers and unfold again, so that you still have this rectangle in front of you.
Step 6: Forming the Wallet


a) Mountain fold the bottom edge behind to meet the top edge.
b) Like this.
c) Insert one of the flaps into the corresponding pocket.
d) It locks in, loosely. When the model is flattened, this will be a more secure lock. Repeat c on the other side.
Step 7: Let's Do the Twist!


a) Ready? Twist the top of the left end towards you while twisting the top of the right side away from you.
b) Thusly. (That's right, I said, thusly. I have a Masters in English, so it's perfectly legal. That doesn't mean you should try it at home.)
c) Note that as you twist, the model flattens into a beautiful hexagonal shape.
d) The finished model.
Step 8: Putting Your Card in the Three Card Monte

a) This is how your cards fit into the pockets. The fit should be snug, but not tight. If the cards don't want to go in, consult step 1 again and make sure you printed your crease pattern out without scaling it down.
b) Did I mention how nicely this wallet fits into your breast pocket?
Why not try this again with the trompe l'oeil patterns? If you're in the USA, you'll want the American letter paper version; if you're in a country that uses a nonhumanistic measuring system, you'll want the A4 version.(See below.)
Step 9: The Small Print
The origami design for the Three Card Monte is under a Creative Commons Attribution-NonCommercial-ShareAlike 2.5 license. That means you can teach this model freely, modify it to your own uses, copy and distribute the diagrams and crease patterns and a lot of other things we haven't thought of yet. It's called Open Origami and it's the up-and-coming thing. What you can't do it make money off of it (without permission) or copyright derivative works.
The artwork on the trompe l'oeil patterns is adapted from the work of David Bellot and is under his Lesser GNU Public License. The use of it in this work appears to me to be consistent with the language and the intent of this license. If you wish to use the patterns elsewhere, consult the license first.
Participated in the
The Instructables Book Contest


