

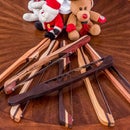
Introduction: The Time-bomb Clock


Ah, Saturday afternoon’s in front of the TV set with the Bug Bunny & Road Runner hour. A solid 60 minutes of high explosives and falling anvils. Here’s one for all the Wile. E. Coyote fans. This never fails to get a laugh and some sort of one-liner.
“What an explosive idea!”
“That blows my mind!”
“That’s a real blast!”
Uh-huh… I’ve never heard any of those before…
It’s a hot seller at my craft shows, yet it’s a simple enough project to require minimal tools. Without further ado, let’s put our Acme hard hat on and get to work.
Step 1: Materials and Tools

Materials
¾” dowel (48”)
¾” base material (see explanation)
¾” clock material (see explanation)
#8 - 1” Wood screws
Speaker hookup wire (18-gauge red and black)
2 @ 10 x 24 x ¾” brass screws
2 @ 10 x 24 knurled knobs
2 @ 10 x 24 brass nuts
1 7/16” clock insert
Wood glue
Cyanoacrylate glue (aka CA glue aka crazy glue)
Masking tape
Can of red spray paint
* The base and clock material can be anything. I’m using maple for the clock and walnut for the base because I like the colours and I happen to have some around. You could use oak, pine, even Russian birch ply which has very slim layers and looks good when well sanded. It’s your choice.
Tools
I will be listing hand tools, portable tools and large tool equivalents. This can be done with any of these tools. The hand tools will just take longer.
Table saw – Power saw – Miter saw – Hand saw
Drill – Drill press
Sander – Sandpaper
1 3/8” drill bit
3/16” drill bit
1/8” drill bit
Countersink bit (or 3/8” drill bit)
Metal saw
Ruler
Tape measure
Linesman’s pliers or needle-nose pliers (to cut the wire… a pair of scissors will do)
A wire stripper or a box knife (to cut the insulation off the wire)
Step 2: Dynamite Sticks


I usually start with the dynamite sticks. These are 7 sticks of 4 inches each cut from the ¾” dowel.
Step 3: Dynamite Sticks (cont'd)


To glue them together is a little convoluted. You may find a better method, I haven’t yet.
I use both wood glue and CA glue together to make the bond. I put a bead of wood glue and leave a bit of wood without glue at both ends of the stick and in the middle. In these empty spots, I apply a drop of CA glue and then bring the parts together and hold for 20 seconds. The CA glue bonds in 20 seconds and serves as a temporary clamp allowing the much stronger wood glue to start setting without my having to clamp or hold the assembly, which is difficult with round pieces.
Once the two sticks on the bottom are glued together, I add a third on top in the middle, then the two outside pieces of the middle tier, then the two pieces of the top tier. Wherever two faces of the dowels touch each other, I repeat the wood glue and 3 drops of CA glue to hold, which means some pieces will require two beads of glue and six drops of CA. I know that some parts will touch more pieces, but more than 2 beads of wood glue is overkill in my book. Once the entire dynamite stack is glued, I use a couple of loops of tightly wound masking tape as a clamp. Once you get used to it, it can be done very quickly. Let dry overnight.
Step 4: Dynamite Sticks (cont'd)


The next day, take the dynamite bundle and drill two 1/8” holes in any two side by side dynamite sticks – but not the centre one. Whichever sticks you select to drill will end up being the top sticks in the finished clock. Screw in a screw, or eyehook by hand in one of these holes. This is a handle for you to hold the sticks while they are spray painted, so it only needs to be screwed in until it holds the assembly securely.
Don your rubber gloves and take this outside if you can. Holding the sticks by the screw handle, spray a light coat of paint everywhere. Please don’t try to get it all perfectly covered in one coat because you will make a mess. Three to four light coats will work best. Spray paints of the type I use can be re-coated in 20-30 minutes so the painting should be over quickly. Remove the screw/eyehook when the assembly is dry.
Step 5: Clock Base


The base is cut to 4 ½”” x 3”. I round the top edges on a belt sander, but this is optional. You could chamfer the edges with a table saw or a router, or simply leave as it. Note that it is always better to relieve the corner and edge sharpness with a couple of passes of sandpaper (yes, you can cut yourself on sharp wood edges). Lightly draw a centerline along length of the bottom, then draw a second line 3/8” away from the centre line. Make marks along the second line 1 ½” from each end. Drill two 1/8” through holes at the intersections. Counter-drill the holes from the bottom with a countersinking bit. If you don’t have a countersinking bit, you can use a 3/8” bit to do the countersink holes These holes will be used to screw the dynamite sticks to the base. Sand through 80, 120, and 220-grit sandpaper, finish the base and put it aside.
Note on finishes: I have traditionally used a wiping varnish to finish these as it is an easy and simple finish. For this instructable, I’m using tung oil which, when dry, will then be finished with a buffed coat of wax. Both these finishes are thin finishes which look better than a thick finish for this project.
Step 6: Clock Face


The clock part is made of a piece of material 2” x 2”. I use maple because of its nice contrast with the red sticks and the walnut base. I prefer to cut a long strip 2” wide and work with a longer piece rather than with a small 2” x 2” piece. It’s much safer to do everything on a longer piece and to cut to dimension at the end when I’m done. Mark the length of the 2” piece, then draw an “X” from corner to corner to find the middle of the piece. Drill a hole halfway deep using the 1 3/8” drill bit for the clock insert. Then drill a 1/8” hole all the way through the middle of the 1 3/8” hole. Use the countersink bit to countersink the 1/8” hole. On the top edge, drill two 3/16” holes about ½” deep, ½” from the edges. Cut the piece out, sand and finish.
Step 7: Preparing the Brass Screws


Drill a 3/16” hole in a foot-long scrap piece of 2 x 4 or 2 x 6. Insert the brass screws in the hole and use it as a holder to saw off the head of the screw with a metal saw. The brass of the screws is relatively soft and easy to cut. Watch out these will be hot when you’re done.
Step 8: Preparing the Wire


Cut a length of wire 18” long and separate the black and red wires. Strip off about ¾” to 1" from one end of each wire and twist the exposed copper wire. Wrap each wire tightly around a pencil to give it that explosive wire look.
Step 9: Assembly


Screw two screws up through the bottom of the base until they are sticking out from the base just a bit. Orient your dynamite bundle so the two drilled pieces are on top of the bundle as shown. Press the bundle down on the screws to mark the location for drilling into the dynamite pieces. Drill the dynamite sticks with the 1/8” drill bit and screw securely to the base.
Screw through the centre of the 1 3/4" hole of the clock face until the screw extends a bit out the back. Place the clock where you would like it to be on the dynamite sticks, and press to mark the location of the hole. Drill this hole with a 1/8” drill bit and screw the clock to the dynamite sticks.
Step 10: Assembly (cont'd)


Put a drop of CA glue into the holes on top of the clock and insert the cut end of the screws into the holes. Wait 5 minutes until well set. Screw on the two brass nuts. Put a tight bend in the stripped ends of the wires and hook them onto the brass screws. Secure with the knurled nuts.
Put a drop of CA glue in the holes drilled into the dynamite sticks, and insert the unstripped end of the wire into these holes. Hold in place for 30 seconds until set, and let stand for 5 minutes to allow to glue properly.
Insert the clock face. Display and wait for the unavoidable "explosion" of jokes and one-liners.

Participated in the
4th Epilog Challenge


