

Introduction: Tools of the Program: Adobe Premier ( Video Effect: Keyframes)


Hello my fellow instructables users!
Today I am here to assist you in figuring out what each and every type of keyframe within the program: Adobe Premier does.
The types of keyframes I will be going over are as follows
1.Position
2.Scale
3.Rotation
4.Opacity
Please note that I will be using the same base name(s) from my previous instructable here
https://www.instructables.com/id/Simple-Scrolling-Credits-Sequence/
This should help you with the base steps to both create and import a base in which to test the keyframes
I hope each and every one of you learn a little something more about a program you may have used many times before.
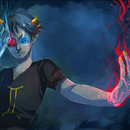
Here is what the finished product looked like for me
Try to make it unique compared to everyone's
Make it yours and yours alone!
Step 1: Opening the Keyframe Tab and Beginning to Add Motion


Once you have the base image imported into Premier now you just need the keyframe menu
The keyframe menu is under: Window, Effect Controls (Also may be shortened by simply pressing shift + 5)
This will bring the new tab conveniently named Effect Controls into one of the windows
From here we can begin adding motion through the Position type of key frame
Once you have your image in the correct spot you simply click "Toggle Animation" and the program will create the first keyframe for you
Now just adjust the timeline to when you want the object to arrive and drag the object, once again the program will create the keyframe for you annnnd ta-dah
You now have a simple moving object, feel free to adjust the timing or the position to you liking
Step 2: Scale and the Keyframes Within It


The second type of keyframe is the scaling type, which adjust the size of the object relative to it's original
The original size is 100%
Anything over 100% is an increase in size and anything under is a shrink in size
Once again toggle the animation for the scaling type of keyframe will instantaneously create the initial keyframe at the current size
Now choose a point at where the item should have reached it's maximum/minimum size and change the size accordingly
This will create a secondary keyframe which will scale up/down throughout the timeline until the ending point of the keyframe, where the maximum/minimum size will have been reached
Step 3: Rotation: Putting Some Spin on It


Rotation Follows some of the same steps as the last but adds some more challenges the simply sizing up/down from 100% to whatever is needed
Rotation can be simplified by clicking the small arrow next to the "Toggle Animation"
This will add a small circle for rotation, simply by clicking and ragging the line on the wheel around rotation can be added
Choose an ending point for the spin and then add the spin by dragging the line around BE CAREFUL if it says 1X, 2X, or more
It will spin that many times before ending 1 entire rotation and onward
Always make sure to test how fast it will spin compared to how long the clip is
Step 4: Invisible to Visible (The Opacity Keyframe)


Now we're on the last step
The opacity keyframe, these keyframes indicate how visible/invisible an object is at a certain time
0%= Gone (Invisible) 100% = Solid and 50% is a mixture of both
The same effect can be achieved through "Video Transition" then dissolve and finally cross dissolve
But for opacity simply select where the object should appear/ disappear and add the apropritate amount of opacity and boom
You've used all 4 basic keyframe types in a single animation!
Hope this instructable helps my fellow users
Good luck animating!


