

Introduction: Transmitter/Receiver + Arduino


Every single RC (radio controlled) plane, boat, car, helicopter, drone, etc, contains a Transmitter and a Receiver. Most of the time you never the the receiver because it is in the vehicle while the transmitter is in your hands. In this tutorial I will reveal what a RC receiver looks like and how to connect it to Arduino in order to read the values from the transmitter.
LETS DIVE IN !!!
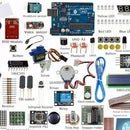
Step 1: Materials
Here are the limited number of materials...
1 x RC transmitter (of any number of channels)
1 x RC receiver (of any number of channels)
1 x Arduino microcontroller
1 x male to female jumper wires
Note the number of channels of the transmitter and receiver have to be the same. Also you do not have to buy the receiver and transmitter together because they can be paired after you buy them.
Step 2: Transmitter

Transmitters are powered by batteries and have a simple on/off switch for power.
Step 3: Receiver


The receiver can be seen as a board with pins that are in a formation of 3 columns with the number of rows with as many channels plus one. You could think of the middle and right columns as power rails on a breadboard because they provide 5V and Ground on each row. Meanwhile the left column is the digital value from the transmitter. To connect to the Arduino just power the receiver with the 5V and Ground and connect the Pins on the receiver to the Arduino digital pins. The diagram below is how to connect it the right way.
If you bought the receiver separate from the transmitter then watch this Video in order to pair them
Step 4: The Code

Here is the code and luckily it requires no libraries.
int ch1; // Here's where we'll keep our channel values
int ch2; int ch3;
void setup() {
pinMode(5, INPUT); // Set our input pins as such pinMode(6, INPUT); pinMode(7, INPUT);
Serial.begin(9600); // Pour a bowl of Serial
}
void loop() {
ch1 = pulseIn(5, HIGH, 25000); // Read the pulse width of ch2 = pulseIn(6, HIGH, 25000); // each channel ch3 = pulseIn(7, HIGH, 25000);
Serial.print("Channel 1:"); // Print the value of Serial.println(ch1); // each channel
Serial.print("Channel 2:"); Serial.println(ch2);
Serial.print("Channel 3:"); Serial.println(ch3);
delay(100); // I put this here just to make the terminal // window happier }
Step 5: Going Further
In order to create and RC car or Plane you can plug the servos directly into the receiver without the use of the Arduino. You can control a motor into channel 4 through and ESC which powers the receiver and so you dont need extra batteries.
Have any questions, comment below or message me.


