

Introduction: Tutorial to Use Infrared Receiver Remote Control With Arduino


Description
Kit theory test distance of about 4 - 9 meters, but the practical application depends on the ambient factors you use, as well as the middle barrier (such as diaphragm, glass, obstructions or other material blocking), receiving head with HX1838 with power work instructions lights, receive 38K frequency any remote coding data.
Specification
- Sensor uses HX1838, high sensitivity
- Operating voltage 5V
- Output form: Digital output.
- VCC: 3.3V-5V external voltage
- GND: external GND.
- IN: external microcontroller I/O port, I/O port has been designed 10K pull-up resistor.
Step 1: Material Preparation
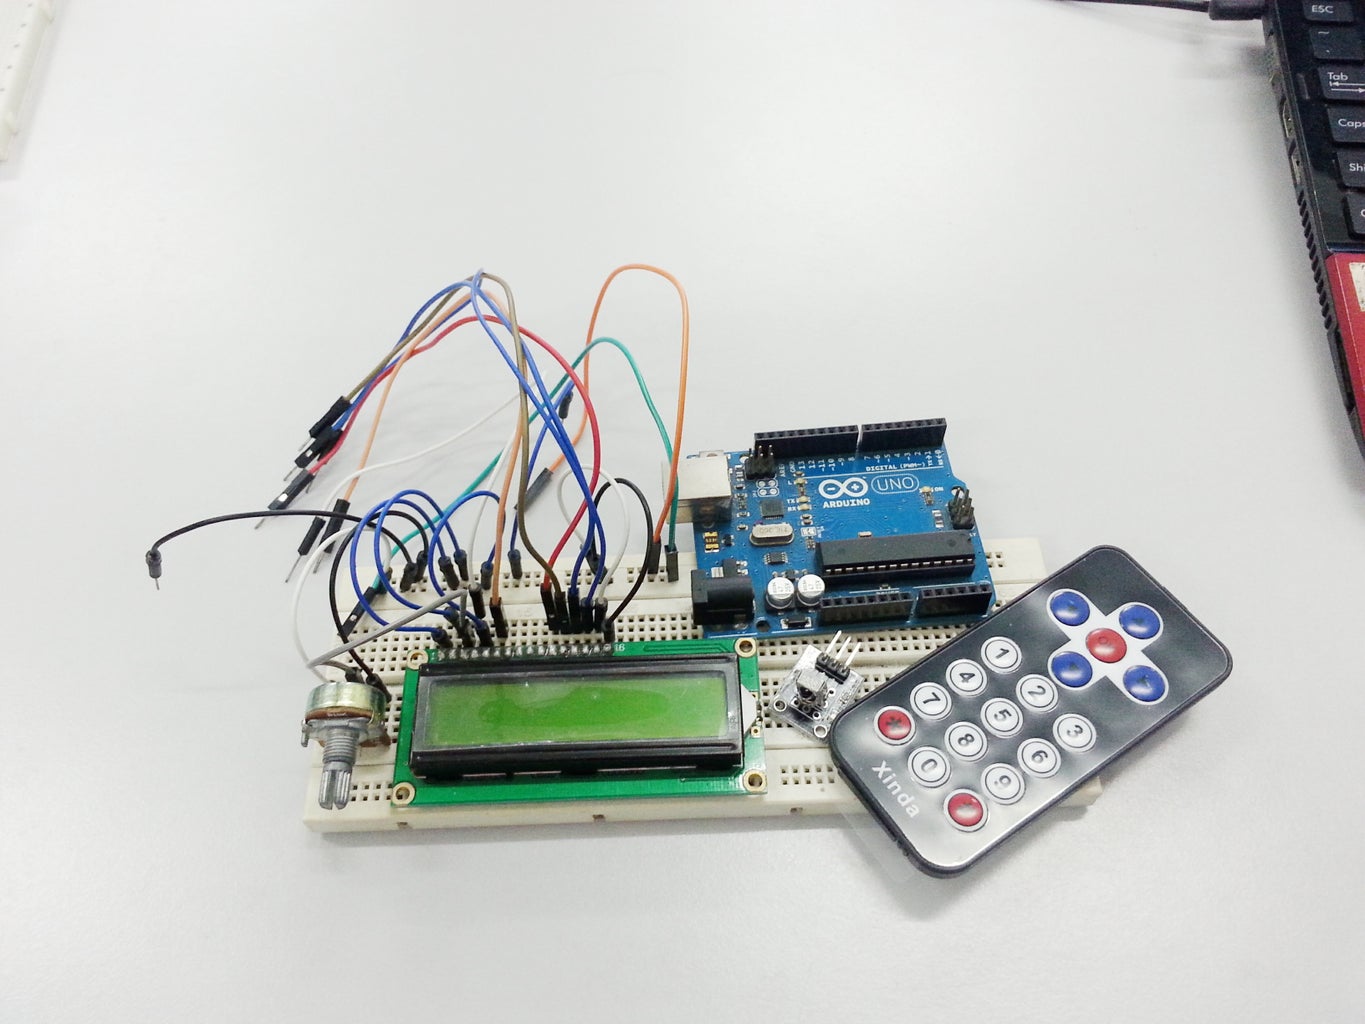
To do this tutorial, you will need :
1. Arduino Uno Board and USB Cable
2. IR Remote Control
3. IR Receiver
4. Jumper Wires
5. LCD 16X2
6. Resistor 10K
Step 2: Pinout Details

- Pin 1 is signal
- Pin 2 positive power
- Pin 3 is ground
Step 3: Pin Connection
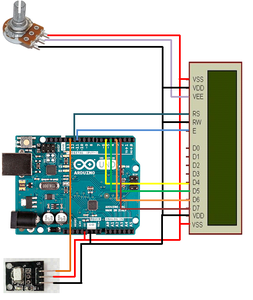

1. Connect your IR Receiver to Arduino Uno Board as following :
- GND to GND
- VCC to 5V
- SIGNAL to Arduino's D11 (you could use any digital pin number)
2. Connect your LCD to Arduino Uno Board as following :
- VSS to +5VVDD to
- GNDRS to 12
- RW to GND
- E to 11
- D4 to 5
- D5 to 4
- D6 to 3
- D7 to 2
- A/VSS to +5V
- K/VDD to GND
3. Connect 10K Potentiometer to LCD as following :
- GND to GND
- Data to V0
- VCC to +5V
4. After completely connect the whole circuit, connect your Arduino Uno Boad to your computer using USB Cable.
Step 4: IRremote Library

You have to download both of these libraries. Open and extract this to your Arduino's Libraries folder. refer the picture above if you need help on how to extract the libraries.

Step 5: Sample Source Code
decoder.rar is a sample source code that will help you recognizing your ir signal number and remotecontrol.rar is a sample source code that will show you how ir remotes control work. Download both of the sample source code below and this sample source code will be explain on the next step.
Attachments
Step 6: Recognizing IR Signal


Unpack decoder.rar and open it on your Arduino IDE. Go to Tools > Board > Arduino/Genuino Uno and Tools > Port > select your Arduino's port. Then, upload decoder sample source code on your Arduino board. via USB cable. Wait till Arduino IDE done uploading and open the serial. Now, press any button on your IR Remote control. Your serial monitor should have print you some numbers.
------------------------------------------------------------------------
I click OK button and serial monitor print :
- 16712445
when I click OK button and hold it for a while. Serial monitor print
- 16712445
4294967295
4294967295
4294967295
Now, i click number 1 button and hold it for a while. Serial monitor will print
- 16738455
4294967295
4294967295
4294967295
You can see that when you hold up any button for a few second, you will get a repeating value (4294967295). Thus, it obviously the first number that matter. Now, repeat the same step for all button and record the first number printed when you press you remote control's button. You will need the signal number of your IR remote control it for the next step.
Step 7: Signal Number
This is my IR Remote Control signal number :
- OK Button = 16712445
- UP Button = 16736925
- DOWN Button = 16754775
- LEFT Button = 16720605
- RIGHT Button = 16761405
- Number 0 = 16730805
- Number 1 = 16738455
- Number 2 = 16750695
- Number 3 = 16756815
- Number 4 = 16724175
- Number 5 = 16718055
- Number 6 = 16743045
- Number 7 = 16716015
- Number 8 = 16726215
- Number 9 = 16734885
- * Button = 16728765
- # Button = 16732845
Step 8: Testing the Remote Control
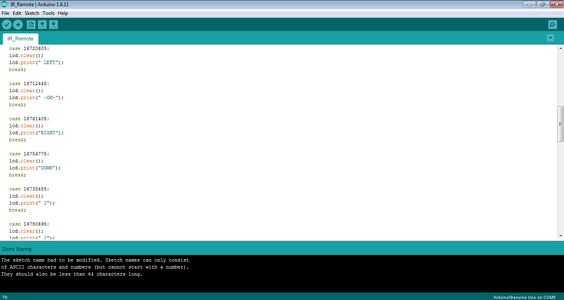
Now, unpack your remotecontrol.rar and open the .ino file. Notice this code below in the remotecontrol.ino
case 0: //change zero to your IR remote UP button number
lcd.clear();
lcd.print("UP");
break;
You have to change 0 to whatever number your IR remote button makes. Below is the example code :
case 16736925:
lcd.clear();
lcd.print("UP");
break;
You have to change 0 to your remote control's OK's signal number for case that print lcd.print("OK"). Do this for all button you have on your remote control. Refer the picture above for more understanding. When you have completely updating your case number, check your board and port again, and upload the code into your Arduino Uno Board.
Step 9: Result
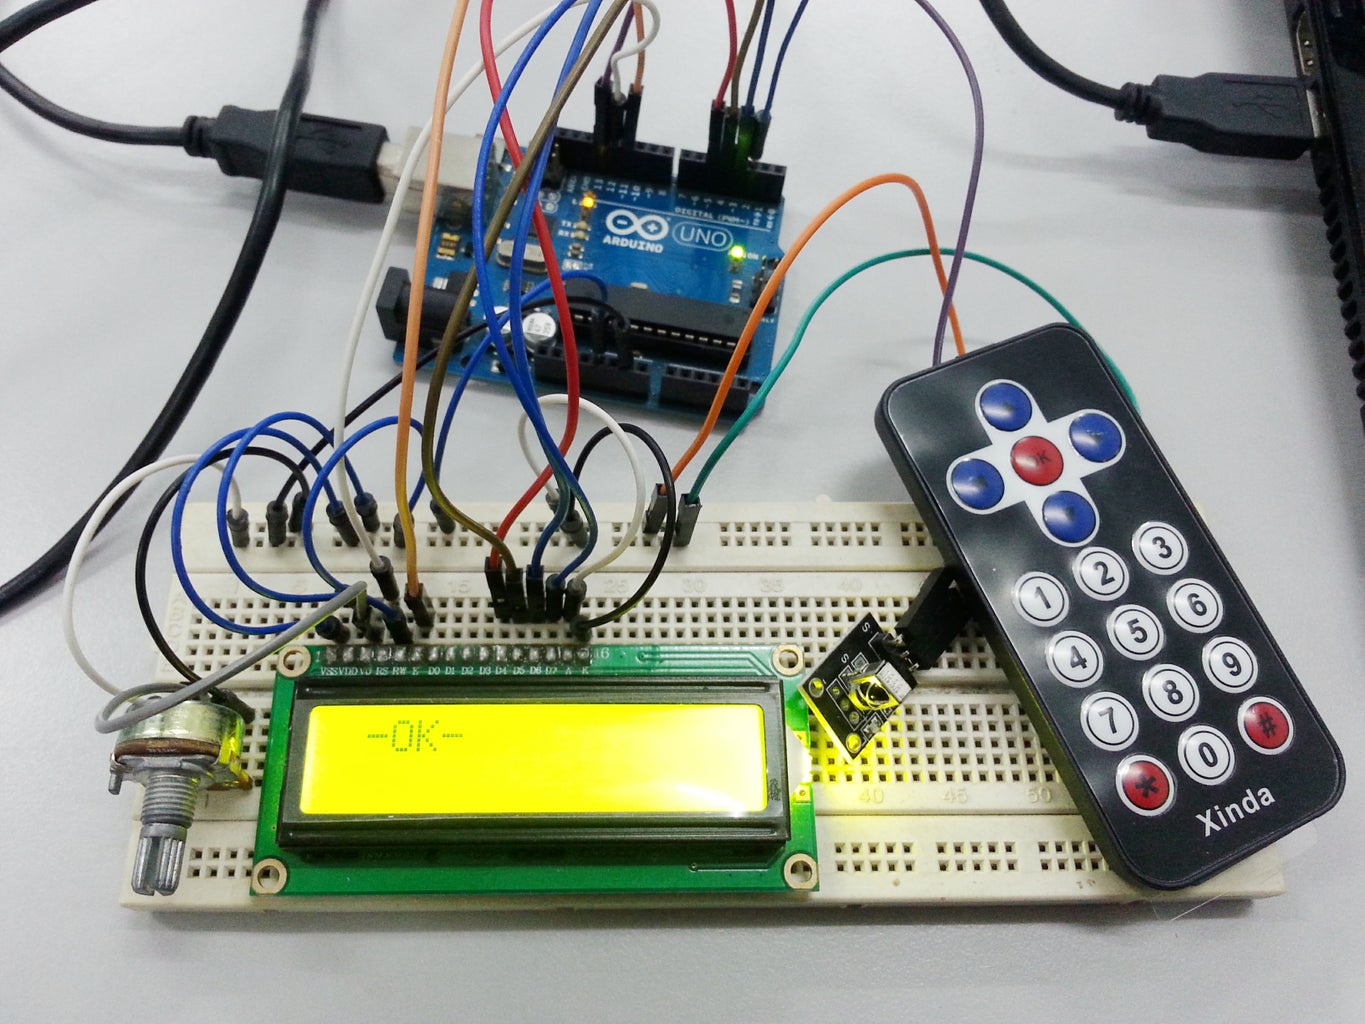

1. When user press number 6 on IR Remote , LCD will display 6 on LCD
2. When user press OK on IR Remote, LCD will display -OKAY- on LCD
this is applied to all button (up, down, left, right, ok, number 0-9 and etc..) based on our remotecontrole.rar sample source code.
Step 10: Video
This video shows how IR Remote control work based on our sample source code.


