

Introduction: Making Quick & Easy Work Tables


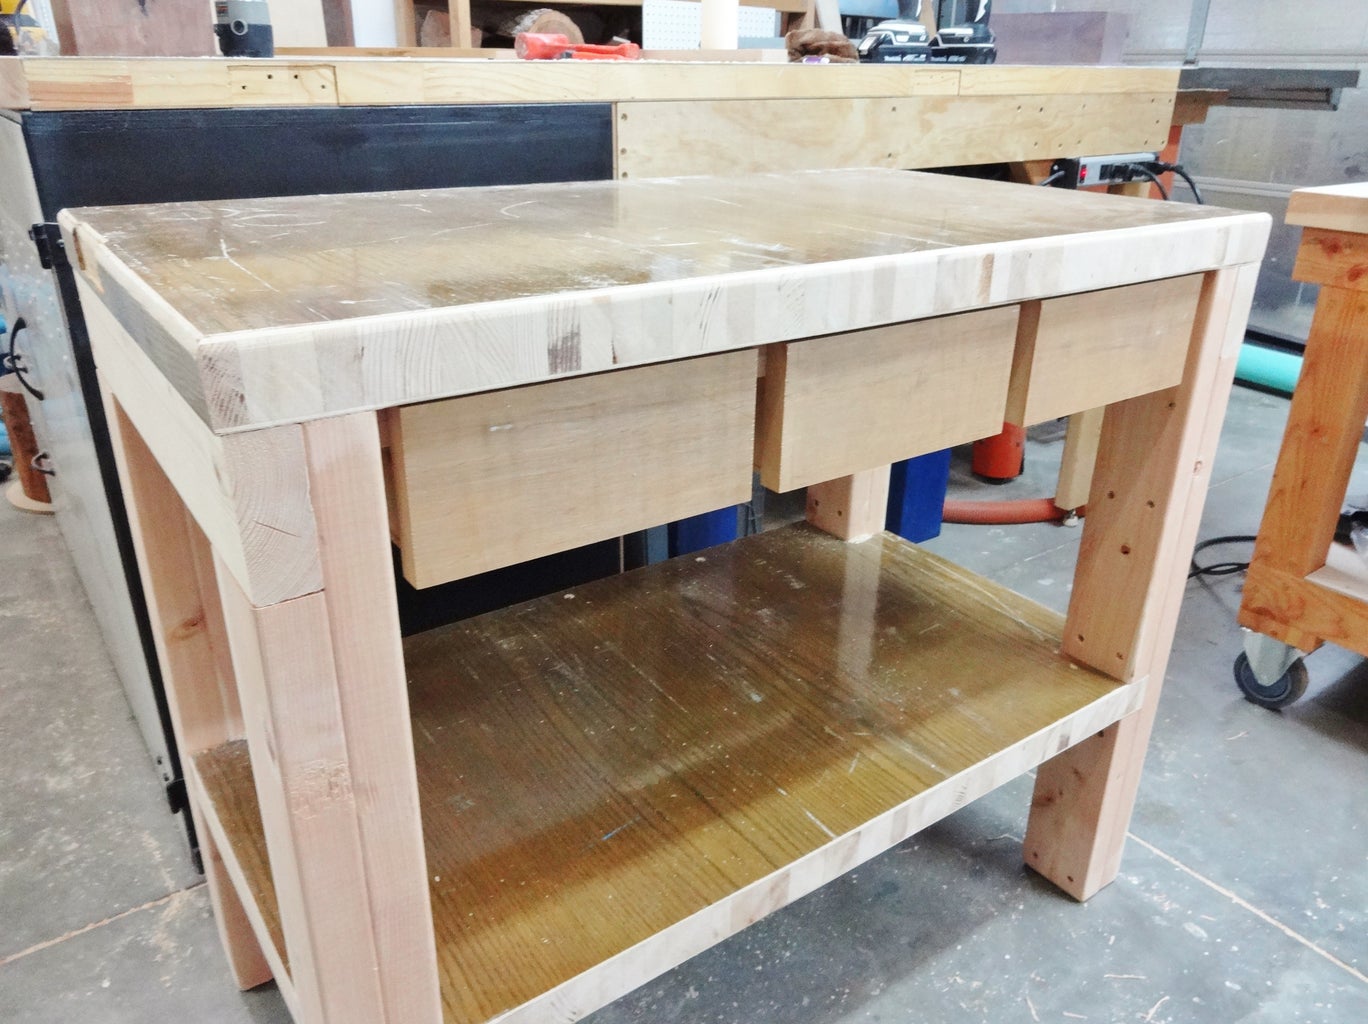
This is a simple workshop table I made from an old door and some 2x4s (basic framing lumber). It includes three simple hanging drawers as well. It was built to hold a small lathe, as shown.
The technique I used was to build the table from top-to-bottom, basically upside-down.
This was a quick project, and this approach could be used to build a simple work table of any size.
This instructable is about the assembly techniques I used . . . so while I have not included any precise measurements, hopefully there are some tips here to help you out with your next project!
Step 1: Solid Core Doors, Aka Heavy-Duty Table Tops


I love old solid core doors, as they make perfect heavy-duty table tops.
I got this door remnant at a ReStore where I live (for more info: Habitat for Humanity ReStores). These stores are a great place to donate and purchase used building materials, and they support an excellent cause.
For my table, I wanted to use the door to make the top as well as a lower shelf. I began by cutting two pieces exactly the same size using a circular saw. Multiple saw horses were used to support the door as it was cut into pieces.
Step 2: Prep 2x4s

I cut sections of 2x4s as needed to create the various leg and support pieces. The layout and how these pieces all fit together are shown in the following steps.
Step 3: Notch Corners of Lower Shelf

I cut the corners out of the panel that will become the lower shelf. These notches were made using a band saw, and were cut to match the thickness and width of the framing lumber that will make up the legs.
These notches could be cut using a variety of other tools if needed. For example: jig saw, table saw, circular saw, hand saw.
Step 4: Skirt Structure


With the top piece top-down, a 2x4 skirt/frame was fastened together with screws installed into drilled and countersunk pilot holes. The skirt structure itself was then fastened to the underside of the table top with screws installed in pocket holes.
This skirt structure was actually left open on one side to allow for the drawers later on.
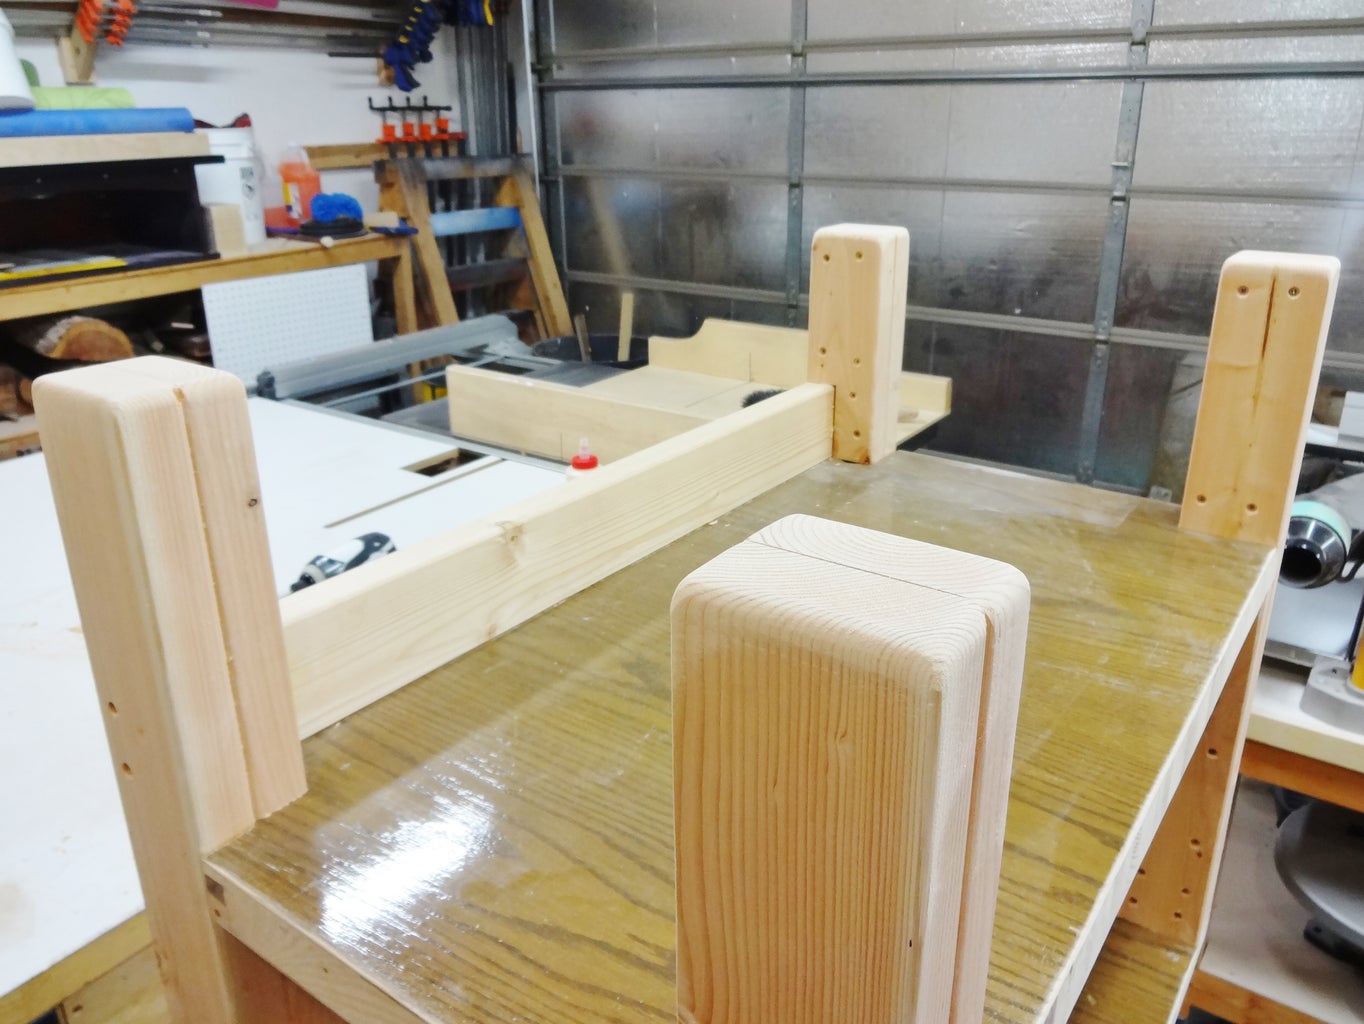
Step 5: Building the Legs


The legs were built of multiple individual boards in order to add strength and support the lower shelf. The photos show the details of how these went together. These were put together using glue as well as screws installed into pre-drilled holes.
If you don't have a set of tapered countersinking bits, you need some.
Note that the back, inner boards have notches to allow them to fit around the skirt structure; these notches were cut using a band saw.
Step 6: Add the Lower Shelf
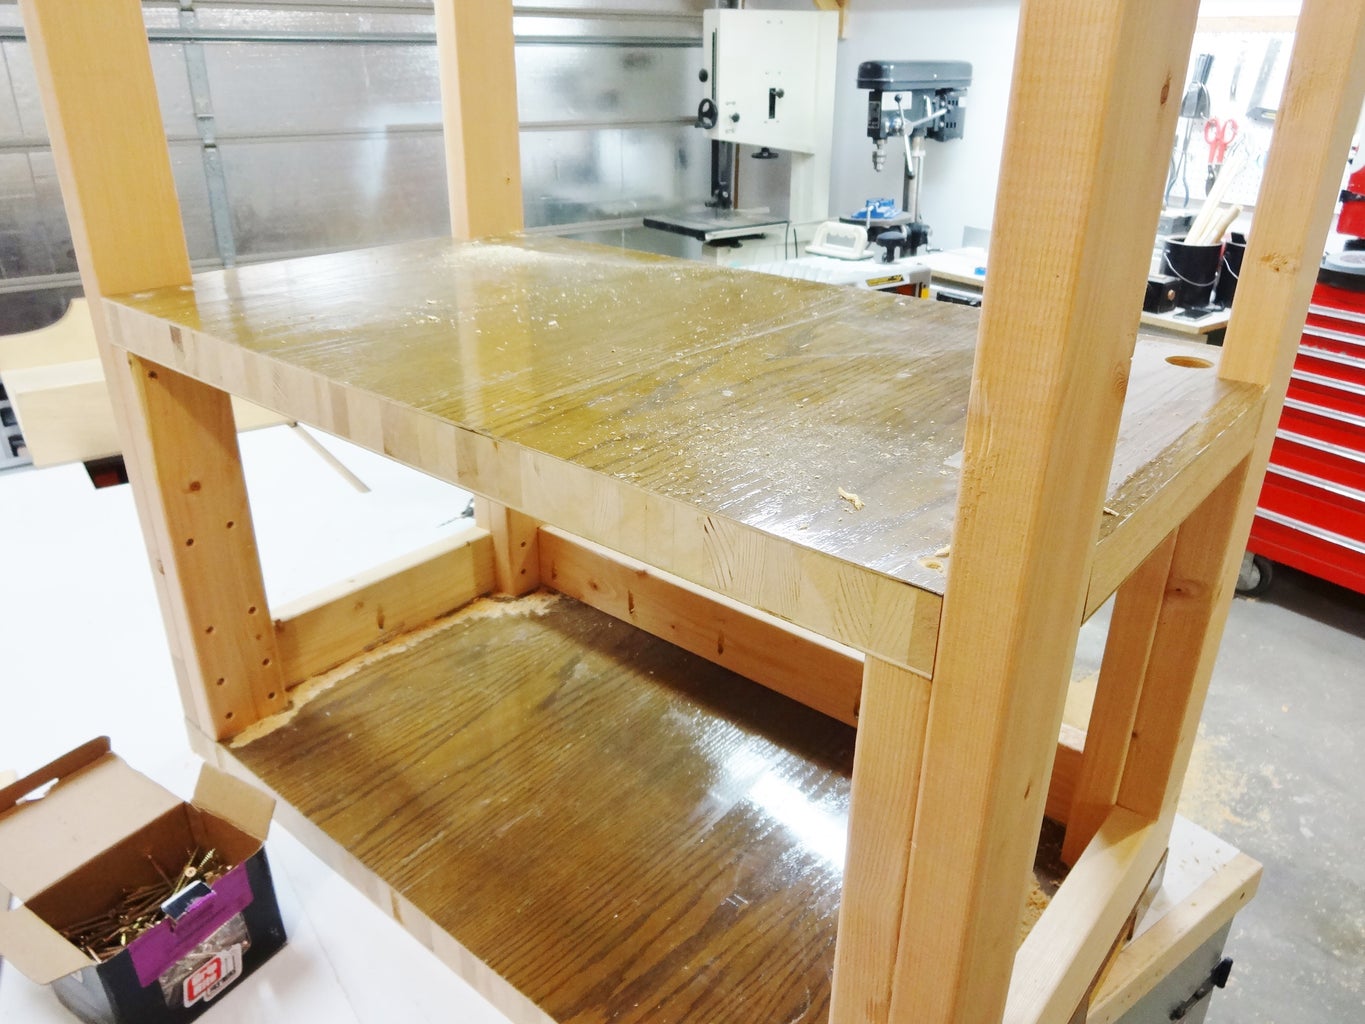

The lower shelf was added next and screwed from the bottom side into the existing leg pieces.
The lower leg pieces were screwed in place next, along with a cross piece added to the backside below the lower shelf.
Step 7: Route Leg Bottoms
The bottoms of the legs were now routed with a 1/2" round-over bit.
Step 8: Route Top
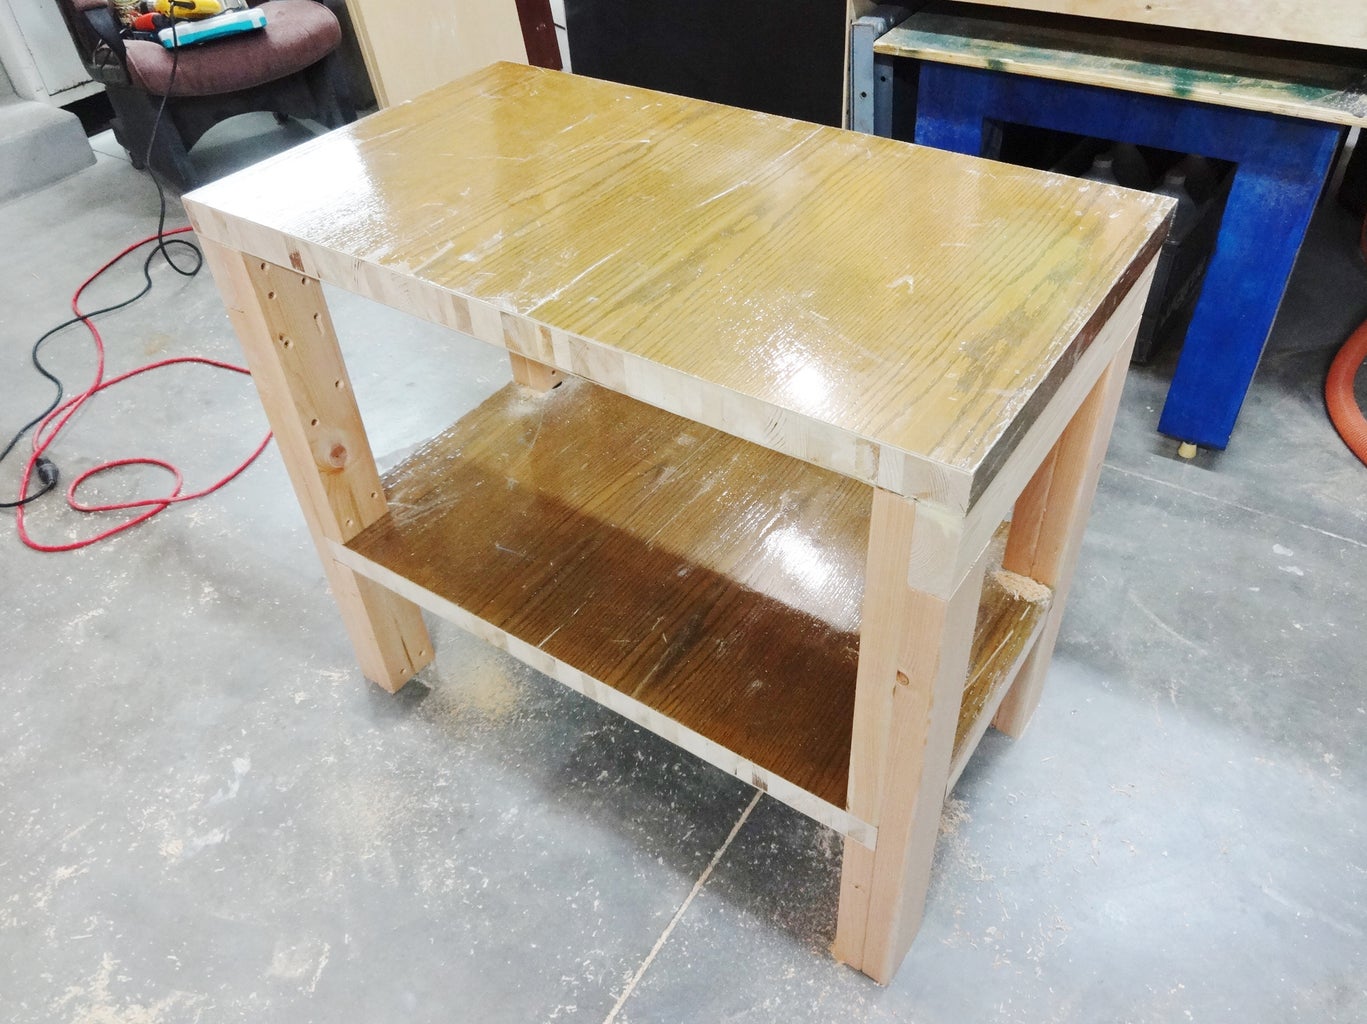
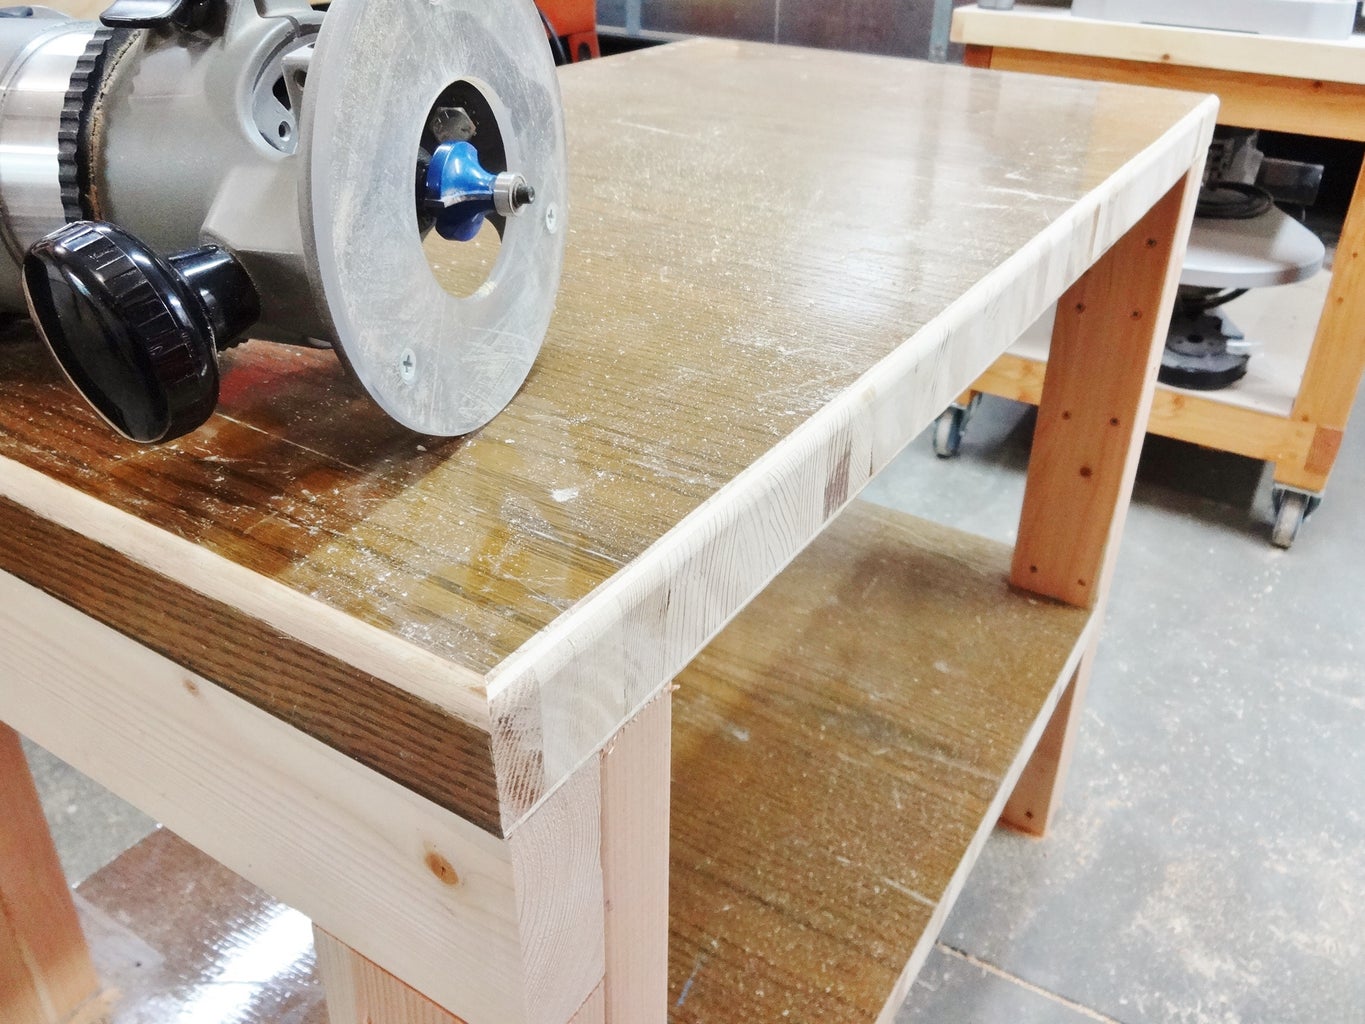
The table was flipped rightside-up, and the top was routed with the same bit that was used on the leg bottoms.
For a simple work table, you're basically done!
At this point, I lightly sanded some edges with 220 sandpaper, and then sprayed a few coats of lacquer onto the bare wood leg structure.
Step 9: Hanging Drawers


I made some simple hanging drawers for this little table.
These were built with scraps of plywood that were glued and screwed together (always in predrilled holes, of course). Drawer bottoms were made of 1/4" mdf scraps, which were also glued and screwed in place.
For drawer guide rails, I cut strips of hardwood scraps which were glued and screwed to the top long edges of each drawer.
Step 10: Drawer Faces

Pieces of pine wood were added as drawer faces. These were screwed in place from the insides of the drawers.
Step 11: Hanging Drawer Guides


More hardwood scraps were cut into strips and screwed to the underside of the table top to act as drawer guides, from which the drawers will hang.
Step 12: Wax the Rails

For the drawers to work smoothly, I sanded off any splintery bits with 220 sandpaper and then waxed the mating surfaces of the drawer guides with basic paraffin canning wax.
Step 13: Add Handles

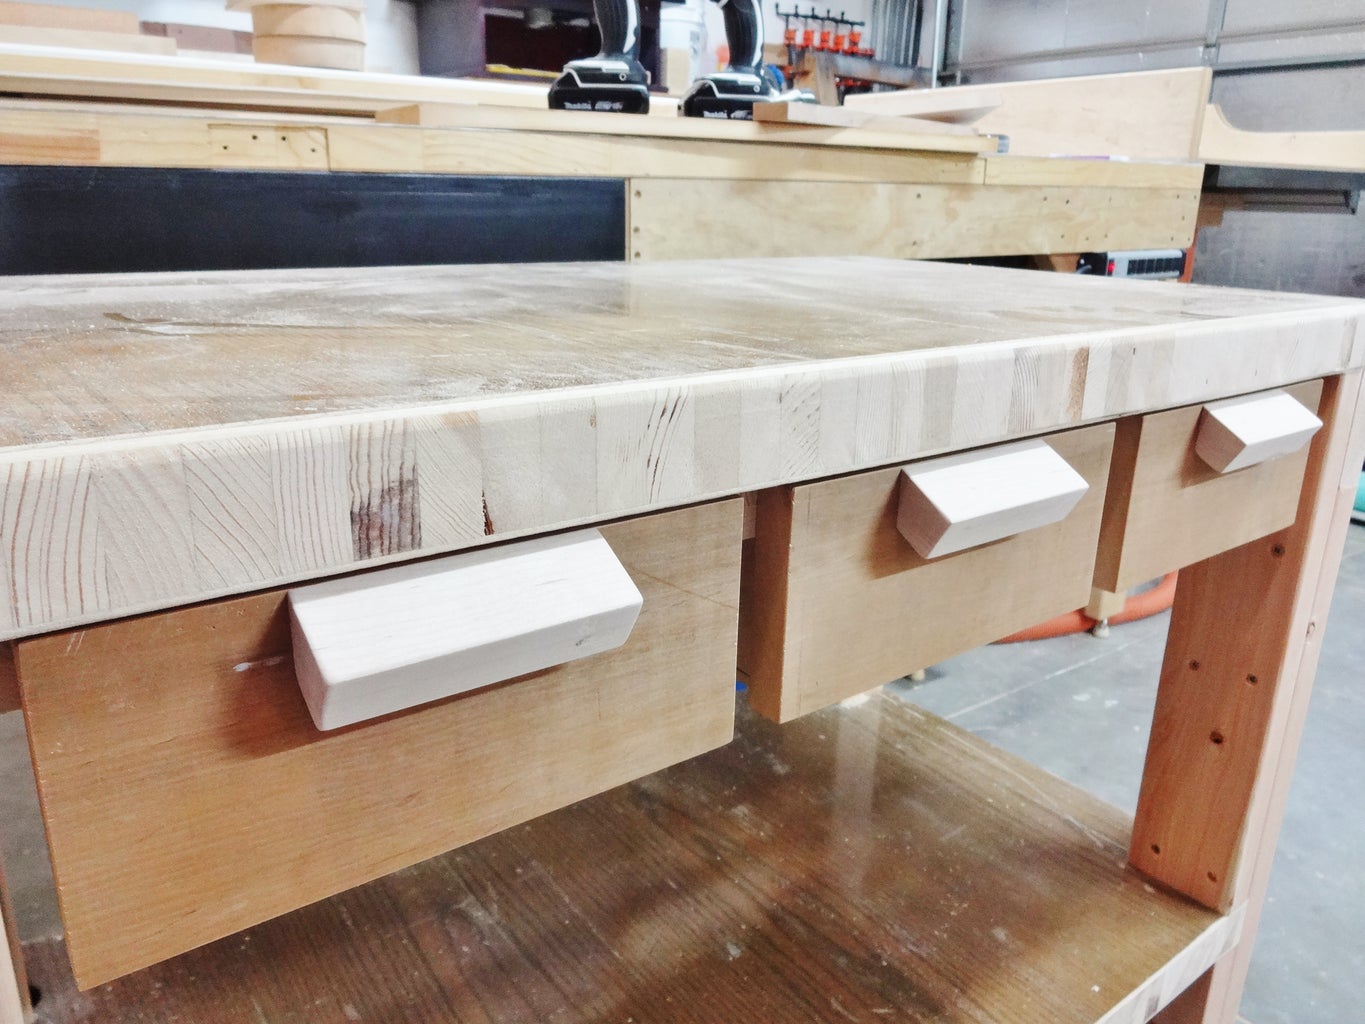
For handles, I cut some bits of wood and screwed these to the drawer faces from the inside of the drawers.
Step 14: Level and Mount


The floor in my shop is sloped, so I always have to shim up my work tables to make them level.
With the table leveled, I screwed it through the skirt structure into the wall studs.
Step 15: Use It!

For such a quick project, it's a rock-solid little table.
Thanks for reading; I hope I shared something you found useful! : )


