

Introduction: Use Arduino Due to Program and Test ESP8266


If you want to program an ESP8266 (Wifi SoC) you will normally use a USB to serial adapter like this one. In case you do not have one but you have an Arduino Due laying around you can rig the Arduino as a bridge to program and test the ESP8266. Please be aware it does not make sense to buy an Arduino Due just for this purpose because it is usually more expensive than the FTDI chip (USB to serial).
Arduino Due is in particular good for this purpose because it does not need any level shifters. Arduino Due works at 3.3V which is compatible with the ESP8266. Here you have the steps how to do this:
Step 1: Get Your Materials
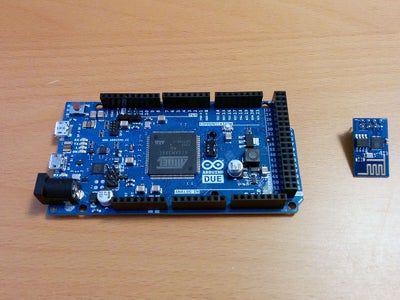
This is easy. As the title of this project says, you need an Arduino Due, the ESP8266 chip and some wires.
Step 2: Wiring
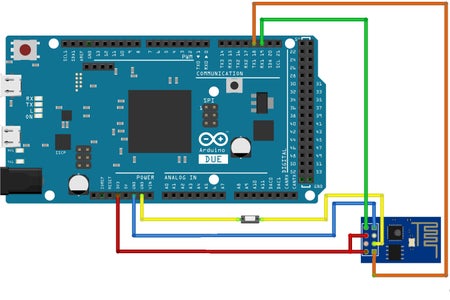
The wiring is fairly simple. If you use a switch you can prepare the wiring for both programing and serial monitoring. The wiring is fairly simple. Vcc on ESP8266 goes to 3.3V on Arduino Due. GND from ESP8266 obviously goes to GND on Arduino Due. CH_PD from ESP8266 goes to 3.3V. RX from ESP8266 goes to TX1 on Arduino and the TX from ESP8266 goes to RX1 on Arduino. GPIO0 is connected to GND for programing or disconnected if it's just running the software.
Step 3: Program Arduino Due to Act As a Bridge
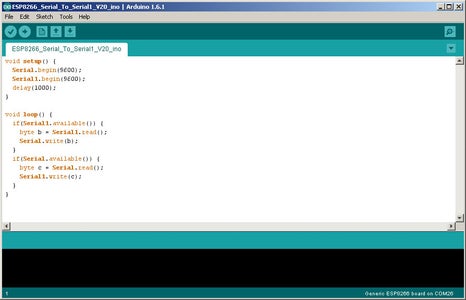
This is a very simple step. You need to know at what speed your ESP8266 works. In case you do not know it you can just try. In most of the cases the speed would be either 9600 or 115200. Set Serial1 on Arduino at that speed. Basically the program reads from Arduino main serial and transfer the data back and forth with Serial1 on Arduino Due.
Step 4: Test the Bridge
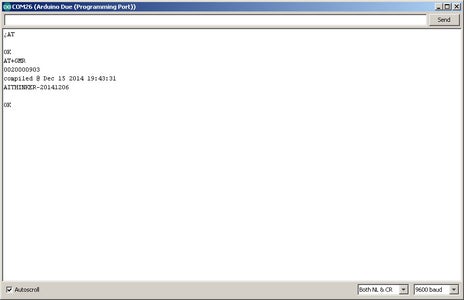
Once you programmed the Arduino Due you can test the connection with ESP8266. Just open the Serial Monitor and make sure the speed matches the speed you set for Serial (not Serial 1) which is the connection between the computer and Arduino and not between Arduino and ESP8266. ESP8266 is pre-programmed to support a series of AT commands. You can try them.
Step 5: Program the ESP8266
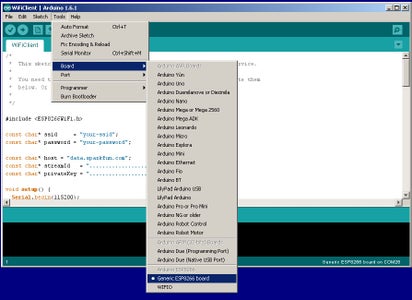
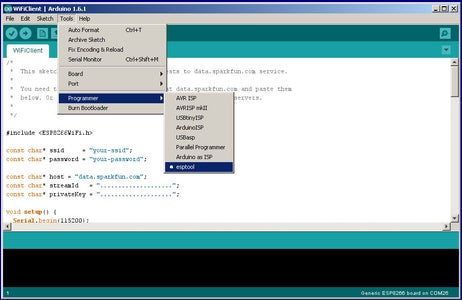
You can use any IDE to program the ESP withe Arduino bridge you just created. In case you want to use Arduino to program the ESP8266 you need to use this release of Arduino. Once installed and made sure you set the port to the one connected to Arduino you need to set ESP8266 as target and the programmer to esptool.


