

Introduction: Using Interrupts.


This is for the lab involving interrupts and serves as a test of the lecture material.
Materials needed:
- 4 220ohm Resistors.
- 2 LEDs
- 1 push button
- 1 potentiometer
- 1 LCD screen
- 1 Arduino Uno
- Handful of jumper wires.
Step 1: Interrupt Test

Start by hooking up your 5V power and ground to the breadboard.
Step 2:

Next add two LEDs
Step 3:

Use two of your 220 ohms resistors and ground the LEDs.
Also add your push button.
Step 4:
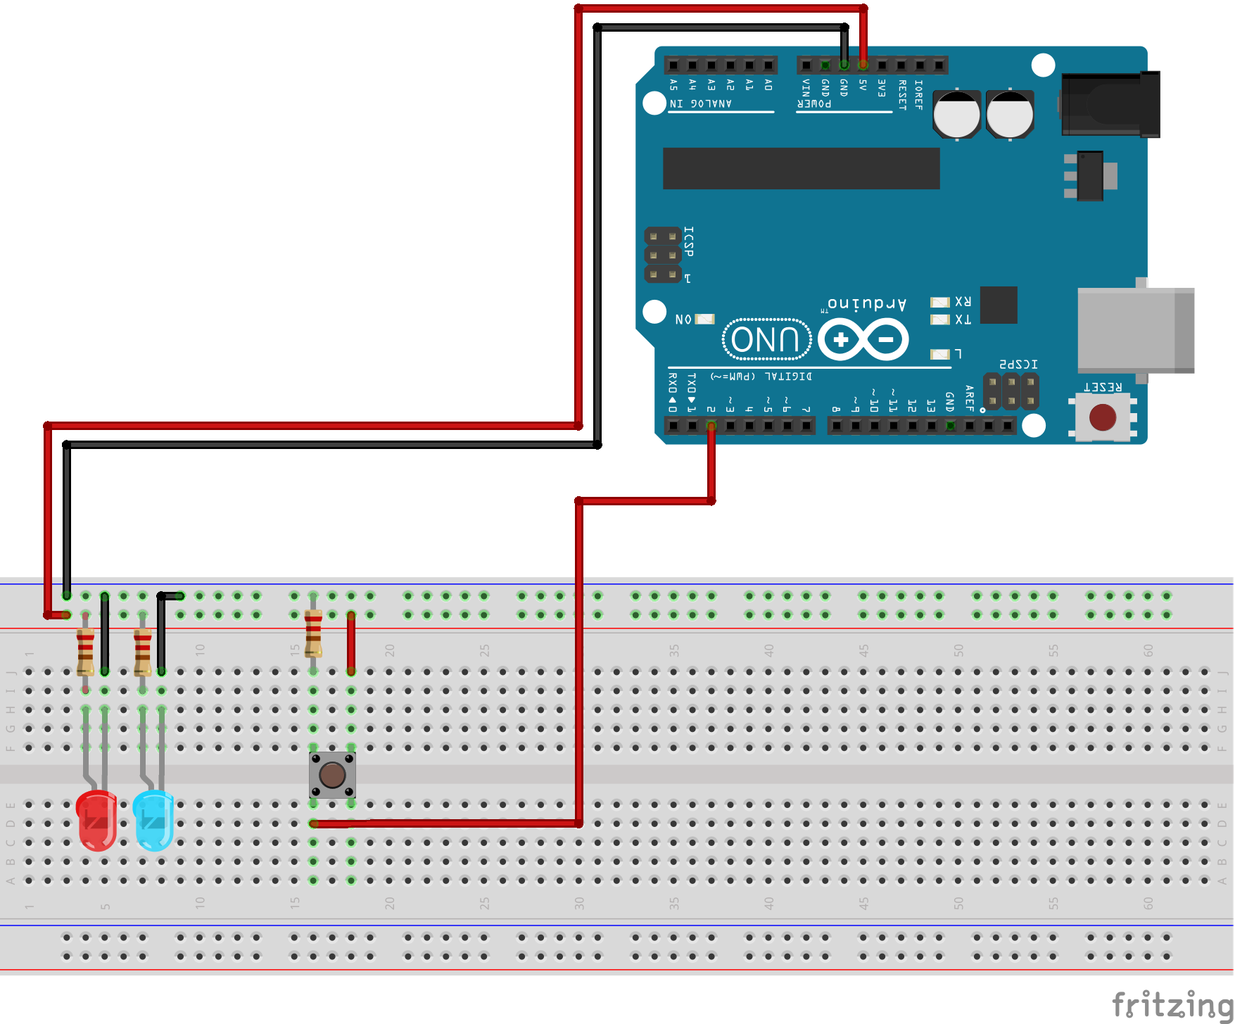
Add the resistor and power to the push button. Be sure to hook up the button to digital pin 2.
Step 5:

Next tack on your LCD screen and add the potentiometer nearby.
Be sure to hook up the middle pin to the third pin on the LCD screen to adjust the LCD.
Step 6:

Be sure in this step to power and ground the LCD screen correctly according to the picture. Note the resistor on the right hand side.
Step 7:

Next connect the digital pins to the arduino board from the LCD screen.


