Introduction: Using NodeMCU to Post Updates to M2X
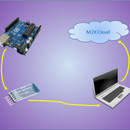
It is useful to be able to save data values to have records, or to look for patterns over time, and many more reasons. This tutorial will teach you how to upload data values from the NodeMCU ESP8266 WiFi module to m2x.att.com, a cloud based data storage website. The code on the NodeMCU will interpret the data, and send the numbers up to the m2x cloud at regular intervals. On the m2x website, you can view a list of all data points, or you can view them as a graph, and the times each value was received.
Step 1: Getting an M2X Account
Go to https://m2x.att.com/ and create an account.
Under the devices tab, click on the "Create New" button on the left panel, and choose to create a new device.
After creating the device, add a new stream. After creating it, you can now log and save values to it.
Step 2: Setting Up NodeMCU
We will be programming the ESP8266 with the Arduino IDE. Open the Arduino IDE.
Go to File -> Preferences. Under Additional Board's Manager URL, copy and paste http://arduino.esp8266.com/stable/package_esp8266com_index.json then click ok. Now go to Tools -> Board -> Boards Manager. The esp8266 boards should show up, and install that library. After the boards are installed, go to Tools -> Board, and choose your board from the ESP8266 Modules. Choose the correct COM port, and you're now ready to upload programs!
Step 3: Getting M2X on Arduino IDE
There are already libraries written for uploading data to M2X through the Arduino IDE over wifi.
Open up a terminal, and clone the github repository that has the files to use M2X and Arduino IDE.
In the terminal, type
git clone https://github.com/attm2x/m2x-arduino
cd m2x-arduino
git submodule update --init
In the Arduino IDE, go to Sketch -> Include Library -> Add .ZIP library
Locate where you saved the m2x-arduino folder, and go to m2x-arduino -> vendor -> jsonlite -> amalgamated, then select the jsonlite folder that appears, and select "Open".
Now we need to import the m2xStreamClient. In the Arduino IDE, go to Sketch -> Include Library -> Add .ZIP library. Open the m2x-arduino folder, and select the M2XStreamClient folder, then click "Open".
In the Arduino IDE, you can now go to File -> Examples -> M2XStreamClient to see many examples of how to upload data to the M2X cloud.
Step 4: Code
This is the code I used to send values to the M2X website from the NodeMCU module.
For this code, I was just sending random numbers up to the M2X website, but you can add a sensor to your NodeMCU and send those readings up to the M2X as well.
Steps in the code:
- Create a WiFi client for the NodeMCU module
- Create an m2xClient using the previously created WiFi client, and the device API key
- Connect NodeMCU to local network
- Send values over wifi to the M2X website at regular time intervals (it's set to update the value every minute in my example)
Attachments
Step 5: Finishing Touches
Now that you have the NodeMCU sending data values to M2X, you can look at your device stream and see the values appear, as well as what time the value was sent.
You can attach a sensor, so that you can upload temperature, humidity, or other types of values to the m2x website if you want.
Congratulations, you've now uploaded data to a cloud-based service over WiFi!
Step 6: AT&T Flow
With M2X, we can see the data values that have been posted. But what if we wanted to send a notification to a user when a certain data value or event occurs? We can do that through AT&T Flow website. We will get the data values from M2X to flow.att.com, and from there we can send out notifications depending on the values.
Create an account at flow.att.com. Then click on the (+) icon near the bottom left corner to create a new flow.
Start with an Inject node. Set it to inject at start, and set the interval to be whatever time interval you want.
Add a Function node (I called mine Get M2X Value) to get the data value from M2X, and connect the output of the Inject node to the input of the Function node. The code for the function node is in the above picture.
Add an M2X node, and connect it to the function node.
Connect the output of the M2X node to a JSON node, so that the M2X data will be converted to a javascript object.
Connect the output of the JSON node to another function node (I called mine Parse Output). The code for the second function is in the picture above. This function finds and takes the value from the msg.payload, and converts it to a number. If your stream sends non-numerical data, you will need to change the function to not convert the value to a number. Also, you might need to change the indices that the value is being taken from, depending on the size of each value.


