

Introduction: VR Car Zombie Apocalypse


In virtual reality (VR) a gamepad is often times a big improvement over head motion controls, but for the best first person VR car driving experience, it seems obvious that having a steering wheel and pedals would offer the most realistic controls possible. I searched online for a racing seat with steering wheel and pedals and found the Playseat, which looked great. http://www.playseat.com/shop/us/us/playseat-thrust... but with a price tag of more than $700 I needed to keep searching.
While browsing a garage sale, I found an old MadCatz Game Shark steering wheel and pedal set, for the PS3. I had no idea if it would actually work with my Android phone in a VR Headset, but for $5 there was no real risk. This instructable documents how I paired the MadCatz Game Shark steering wheel and pedals with my Samsung phone, to control the gameplay, in a VR app. I was very pleased with the end result. The NUI natural user interface, of the steering wheels and pedals, gives the VR game a much more immersive feel.
MATERIALS:
Android Phone - Tested with GAlaxy S5 & Note 5
USB OTG Cable for the Android Phone
MadCatz Game Shark steering wheel and pedals
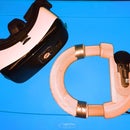
VR Headset - Google Cardboard
VR Car Zombies app
Chair and Frame - I started by putting the pedals on the floor and mounting the steering wheel to a desk
Step 1: Connecting the Steering Wheel to My Android


For this project, my Gear VR will need to sit out, due to the lack of data pass through on the USB port of the Gear VR (first consumer version). Instead, I have tested this project with a Google Cardboard headset and a cardboard type headset I purchased from Walmart for around $15.
The USB OTG cable allows your Android device to work as the USB Host. This is useful for plugging USB storage devices into your phone and it also allows you to plug into a USB controller. I used this in a previous instructable "Escape From Reality" to connect a standard PS3 controller to my phone.
The VR Vue FX headset worked out well, because it has an open slot that I can use for the USB OTG cable. I just needed to shim up my Galaxy S5, using some Legos, in order to center the USB connection up with the open slot. With the USB OTG cable in place, just plug the USB cord from the MadCatz steering wheel into the USB OTG cable and press the Home button just above the horn. The S5 automatically recognized the steering wheel as a controller. At this point I could navigate my home screen by steering left & right.
Step 2: Download the App


Now that the steering wheel is connected to the phone, you'll need a VR app, based on driving from a first person perspective, that uses the left analog joystick for steering and the pedal's corresponding buttons for gas and brake. After some trial and error I found the app VR Car Zombies. This app is great for this project. I only wish there was a paid version, so I could remove the ads. The ads do not affect game play they just make you wait between restarts. A reset and reset view control would also be helpful, but otherwise this app is perfect for this project.
Once you have the app installed, you can plug the steering wheel into your phone and press the home button on the steering wheel to connect. You should do this before starting the app, because when you press the home button to connect you will be brought to your home screen on your phone. Once you are connected to the steering wheel, start the VR Car Zombies app. The app will not let you play if a controller is not detected.
At this point, you could simply sit on the couch, with the pedals on the floor and the steering wheel in your lap, put your phone into your headset and enjoy. I did just that, at first, but it just didn't have the real feel of being in a car. I had come this far, so why not build a custom frame, to complete the rig.
Step 3: Building the Frame


You could use wood, if your more comfortable working with wood, but for me metal is easier. I had an old office chair hanging around that had the fabric, from the back, tear out. This seemed like a good place to start. I also had some 1-1/8" tubing laying around and I have a tubing bender that I made, based on a JD Squared model, so I thought I would give it a work out. My goal was to make 90 degree bends as close as possible to each other to make a tight offset from the bottom of the chair down to the floor. I bent another piece of tubing to come up and carry the steering wheel. The plan was to be able to slide the tubing frame, to allow for some adjustment of the pedals and steering wheel, in relation to the chair. I played around with the overall length and wound up with the nose about 3' from the front of the chair. For the steering wheel mount, I left the tubing long, so I could hold it in place to find a comfortable location and then cut the tubing to match. Once all the pieces were bent and notched to fit together, it was off to the Makerspace to be welded. I also welded some fence post tubing, which was just large enough to allow the 1-1/8" tubing to slide through it, to the bottom of the armrests. This was how I would mount the frame to the chair and allow for some adjustment, for different users. After fitting everything up, I found some sheet metal, to use for the floor pan. I decided to add a caster wheel to the front so that the frame sits just off the ground and can swivel, in case I needed to compensate for drift on the fly. I formed a sheet metal panel for the front, just for looks and lined the edges with some automotive door panel trim, for a nice finish. Now the frame needed a paint job. With everything painted black it was time to breakout the sewing machine. I found some old vinyl material, from a pool table cover that my dogs had chewed up. The hardest part was remembering where it had been stashed away, for the last ten years. I pinned the vinyl, inside out, in place around the back frame and then removed the vinyl with the pins in place. I then did my best to remember how to use the sewing machine. When I was confident the seems would hold, I trimmed the edges and fit the back cover onto the chair.
Step 4: Time for Some Zombie Apocalypse Getaway Action
The frame was worth the extra effort. It not only looks great, but it offers a much more comfortable and natural feel to the steering wheel and pedals. Here's a preview of the gameplay in a side by side VIDEO so you can see how the head tracking and steering wheel controller make this VR experience one of the most immersive mobile VR experiences available.
I hope you enjoyed this insructable and consider voting for me in th Epilog contest. I would like to see if I can figure out how to plug the USB from the steering wheel into a micro controller, such as Arduino, and convert the signal to bluetooth HID. This would allow me to use my Gear VR and detach the cord, from this project. Until then, I'll be mowing down zombies and thinking of other ways to incorporate NUI natural user interfaces with VR experiences.

Participated in the
Epilog Contest 8


